The Best Fluffy Pancakes recipe you will fall in love with. Full of tips and tricks to help you make the best pancakes.
There’s something deeply comforting about the smell of freshly baked bread—warm, rustic, and inviting. Sheepherder bread, with its simple ingredients and time-honored baking techniques, captures the magic of a slower, simpler time when life was lived close to the land. This hearty, crusty bread has roots in the rugged lifestyle of sheepherders who baked their loaves over open campfires, creating a timeless recipe that has been passed down through generations.
In this blog, we’ll explore the fascinating history behind sheepherder bread, dive into the rustic ingredients and techniques that make it so special, and guide you step-by-step through making your own loaf at home. Whether you’re a seasoned baker or just looking to reconnect with traditional artisan bread, you’ll discover how this humble bread can bring warmth and a touch of rustic charm to your kitchen.
The History and Tradition of Sheepherder Bread
Sheepherder bread is more than just a simple loaf; it’s a slice of history baked into every crust. This rustic bread has its origins in the rugged, outdoor lifestyle of sheepherders—those hardworking individuals who tended flocks in remote, often mountainous areas. With limited access to fresh supplies and modern kitchen tools, sheepherders relied on a handful of basic ingredients and ingenious baking methods to create nourishing bread that could sustain them through long days on the trail.
Origins of Sheepherder Bread and Its Cultural Significance
The tradition of sheepherder bread dates back centuries and is rooted in the practical needs of shepherds across Europe, Asia, and the American West. These breads were made to be simple, durable, and easy to prepare with minimal equipment—often just a cast-iron pot or a Dutch oven and a campfire. Beyond its practicality, the bread also became a symbol of sustenance and comfort in a nomadic lifestyle. Each loaf carried the warmth of home, no matter how far the shepherd had traveled.
Sheepherders and Their Rustic Lifestyle
Living in close harmony with nature, sheepherders led a lifestyle that demanded resilience and resourcefulness. Their bread reflected this—using locally available wheat or rye flour, wild yeast or simple leavening, and water, the ingredients were pure and unpretentious. The method of baking on open flames or in hearths imparted a distinct flavor and rustic texture that modern ovens often can’t replicate. This bread was designed to be hearty, filling, and easy to carry, providing vital energy to endure long hours outdoors.
Traditional Baking Methods Passed Down Through Generations
The baking techniques used by sheepherders are timeless and have been passed down through families and communities for generations. Many of these methods emphasize slow fermentation and natural leavening, which develop the bread’s flavor and improve digestibility. The use of no-knead doughs and slow, gentle cooking over embers are hallmarks of sheepherder bread. These methods highlight the art of patience and simplicity in baking—qualities that have kept the tradition alive even in today’s fast-paced world.
The Role of Campfire Cooking in Sheepherder Bread Making
Campfire baking defines sheepherder bread’s unique character. It needs hands-on heat control by moving coals and ashes. This method creates a thick, crunchy crust and soft, airy interior. The process connects the baker to nature, making bread-making a sensory, meditative experience.
Ingredients and Simple Techniques for Rustic Bread
At the heart of every great sheepherder bread loaf lies simplicity—few ingredients, straightforward techniques, and a touch of patience. Unlike commercial breads filled with preservatives and additives, rustic bread relies on natural ingredients and traditional methods that honor both flavor and texture. Let’s break down the essentials that make this bread so magical and easy to recreate at home.
Essential Ingredients: Wheat Flour, Yeast, and Water
The beauty of sheepherder bread is in its humble ingredient list. Typically, it includes just wheat flour, water, yeast (or a natural sourdough starter), and salt. The flour used is often coarse or whole grain, contributing to the bread’s hearty texture and deep flavor. Water is not just a mixer but a crucial element that activates the yeast or starter, helping the dough rise and develop. Salt enhances flavor and strengthens the gluten structure, ensuring a well-balanced loaf. These simple ingredients come together to form a bread that’s both nourishing and satisfying.
Using Natural Fermentation and No-Knead Methods
Traditional sheepherder bread often embraces natural fermentation—a process where wild yeast and bacteria from the environment work slowly to leaven the dough. This method not only adds complexity to the flavor but also improves digestibility, making the bread easier on the stomach. Many rustic bread recipes use a no-knead technique, meaning the dough requires little to no hands-on kneading. Instead, the dough is mixed and left to rest for several hours, allowing time for gluten to develop naturally. This hands-off approach is perfect for home bakers looking for authentic results without the fuss.
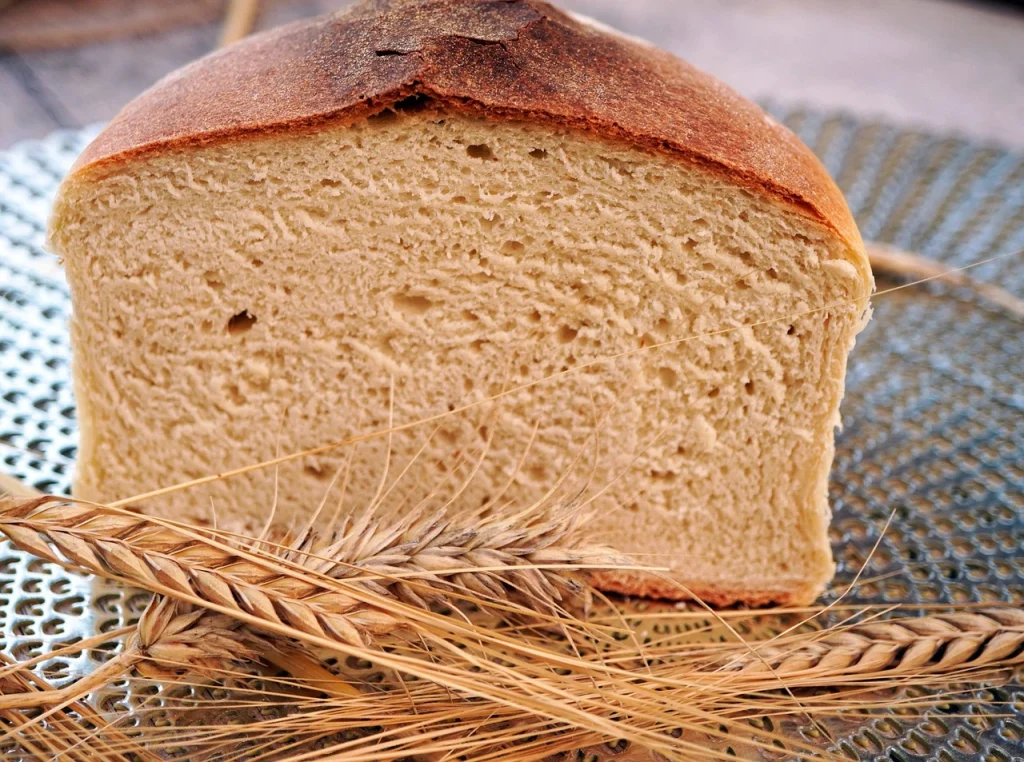
How to Achieve a Crusty Exterior with a Soft Interior
One of the defining features of sheepherder bread is its contrast between a crunchy, golden crust and a soft, chewy interior. Achieving this balance starts with proper hydration—the dough should be moist but not overly sticky. Baking temperature and steam also play a critical role; introducing steam in the oven creates a humid environment that helps the crust form while keeping the inside tender. In traditional campfire baking, the coals and ashes provide a natural heat source that crisps the crust to perfection. Replicating these conditions at home can be as simple as placing a pan of water in your oven or using a Dutch oven to trap steam.
Tips for Baking Without Fancy Equipment
You don’t need a professional bakery setup to make authentic sheepherder bread. Many traditional methods were developed precisely because equipment was limited. A sturdy Dutch oven or cast-iron pot works wonderfully for home bakers, simulating the closed environment of a campfire hearth. If you don’t have these, a baking stone or even a heavy baking sheet can help mimic the heat retention needed for a good crust. Temperature control is key—preheat your oven well, and experiment with positioning the bread closer or further from the heat source. With a little practice, you’ll master rustic bread baking with the tools you already have.
Step-by-Step Guide to Making Sheepherder Bread at Home
Baking sheepherder bread at home is a rewarding experience that connects you to centuries of tradition while filling your kitchen with the irresistible aroma of warm, crusty bread. Though the process is simple, a few key steps ensure your loaf comes out perfectly rustic and delicious every time. Here’s a straightforward guide to help you bring this timeless bread to life in your own oven.
Preparing the Dough: Mixing and Resting
Start with these basic ingredients:
- 4 cups (480 grams) all-purpose flour
- 1 ½ cups (360 ml) warm water (about 100–110°F)
- 2 teaspoons (7 grams) active dry yeast or ½ cup (120 ml) sourdough starter
- 2 teaspoons (12 grams) salt
Combine the flour, salt, and yeast (if using) in a large bowl. Slowly add the warm water and mix gently with a wooden spoon or your hand until all the flour is hydrated. The dough will be sticky and shaggy — this is perfect for rustic bread. Avoid heavy kneading.
Cover the bowl loosely with a clean kitchen towel or plastic wrap. Let it rest at room temperature for 8 to 12 hours. This slow fermentation allows the yeast to develop flavor and the gluten to form, resulting in an airy, elastic dough ready for shaping.
Shaping the Bread the Rustic Way
Once the dough has risen and doubled in size, it’s time to shape it. Lightly flour your hands and work surface, then gently turn the dough out. Fold the edges toward the center to create tension on the surface, shaping it into a rough ball or oval. Resist the urge to overwork the dough — rustic bread celebrates imperfections. Place the shaped dough on a piece of parchment paper or a well-floured cloth and let it rest again for about 30 to 60 minutes to rise a little more before baking.
Baking Techniques: Campfire vs. Oven Baking
Traditionally, sheepherder bread was baked in a cast-iron pot or Dutch oven buried in embers or over an open fire, imparting a smoky aroma and perfect crust. At home, you can replicate this by preheating a Dutch oven in your oven—like this Ninja Dutch Oven. Then carefully transfer the dough inside before covering and baking. The covered pot traps steam, essential for a crispy crust and moist crumb. Bake covered for about 20 minutes, then remove the lid and bake another 20-25 minutes until the crust is deeply golden and crackly. If you don’t have a Dutch oven, use a heavy baking sheet and add steam to your oven by placing a pan of hot water at the bottom.
How to Tell When Your Bread is Perfectly Baked
Knowing when your rustic bread is done takes a bit of practice but is easy to master. The crust should be a deep golden brown, firm, and slightly crackly to the touch. Tap the bottom of the loaf — it should sound hollow, indicating the inside is cooked through. If it sounds dull or heavy, it needs more time. Let the bread cool completely on a wire rack before slicing to allow the crumb to set properly. This resting step is key to preserving the soft, chewy interior that contrasts beautifully with the crust.
The Magic of Rustic, Artisan Bread in Modern Baking
In a world dominated by fast food and mass-produced loaves, rustic artisan bread like sheepherder bread holds a special place. Its magic lies not just in its flavor and texture, but in the way it connects us to tradition, craftsmanship, and the joy of simple, honest baking. Let’s explore why rustic breads continue to captivate bakers and food lovers alike in today’s modern kitchens.
Why Rustic Bread is Still Popular Today
Rustic breads embody authenticity. They remind us of the time and care that go into making something truly nourishing. In an era of convenience, many people seek the soulful experience of baking bread by hand, valuing quality over speed. The distinctive crust, open crumb, and deep, complex flavors of rustic bread stand out from the uniformity of factory-made bread. For many, baking or enjoying a loaf of artisan bread is an act of self-care—a comforting ritual that brings warmth and satisfaction.
Comparisons with Sourdough and Other Artisan Breads
Rustic breads like sheepherder bread share many traits with popular artisan varieties such as sourdough, but each has its own unique identity. While sourdough relies heavily on a wild yeast starter and long fermentation to build tangy flavors, sheepherder bread often features simpler, more direct fermentation methods and a focus on hearty, straightforward taste. Both celebrate slow baking and natural processes, but sheepherder bread’s no-fuss ingredients and campfire heritage give it a distinct character that’s more approachable for beginners.
The Health Benefits of Natural Fermentation
Natural fermentation isn’t just about flavor—it also offers health benefits. Slow fermentation breaks down gluten and other proteins, making the bread easier to digest and reducing its glycemic index. It encourages the growth of beneficial bacteria, which can improve gut health. Rustic breads made with minimal additives and preservatives are often a healthier choice compared to many commercial breads. This blend of nourishment and simplicity makes rustic artisan bread a wholesome addition to any diet.
Bringing a Timeless Touch to Your Kitchen
Baking rustic bread at home invites a sense of timelessness into your daily life. It’s a way to slow down, embrace patience, and reconnect with the primal joy of creating food from scratch. Whether you bake it for a family meal, a cozy breakfast, or as a gift for friends, rustic artisan bread adds a layer of warmth and tradition that modern convenience often lacks. It’s more than just bread—it’s a celebration of heritage, craftsmanship, and the simple pleasures that never go out of style.
Serving and Enjoying Sheepherder Bread
Once your sheepherder bread is baked to golden perfection, the best part begins—enjoying it! This rustic, hearty loaf is incredibly versatile and pairs beautifully with a variety of foods, making every meal feel warm, comforting, and special. Here’s how you can serve and savor your homemade sheepherder bread to make the most of its rich flavors and satisfying texture.
Classic Pairings: Butter, Honey, and Cheese
Sometimes, the simplest accompaniments let rustic bread shine. A thick pat of creamy butter melting into a warm slice is pure bliss. For a touch of sweetness, drizzle with local honey, which complements the bread’s natural nuttiness. Sheepherder bread also pairs wonderfully with a range of cheeses—from sharp cheddar and tangy goat cheese to creamy brie. These classic combinations enhance the bread’s hearty flavor while keeping the experience rustic and authentic.
Creating Hearty Sandwiches and Open-Faced Toasts
Sheepherder bread’s firm texture makes it an excellent base for robust sandwiches and open-faced toasts. Try layering it with smoked meats, fresh vegetables, and flavorful spreads like mustard or aioli for a satisfying lunch. For a simpler snack or breakfast, top toasted slices with avocado, poached eggs, or a sprinkle of herbs and sea salt. The bread’s sturdy crumb holds up well under toppings, making every bite deliciously satisfying.
Pairing with Soups, Stews, and Rustic Meals
The warm, crusty nature of sheepherder bread makes it the perfect companion for hearty soups and stews. Whether it’s a rich beef stew, a vegetable soup, or a creamy chowder, tearing off chunks of this bread to dip and soak up the broth adds a rustic charm to your meal. It also pairs beautifully with traditional rustic dishes like roasted meats, grilled vegetables, or farmhouse cheeses, completing a wholesome and comforting dining experience.
Tips for Storing and Reheating Your Bread
To enjoy sheepherder bread over several days, proper storage is key. Keep your loaf wrapped loosely in a clean kitchen towel or paper bag at room temperature to maintain its crusty exterior while preventing it from drying out. Avoid plastic bags, which can make the crust soggy. If your bread starts to go stale, revive it by lightly sprinkling with water and warming in the oven at 350°F (175°C) for 5–10 minutes. This simple trick refreshes the crust and brings back that delightful rustic texture.