The Best Fluffy Pancakes recipe you will fall in love with. Full of tips and tricks to help you make the best pancakes.
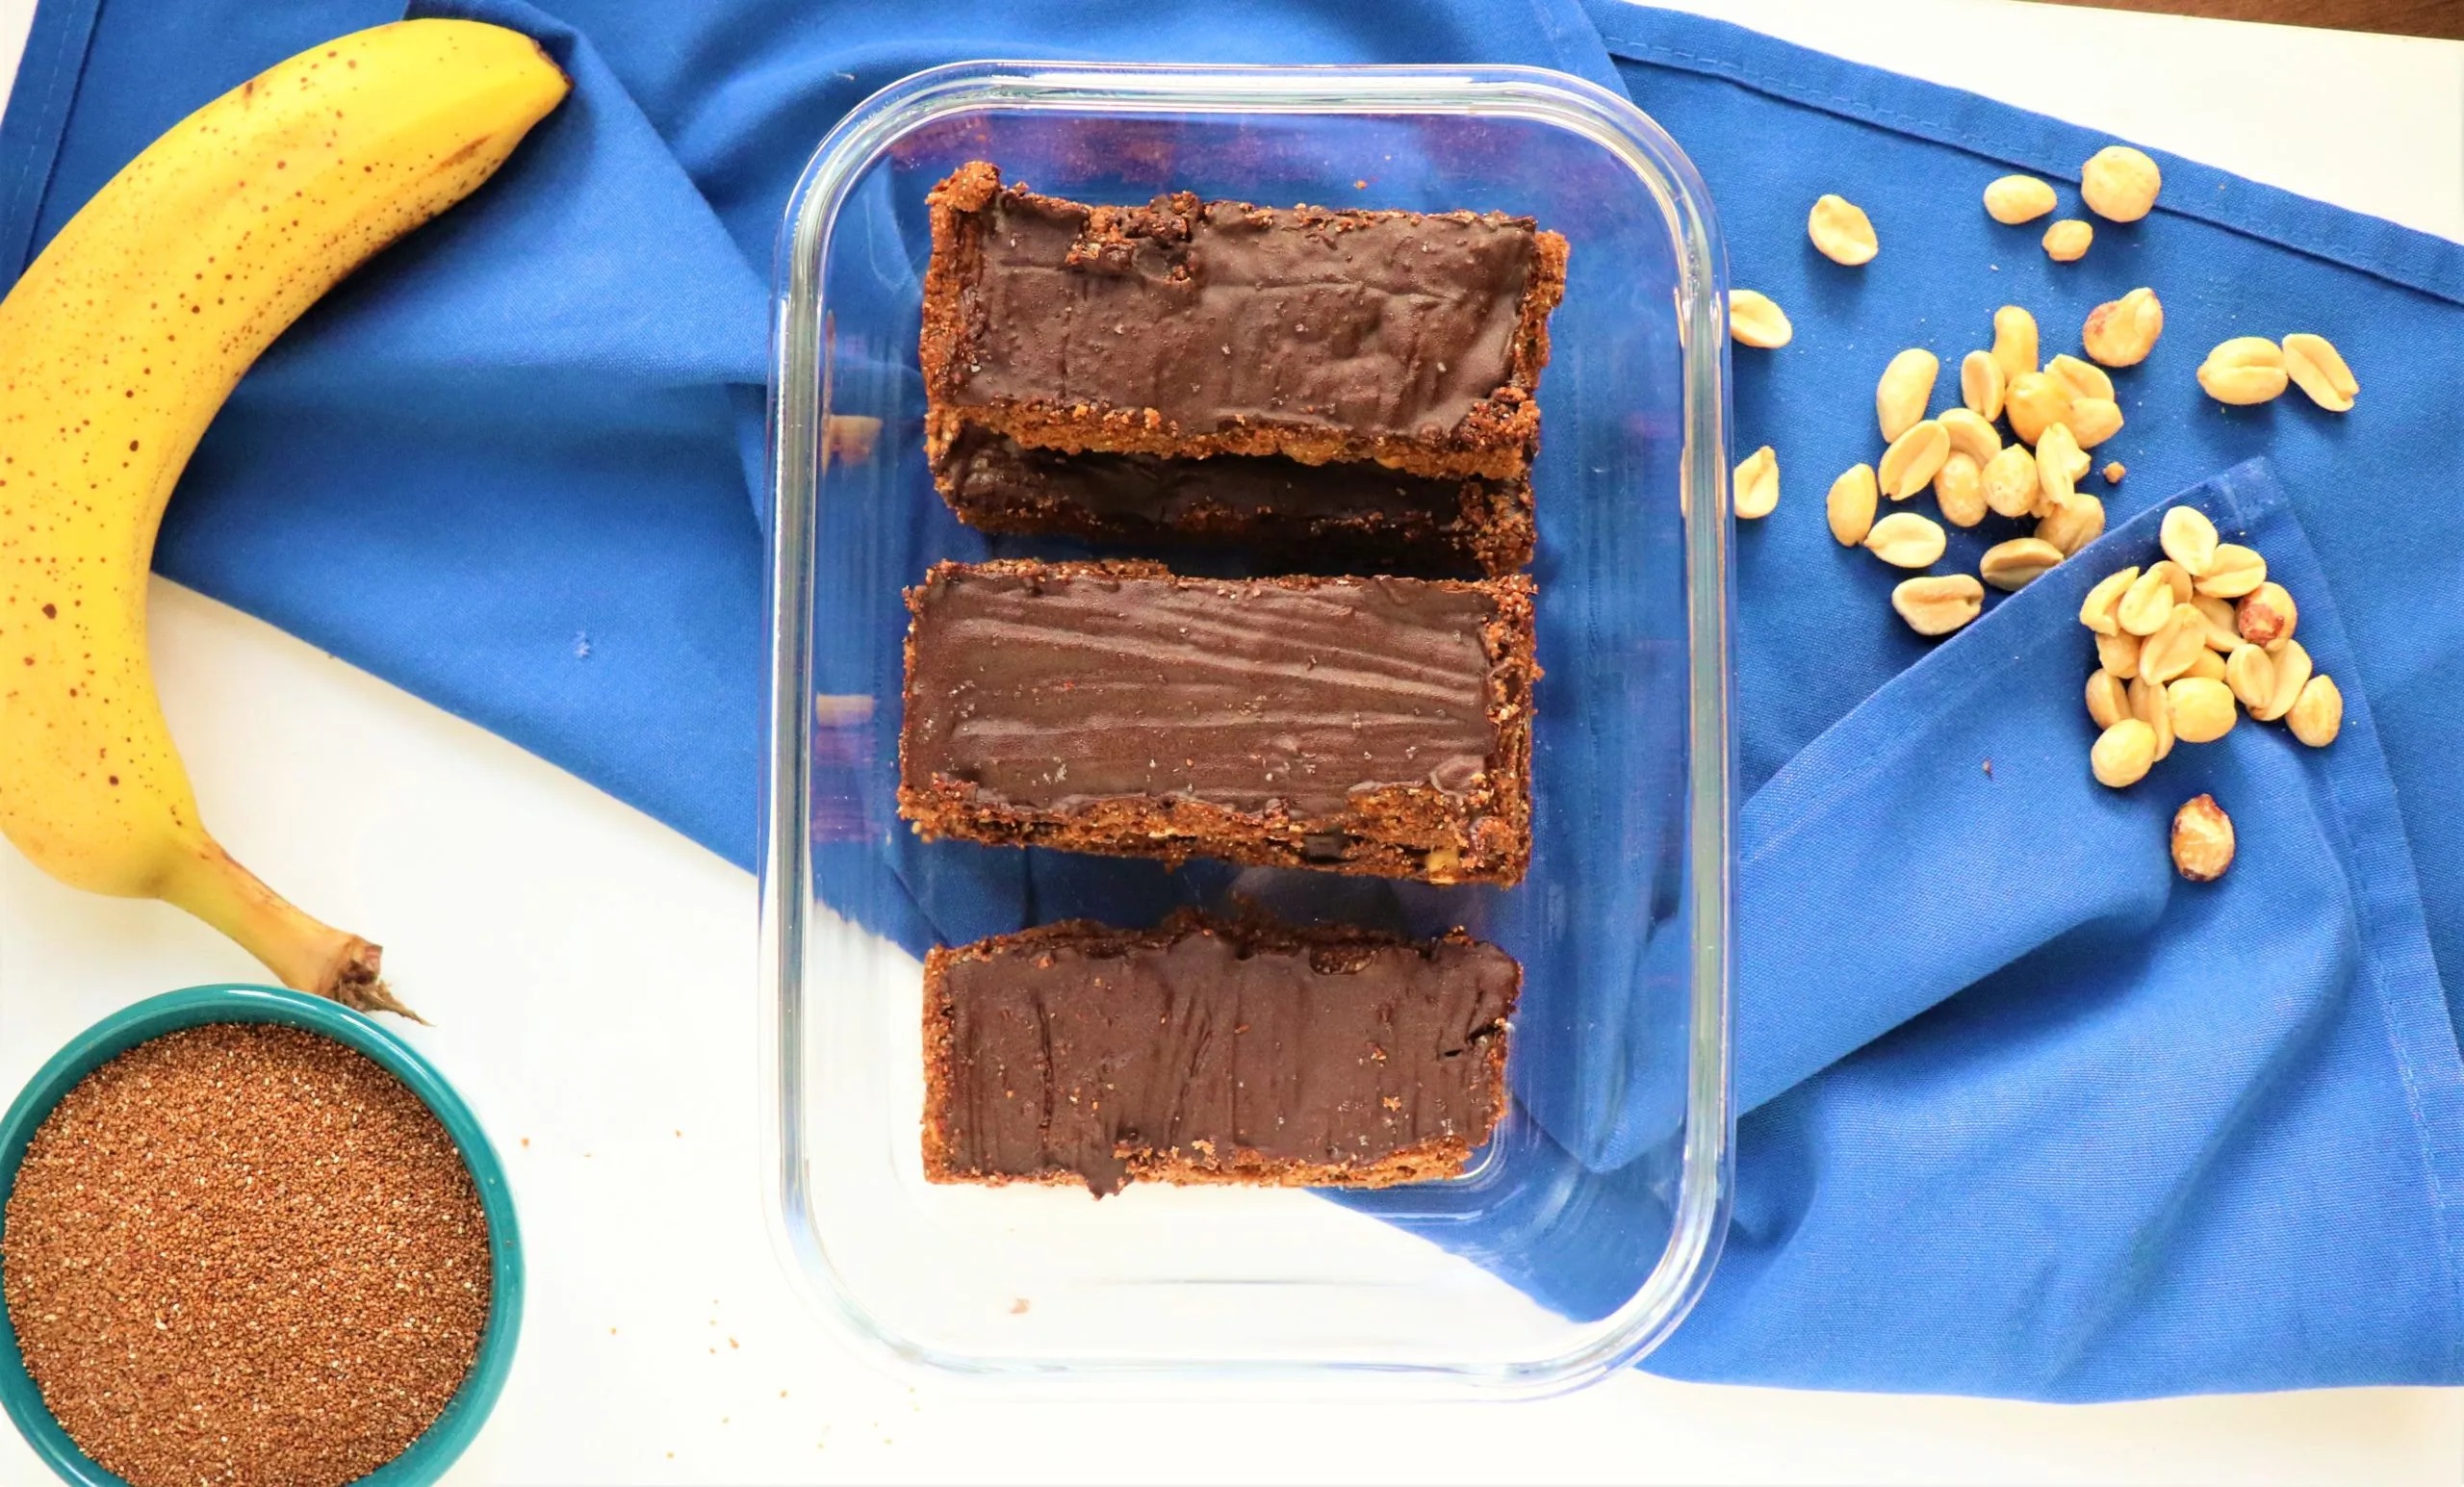
There’s nothing better than a homemade, protein-packed snack to keep you energized throughout the day. These Peanut Butter Banana Protein Bars with a Chocolate Twist are the perfect combination of creamy peanut butter, naturally sweet bananas, and rich dark chocolate—all in a nutritious, easy-to-make bar. Whether you’re looking for a quick breakfast, a post-workout snack, or a healthy treat, these bars have got you covered.
Made with simple, wholesome ingredients like oats, protein powder, and natural sweeteners, these bars are gluten-free, customizable, and loaded with nutrients. Plus, the dark chocolate drizzle adds just the right amount of indulgence! Say goodbye to store-bought protein bars and make these delicious, homemade alternatives in just a few easy steps.
Let’s dive into why you’ll love this recipe and how to make your own batch of Peanut Butter Banana Protein Bars with a Chocolate Twist!
Why You’ll Love These Peanut Butter Banana Protein Bars
If you’re looking for a delicious, healthy, and convenient snack, these Peanut Butter Banana Protein Bars with a Chocolate Twist check all the boxes. Whether you need a quick breakfast, a post-workout energy boost, or a satisfying treat, these bars are packed with nutrients and flavor. Here’s why they’re a must-try!
Nutritious and Protein-Packed
These bars are a great source of protein, fiber, and healthy fats, making them ideal for fueling your body and keeping you full longer. With peanut butter providing healthy fats and protein, bananas adding natural sweetness and potassium, and protein powder boosting the overall protein content, this recipe is perfect for maintaining energy throughout the day.
Easy to Make
Forget complicated recipes—these homemade protein bars require just a few simple ingredients and minimal effort. You can make them in one bowl, with no fancy equipment needed. Plus, they can be no-bake or baked, depending on your preference. In under 30 minutes, you’ll have a batch of fresh, delicious protein bars ready to go!
Naturally Sweetened
Unlike store-bought protein bars that are often packed with artificial sweeteners and preservatives, these bars rely on ripe bananas and natural sweeteners like honey or maple syrup. This not only enhances the flavor but also makes them a healthier alternative to processed snacks.
Customizable to Fit Your Diet
These protein bars can be easily adapted to different dietary needs and preferences:
- Gluten-Free: Use certified gluten-free oats.
- Vegan-Friendly: Swap honey for maple syrup and use plant-based protein powder.
- Nut-Free Option: Replace peanut butter with sunflower seed butter or tahini.
- Extra Crunch: Add chopped nuts, seeds, or granola for added texture.
Whether you prefer them soft and chewy or firm and crunchy, these bars are flexible enough to match your taste and nutritional goals.
These Peanut Butter Banana Protein Bars aren’t just a snack—they’re a delicious way to fuel your body with wholesome ingredients. Now, let’s dive into what you’ll need to make them!
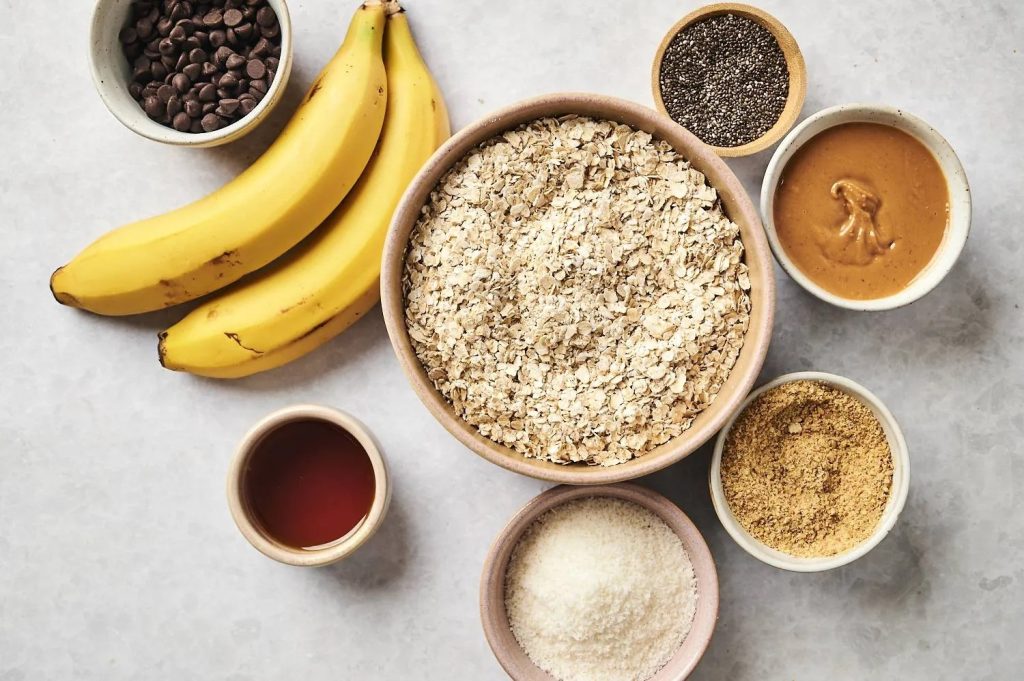
Ingredients You’ll Need
One of the best things about these Peanut Butter Banana Protein Bars with a Chocolate Twist is that they are made with simple, wholesome ingredients—most of which you probably already have in your pantry. Each ingredient plays an important role in providing flavor, texture, and nutrition, making these bars a perfect balance of protein, healthy fats, and natural sweetness.
Main Ingredients
These are the core ingredients that give the bars their signature taste and texture:
- Peanut Butter – The creamy base of these bars, peanut butter adds rich flavor, protein, and healthy fats to keep you satisfied. Opt for natural peanut butter without added sugars or oils for a healthier choice.
- Bananas – Ripe bananas provide natural sweetness, moisture, and potassium, helping to bind the bars together while keeping them soft and chewy. The riper the bananas, the better the sweetness!
- Dark Chocolate – The chocolate twist in this recipe! Dark chocolate not only adds a touch of indulgence but is also rich in antioxidants. You can melt and drizzle it over the bars or mix in dark chocolate chips for a delicious crunch.
- Oats – Rolled oats act as the binding agent and give the bars a slightly chewy texture. They’re also a great source of fiber and slow-digesting carbs, helping to keep you full for longer. Use gluten-free oats if needed.
Protein Boosters
To make these bars even more nutrient-dense and protein-packed, consider adding:
- Protein Powder – A scoop of vanilla or chocolate protein powder enhances the protein content and adds extra flavor. Use whey, plant-based, or collagen protein based on your dietary needs.
- Chia Seeds or Flaxseeds – These tiny seeds add a boost of fiber, omega-3 fatty acids, and protein, making the bars even more nutritious. They also help with binding and texture.
- Nuts or Seeds – Almonds, walnuts, sunflower seeds, or pumpkin seeds provide crunch, healthy fats, and an extra protein boost.
Sweeteners and Flavor Enhancers
For a touch of natural sweetness and flavor, you can include:
- Honey or Maple Syrup – These natural sweeteners add a hint of sweetness while helping to bind the ingredients. Honey is great for a chewier texture, while maple syrup is a good vegan-friendly option.
- Vanilla Extract – A splash of vanilla enhances the flavors and gives the bars a warm, aromatic taste.
- Cinnamon – A dash of cinnamon pairs well with banana and chocolate, adding a subtle warmth and depth of flavor.
Optional Add-ins for Extra Flavor and Texture
- Coconut Flakes – Adds a slight chewiness and natural sweetness.
- Dried Fruit – Chopped dates, cranberries, or raisins can add a burst of flavor and texture.
- Yogurt or Nut Milk – If you prefer a softer bar, a tablespoon of Greek yogurt or almond milk can help make them extra moist.
Ingredient Substitutions
Need to customize the recipe to fit your dietary needs? Here are some simple swaps:
- Nut-Free: Use sunflower seed butter or tahini instead of peanut butter.
- Gluten-Free: Choose certified gluten-free oats.
- Dairy-Free/Vegan: Use plant-based protein powder, maple syrup instead of honey, and dairy-free dark chocolate.
With just a few pantry staples, you can create these delicious, protein-packed bars that are perfect for breakfast, snacking, or post-workout fuel. Now, let’s move on to how to make them!
Step-by-Step Guide to Making Peanut Butter Banana Protein Bars
Making these Peanut Butter Banana Protein Bars with a Chocolate Twist is incredibly simple and requires just a few easy steps. Whether you choose to make them no-bake or baked, you’ll end up with a delicious, protein-packed snack that’s perfect for meal prep. Let’s walk through the process step by step.
Step 1: Gather and Prepare Your Ingredients
Before you start mixing, gather all the ingredients to make the process smooth and efficient. Here’s what you need to do:
- Mash the Bananas – Use a fork or potato masher to mash ripe bananas in a large mixing bowl until smooth. The bananas will help bind the mixture and provide natural sweetness.
- Measure the Peanut Butter – If your peanut butter is thick, you can slightly warm it in the microwave for 10-15 seconds to make it easier to mix.
- Prepare the Dark Chocolate – If you plan to drizzle or coat the bars in chocolate, you can either chop the chocolate into small pieces or melt it in advance using a microwave (in 30-second intervals) or a double boiler.
Step 2: Mix the Ingredients
Now it’s time to combine everything into a delicious, chewy bar mixture:
- Combine the Wet Ingredients – In the mixing bowl, stir together the mashed bananas, peanut butter, honey (or maple syrup), and vanilla extract until well blended.
- Add the Dry Ingredients – Gradually fold in the oats, protein powder, cinnamon, and any additional mix-ins like chia seeds, flaxseeds, or nuts. Stir until everything is evenly combined.
- Adjust the Consistency – If the mixture feels too dry, add a splash of almond milk or a little more mashed banana. If it’s too wet, mix in a bit more oats or protein powder. The goal is to get a dough-like consistency that holds together when pressed.
To achieve the perfect texture for your peanut butter banana protein bars, a high-quality blender is essential. The Ninja TB201 BlendSense Technology Blender is a great option for effortlessly blending bananas, oats, and other ingredients into a smooth, well-incorporated mixture. Its powerful motor and intelligent blend settings ensure a consistent, lump-free result every time.
Step 3: Shape and Set the Bars
Once the mixture is fully combined, it’s time to form the bars:
- Line a Baking Pan – Use parchment paper to line an 8×8-inch or 9×9-inch pan for easy removal.
- Press the Mixture Firmly – Transfer the mixture into the pan and use a spatula (or your hands) to press it down evenly. Ensure the surface is smooth so the bars hold their shape.
- Chill or Bake
- For No-Bake Bars: Cover the pan and refrigerate for at least 1-2 hours until the bars firm up.
- For Baked Bars: Preheat the oven to 350°F (175°C) and bake for 15-20 minutes until the edges turn golden brown. Let them cool completely before cutting.
Step 4: Add the Chocolate Twist
Now comes the best part—the chocolate twist!
- Melt the Dark Chocolate – If you haven’t already, melt your dark chocolate chips or chopped dark chocolate in the microwave in 30-second intervals, stirring in between until smooth.
- Drizzle or Dip –
- Drizzle the melted chocolate over the bars using a spoon or piping bag for a decorative touch.
- Dip one side or fully coat the bars in chocolate for extra indulgence.
- Let the Chocolate Set – Place the bars back in the fridge for 15-20 minutes until the chocolate hardens.
Step 5: Cut and Store
Once the bars are fully set, carefully lift them from the pan and cut them into even-sized bars or squares. Use a sharp knife for clean edges.
Storage Tips:
- Refrigerator: Store the bars in an airtight container in the fridge for up to one week.
- Freezer: For long-term storage, wrap the bars individually and freeze them for up to three months. Just grab one when needed and let it thaw for a few minutes before eating.
Enjoy Your Homemade Protein Bars!
And that’s it! You’ve just made your own Peanut Butter Banana Protein Bars with a Chocolate Twist. These bars are perfect for breakfast, a pre/post-workout snack, or a healthy dessert. Try experimenting with different mix-ins and toppings to customize them to your taste.
Now that you know how easy they are to make, are you ready to give them a try? Let’s move on to some storage tips and flavor variations!
Tips for Storage and Variations
Once you’ve made your Peanut Butter Banana Protein Bars with a Chocolate Twist, you’ll want to store them properly to keep them fresh and delicious for as long as possible. Additionally, you can easily customize the recipe to fit your taste preferences or dietary needs. Below, you’ll find the best storage methods, along with creative variations to try!
How to Store Your Protein Bars
Proper storage ensures your homemade protein bars stay fresh, chewy, and flavorful for days or even weeks.
1. Refrigerator Storage (Best for Freshness)
If you plan to eat the bars within a week, storing them in the fridge is the best option:
- Place the bars in an airtight container or wrap them individually in parchment paper to prevent them from drying out.
- Store them in the refrigerator for up to 7 days.
- If the bars contain melted chocolate or extra moisture from bananas, keeping them cold helps maintain their firm texture.
2. Freezer Storage (Best for Long-Term Use)
Want to make a large batch and enjoy them over time? Freezing is a great option:
- Wrap each protein bar individually in plastic wrap or parchment paper to prevent freezer burn.
- Store them in a freezer-safe bag or airtight container.
- Bars can be kept frozen for up to 3 months.
- When ready to eat, let a bar thaw for 10-15 minutes at room temperature or warm it slightly in the microwave for a softer texture.
3. Room Temperature (Short-Term Storage)
If you plan to consume the bars within 2-3 days, they can be kept at room temperature:
- Store them in an airtight container in a cool, dry place.
- If the weather is warm, avoid leaving them out for too long, as the chocolate may melt and the bananas can make the bars too soft.
Delicious Variations to Try
The beauty of homemade protein bars is that you can customize them to fit your preferences. Here are some fun ways to switch up the flavors and ingredients:
1. Different Nut Butters
Not a fan of peanut butter? Try these alternatives:
- Almond Butter – A milder, slightly sweet alternative.
- Cashew Butter – Extra creamy with a rich, buttery flavor.
- Sunflower Seed Butter – A great nut-free option.
- Tahini (Sesame Seed Paste) – Adds an earthy, nutty flavor and pairs well with chocolate.
2. Protein Variations
Boost the protein content with these swaps:
- Use vanilla, chocolate, or peanut butter protein powder for a different flavor profile.
- Swap protein powder for collagen peptides for a gut-friendly option.
- Add Greek yogurt powder for extra creaminess.
3. Sweetener Substitutions
Adjust the sweetness to your liking with these options:
- Maple Syrup – A great vegan-friendly choice.
- Honey – Adds a slight floral sweetness and helps with binding.
- Medjool Dates – Blend them into a paste for a natural sugar alternative.
4. Crunchy Add-Ins
Add some texture to your bars with these mix-ins:
- Chopped Nuts – Almonds, walnuts, pecans, or hazelnuts for extra crunch.
- Pumpkin or Sunflower Seeds – Perfect for nut-free protein bars.
- Granola – A crunchy addition that pairs well with banana and peanut butter.
5. Extra Flavor Enhancers
Take the flavor up a notch with these additions:
- Coconut Flakes – Adds a light tropical twist.
- Cocoa Powder – Intensifies the chocolate flavor.
- Espresso Powder – A hint of coffee flavor enhances the richness of dark chocolate.
6. Chocolate Variations
Experiment with different types of chocolate for your drizzle or mix-ins:
- White Chocolate – Adds extra sweetness and contrast.
- Milk Chocolate – A creamier, less bitter alternative to dark chocolate.
- Cacao Nibs – A less processed, crunchy chocolate alternative.
7. Fun Toppings and Coatings
For a unique touch, try these creative toppings:
- Sea Salt – Enhances the sweetness of the chocolate drizzle.
- Crushed Pretzels – Adds a salty crunch.
- Drizzled Almond Butter or Honey – For extra decadence.
If you’re looking for more delicious and nutritious breakfast ideas, check out our guide on The Best Breakfast Cereal Combinations. You’ll find creative ways to mix cereals, fruits, nuts, and more for a balanced and energizing start to your day!
Frequently Asked Questions
When making Peanut Butter Banana Protein Bars with a Chocolate Twist, you might have a few questions about ingredients, storage, substitutions, and troubleshooting. Below, we’ve answered some of the most common questions to help you create the perfect homemade protein bars.
1. Can I make these protein bars without protein powder?
Yes! If you don’t want to use protein powder, you can still make these bars with other nutrient-dense ingredients that add natural protein. Here are some great alternatives:
- Ground flaxseeds or chia seeds – They provide fiber and protein while helping to bind the bars.
- Oat flour or almond flour – Adds texture and structure.
- Greek yogurt or cottage cheese – Blend these into the wet ingredients for a protein boost.
- Powdered peanut butter (PB2) – A lower-fat, high-protein alternative.
If you remove protein powder, you may need to adjust the oats slightly to get the right texture.
2. Can I make these bars without bananas?
Absolutely! Bananas add natural sweetness and moisture, but if you don’t want to use them, try these alternatives:
- Unsweetened applesauce – Provides moisture and mild sweetness.
- Pumpkin puree – Great for a fall-inspired version.
- Mashed sweet potatoes – Adds a slightly denser texture but still works well.
- Nut butter or coconut oil – Helps bind the ingredients, but you may need to add extra honey or maple syrup for sweetness.
Keep in mind that substituting bananas may slightly alter the texture and taste, so adjust sweetness accordingly.
3. Can I make these bars vegan?
Yes! Here’s how to make them 100% plant-based:
- Use a plant-based protein powder – Opt for pea, rice, or a blended vegan protein powder.
- Swap honey for maple syrup or agave nectar – A great alternative for natural sweetness.
- Choose dairy-free chocolate – Use dark chocolate labeled as vegan or go for cacao nibs.
These swaps will ensure your bars stay dairy-free and completely vegan!
4. Are these protein bars gluten-free?
Yes! This recipe is naturally gluten-free, as long as you use:
- Certified gluten-free oats – Some oats may contain traces of gluten due to processing, so check the label.
- Gluten-free protein powder – Some whey or plant-based powders may contain additives with gluten.
- Gluten-free chocolate – Most dark chocolate is naturally gluten-free, but double-check for hidden ingredients.
If you’re highly sensitive to gluten or have Celiac disease, be sure to read ingredient labels carefully.
5. How can I make these bars crunchier or softer?
The texture of your protein bars can be adjusted based on personal preference:
- For crunchier bars:
- Use crunchy peanut butter instead of creamy.
- Add mix-ins like chopped nuts, granola, or toasted coconut flakes.
- Bake the bars slightly longer if using the baked method.
- For softer bars:
- Increase the amount of mashed bananas or honey for extra moisture.
- Store them in the fridge instead of at room temperature.
- Add a tablespoon of almond milk to make them chewier.
6. Can I bake these bars instead of making them no-bake?
Yes! This recipe can be enjoyed either no-bake or baked:
- No-Bake Version:
- Press the mixture into a lined pan and refrigerate for at least 1-2 hours before slicing.
- Baked Version:
- Preheat oven to 350°F (175°C).
- Press the mixture into a baking dish and bake for 15-20 minutes or until golden brown on the edges.
- Let cool completely before cutting.
Both versions are delicious, so choose the one that fits your preference!
7. How do I keep my protein bars from falling apart?
If your bars aren’t holding together, try these fixes:
- Make sure your wet-to-dry ratio is balanced – If the mixture is too dry, add more peanut butter, mashed banana, or honey. If it’s too wet, mix in more oats or protein powder.
- Press the mixture firmly – When shaping the bars, press the mixture very tightly into the pan to help them hold together.
- Let them chill – No-bake bars must be refrigerated to firm up before slicing.
- Use a binder – If needed, add a tablespoon of ground flaxseed mixed with water (a flax egg) to improve the structure.
8. How can I add even more protein to these bars?
If you want extra protein, try these additions:
- Add chopped nuts or seeds like almonds, walnuts, pumpkin seeds, or hemp seeds.
- Mix in Greek yogurt powder for a creamy boost.
- Use milk instead of water when adjusting the texture.
- Blend in silken tofu with the wet ingredients for an extra protein kick.
These simple tweaks can turn your protein bars into a powerhouse snack!


