The Best Fluffy Pancakes recipe you will fall in love with. Full of tips and tricks to help you make the best pancakes.
There’s something truly mesmerizing about a zebra cake. With its bold stripes of chocolate and vanilla, this delightful dessert is more than just a treat—it’s a showstopper. Whether you’re hosting a birthday party, baking with the kids, or simply craving a cake that’s both fun to make and delicious to eat, zebra cake delivers on all fronts. Inspired by the iconic look of Little Debbie’s snack cakes but made entirely from scratch, this cake brings visual magic and rich flavor to your table. In this post, we’ll explore the magic behind zebra cakes—from ingredients and baking tips to fun decorating ideas and tasty variations that will keep everyone coming back for more.
What Is a Zebra Cake and Why It’s So Magical
Zebra cake isn’t just a dessert—it’s a visual and flavorful experience that combines the best of both worlds: rich chocolate and smooth vanilla. Named for its signature black-and-white striped pattern, this cake stands out for its beauty and simplicity. But what truly makes it magical is how something that looks so impressive can be made with basic ingredients and a simple layering technique.
A Cake That’s All About Contrast
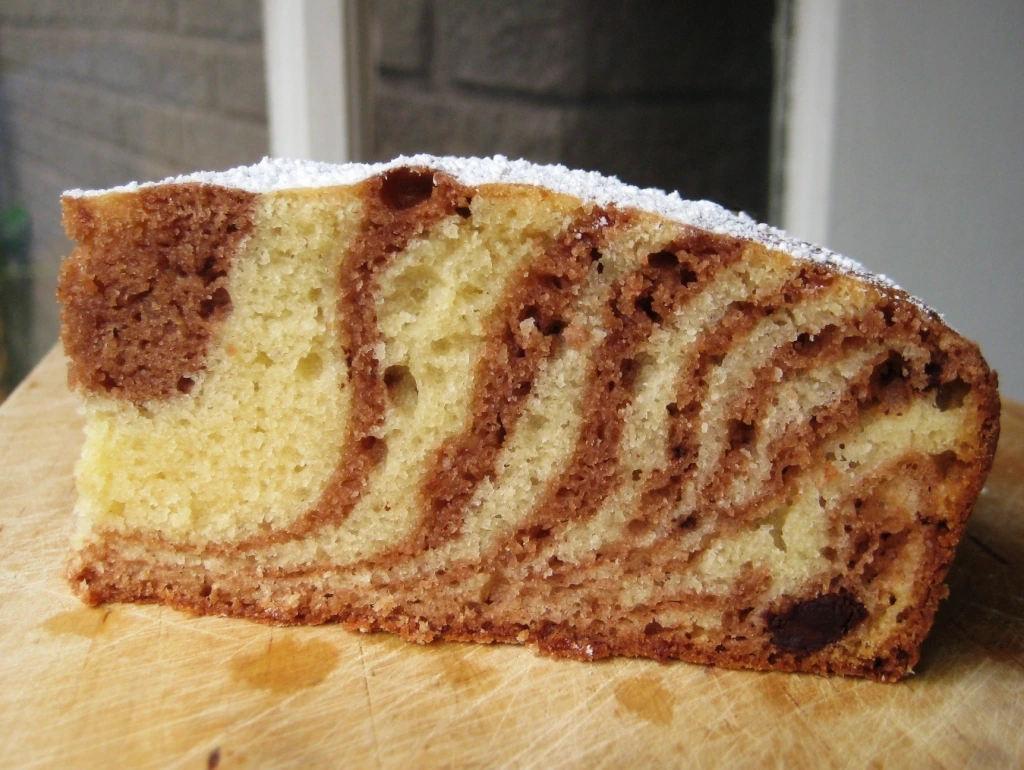
At first glance, zebra cake looks like something only a professional baker could pull off. But the magic lies in its effortless design. By alternating spoonfuls of chocolate and vanilla batter in the center of the pan, a striking stripe pattern forms naturally as the cake bakes. Once sliced, you’re greeted with mesmerizing rings that resemble zebra stripes—soft, uniform, and undeniably cool.
Origins and Inspiration Behind Zebra Cakes
Zebra cakes have gained popularity in both snack form and homemade versions. Many people associate them with nostalgic childhood memories of Little Debbie Zebra Cakes, which feature a vanilla cream-filled cake covered in white icing and striped with fudge. While those are tasty in their own right, the homemade zebra cake offers a fresher, more customizable version that’s perfect for any baking enthusiast.
Ideal for Celebrations and Everyday Treats
Whether you’re baking for a birthday party, brunch, school event, or just a weekend treat, zebra cake is a go-to choice. Its eye-catching pattern makes it a standout on dessert tables, while its simple flavor combination of vanilla and cocoa appeals to almost everyone. Plus, the wow factor doesn’t require fancy tools or advanced baking skills—just a little patience and a love for cake.
Ingredients You’ll Need to Make Zebra Cake
Creating a stunning zebra cake starts with a handful of everyday ingredients you likely already have in your kitchen. The real magic comes from how these basic components are combined and divided to form two flavorful batters—one vanilla, one chocolate—that layer into the eye-catching zebra pattern. Below, we’ll break down the essentials and optional add-ins to help you create a moist, fluffy, and striped masterpiece.
Basic Pantry Staples
To make your zebra cake from scratch, you’ll need:
- 2 cups (250g) all-purpose flour – Forms the structure of the cake.
- 1 cup (200g) granulated sugar – Adds sweetness and helps the cake brown.
- 1 tablespoon baking powder – Ensures a nice, even rise.
- ¼ teaspoon salt – Balances the flavors and enhances both chocolate and vanilla.
- 4 large eggs – Provide moisture, structure, and richness.
- 1 cup (240ml) vegetable oil or melted butter – Keeps the cake tender and soft.
- 1 cup (240ml) milk – Thins the batter slightly and contributes to a smooth texture.
These base ingredients are used in both the vanilla and chocolate portions of the batter.
Flavor Boosters and Enhancers
To give your zebra cake its signature taste, you’ll need:
- 1 tablespoon vanilla extract – Adds warmth and sweetness to the vanilla batter.
- 2½ tablespoons (15g) unsweetened cocoa powder – Gives the chocolate batter its deep, rich flavor.
- ½ teaspoon instant espresso powder (optional) – Enhances the depth of the chocolate layer.
The vanilla and chocolate batters share the same base but are flavored separately for contrast.
Optional Add-ins and Variations
Depending on your preferences or dietary needs, you can modify the recipe with these additions:
- ¼ cup (60g) yogurt or sour cream – Adds extra moisture and a slight tang for a softer crumb.
- ½ teaspoon almond or coconut extract – A small twist to enhance the vanilla side.
- 1:1 gluten-free flour substitute – Use in place of regular flour for a gluten-free version (adjust liquids if needed).
- A few drops of natural food coloring – Use beet juice, matcha, or other colorings to create fun swirls or themed designs.
Step-by-Step Guide to Making the Perfect Zebra Cake
Baking a zebra cake might look like a professional feat, but it’s surprisingly simple once you learn the layering technique. With just two bowls, a steady hand, and a little patience, you can create a show-stopping striped cake that’s as beautiful as it is delicious. Here’s how to do it right from start to finish.
1. Preparing Your Cake Batter
Start by mixing the base batter:
- Whisk together dry ingredients like flour, baking powder, and salt in one bowl.
- In another bowl, combine eggs, sugar, milk, oil, and vanilla extract until smooth and creamy.
- Gradually mix the dry ingredients into the wet until fully incorporated. The batter should be smooth but not too runny.
Once your base batter is ready, divide it evenly into two separate bowls:
- Leave one bowl as vanilla (you can enhance it with more vanilla extract or a touch of almond).
- To the second bowl, add cocoa powder and mix until fully combined to create your chocolate batter.
Tip: If the cocoa batter becomes too thick, add a tablespoon of milk to match the consistency.
2. How to Layer the Batter for the Zebra Effect
This is where the zebra magic happens:
- Grease and line your round cake pan (usually 8 or 9 inches).
- Using two spoons or ladles, alternate dropping one spoonful of vanilla batter into the center of the pan, followed by one spoonful of chocolate batter directly on top of it.
- Repeat the process, always layering in the center. The batter will naturally spread outward and form rings.
Tip: Be consistent with the amount you pour each time—about 2 tablespoons per layer works well.
3. Baking and Cooling Your Cake
- Preheat your oven to 350°F (175°C).
- Bake the cake for 35–45 minutes, or until a toothpick inserted in the center comes out clean.
- Avoid opening the oven too often, as this can disrupt the rising process and distort the zebra pattern.
- Once baked, let the cake rest in the pan for 10 minutes, then transfer it to a cooling rack.
Proper cooling ensures your cake doesn’t become soggy or lose shape.
4. Pro Tips for a Perfect Pattern Every Time
- Use equal batter amounts: This ensures even rings throughout.
- Keep the batter at medium consistency: Too thick and it won’t spread; too thin and it will blur the stripes.
- Tap the pan gently before baking to release air bubbles without disrupting the design.
- Use a light-colored cake pan: It helps the cake bake evenly and makes spotting golden edges easier.
Decorating and Serving Suggestions
Once your zebra cake has cooled and the beautiful striped pattern has been revealed, it’s time to take it to the next level with decorations and thoughtful presentation. Whether you prefer a simple glaze, a fancy frosting, or want to turn your zebra cake into a centerpiece dessert, here are some creative ways to decorate and serve it to impress.
1. Classic and Simple Icing Ideas
If you’re going for elegance without overcomplicating things, a light icing can enhance your zebra cake beautifully:
- Chocolate ganache or glaze – A smooth, shiny topping made with chocolate and cream adds richness and depth without hiding the zebra pattern.
- Vanilla glaze – A drizzle of powdered sugar mixed with milk or cream and a touch of vanilla makes a sweet, subtle finish.
- Powdered sugar dusting – A quick and easy option if you want the stripes to stay visible.
Tip: Avoid heavy frosting that could overpower the pattern—zebra cakes shine best when you let the stripes show.
2. Creative Presentation for Special Occasions
Want to turn your zebra cake into a showstopper? Try these ideas:
- Layered zebra cake – Slice your cake in half and add a light whipped cream or chocolate mousse between layers for extra indulgence.
- Cake toppers and themes – Decorate with edible animal figurines, safari-themed toppers, or fresh flowers to fit a party or celebration.
- Edible glitter or metallic sprays – These add shimmer and a touch of glam without altering the flavor.
Perfect for birthdays, kids’ parties, baby showers, or even brunch spreads.
3. Pairing Zebra Cake with Other Treats
Enhance your serving experience by pairing zebra cake with complementary flavors:
- Ice cream – Vanilla, coffee, or chocolate chip pair wonderfully with the cake’s rich flavor.
- Fresh berries – Strawberries, raspberries, or blueberries add a burst of freshness and color to each slice.
- Hot beverages – Serve with coffee, espresso, or black tea to balance the sweetness.
These combinations turn a simple slice into a satisfying dessert plate.
4. Making Mini Zebra Cakes or Cupcakes
If you’re baking for a crowd or want something portable:
- Mini zebra cakes – Use smaller pans or ramekins for individual portions with the same striping technique.
- Zebra cupcakes – Alternate batters by spooning layers into cupcake liners for cute, swirled single servings.
- Zebra cake pops – Crumble baked zebra cake, mix with frosting, and form into balls on sticks for bite-sized fun.
Perfect for parties, school lunches, dessert boxes, or bake sales.
Storage Tips and Fun Variations to Try
A zebra cake is not only beautiful and delicious—it’s also surprisingly easy to store and incredibly versatile. Whether you’re saving leftovers or planning ahead for a celebration, knowing how to keep your cake fresh and experimenting with creative variations can help you enjoy this striped dessert again and again in new ways.
1. How to Store Zebra Cake for Freshness
Proper storage keeps your cake moist, flavorful, and ready for another slice (or two!).
- Room Temperature: If unfrosted or lightly glazed, zebra cake can be stored at room temperature in an airtight container for up to 3 days. Keep it in a cool, dry place away from sunlight.
- Refrigeration: For frosted cakes or if your kitchen is warm, refrigerate the cake for up to 5 days. Wrap it in plastic wrap or store it in a cake dome to prevent drying out.
- Freezing for Later: Zebra cake freezes well! Wrap individual slices or the whole cake tightly in plastic wrap and then in foil. Freeze for up to 2 months. Thaw in the fridge or at room temperature before serving.
Tip: Avoid refrigerating the cake uncovered—this causes it to dry out faster.
2. Turning It Into a Layer Cake or Roll Cake
Zebra cake isn’t limited to a single-layer round cake. You can elevate it with a few fun twists:
- Layer Cake: Bake two zebra-patterned cakes, slice each in half horizontally, and stack them with whipped cream, mousse, or buttercream between layers for a show-stopping striped interior and tall presentation.
- Zebra Swiss Roll: Pour the batter in stripes onto a rectangular baking sheet, bake thin, and roll it with cream filling for a stunning spiral zebra roll.
- Bundt Zebra Cake: Use a bundt pan and alternate the batters to create a marbled effect in a ring shape—perfect for brunches or gifting.
3. Gluten-Free and Healthier Options
Looking for a lighter or allergen-friendly zebra cake? You can easily adapt the recipe without losing the magic:
- Gluten-Free Version: Use a 1:1 gluten-free flour blend. Add a little extra moisture (like yogurt or an extra egg) to prevent dryness.
- Reduced Sugar: Swap some of the sugar for natural alternatives like honey, coconut sugar, or stevia blends.
- Dairy-Free Alternatives: Substitute regular milk with almond, oat, or soy milk. Use oil or plant-based butter for richness.
These versions are great for those with dietary needs—or anyone wanting a lighter dessert without compromising flavor.
4. International Twists and Flavor Variations
Zebra cake’s concept lends itself to endless creative interpretations:
- Red Velvet and Cream: Use red velvet batter instead of chocolate for a festive red-and-white zebra cake—perfect for Valentine’s Day or holidays.
- Matcha and Vanilla: Add matcha green tea powder to half the batter for a beautiful green-striped twist.
- Coffee and Vanilla: Mix instant coffee or espresso powder into the chocolate batter for a mocha-flavored zebra cake.
- Spiced Zebra Cake: Add cinnamon, cardamom, or nutmeg to the vanilla layer for a warm, autumn-inspired version.
You can also decorate with regional ingredients like pistachios, rose water, or coconut for a culturally inspired flair.


