The Best Fluffy Pancakes recipe you will fall in love with. Full of tips and tricks to help you make the best pancakes.
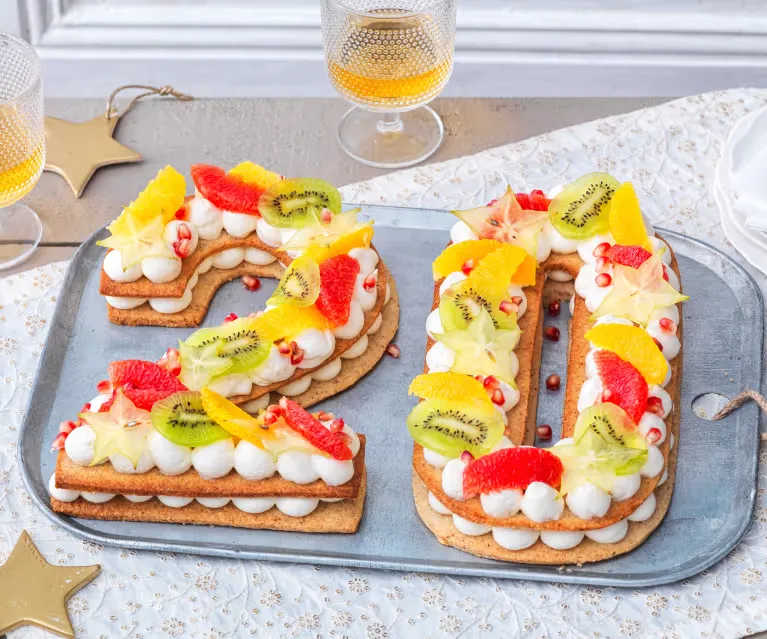
Number cakes have taken the world of baking by storm, becoming a go-to choice for those looking to create a show-stopping dessert for any celebration. Whether you’re celebrating a birthday, an anniversary, or a special milestone, a beautifully decorated number cake adds a personal and artistic touch to the occasion. With their customizable shapes, vibrant colors, and decadent layers, number cakes are the perfect way to make any event memorable.
In this ultimate guide, we’ll walk you through everything you need to know about baking and decorating a stunning number cake. From choosing the right ingredients to mastering cake shaping techniques and adding that perfect finishing touch, you’ll be able to create a delicious, eye-catching centerpiece that will wow your guests. Let’s get started on your journey to creating the ultimate number cake!
What Are Number Cakes and Why They’re Perfect for Celebrations
Understanding Number Cakes: A Delicious Trend in Baking

Number cakes are a unique and visually striking dessert that typically consist of cake layers shaped to form numbers—usually signifying a milestone such as an age or anniversary year. These cakes are more than just your average birthday treat; they’re an edible canvas for creativity. The base is usually made of moist, fluffy cake layers, often filled with a delicious creamy filling like buttercream, whipped cream, or mascarpone cheese. The real magic, however, lies in their decoration—each number is transformed into a work of art with toppings like fresh fruit, meringue, edible flowers, chocolates, and even sprinkles.
Why Number Cakes Are Perfect for Special Occasions
Number cakes are particularly popular for celebrations where you want to highlight a meaningful number, such as a milestone birthday (think turning 30, 40, or 50) or a significant anniversary. Their large, bold shapes make them an ideal focal point for a celebration, drawing guests’ attention as they enter the venue or party space.
- Birthdays: For milestone birthdays, like sweet 16, 21st, 30th, or 50th birthdays, a number cake creates a statement. You can customize it to reflect the person’s favorite colors, hobbies, or even a theme tied to their life or interests.
- Anniversaries and Weddings: Number cakes can also serve as the perfect dessert for anniversaries and weddings, where you can feature the years of marriage or the age of the couple to symbolize their journey together.
- Graduations and Other Milestones: A number cake can celebrate any significant achievement, such as graduation, a promotion, or even a child’s big achievement like their first sports trophy.
The Allure of Customization and Personalization
One of the most appealing aspects of number cakes is the ability to fully customize them. Whether you’re baking for a child, a friend, or a significant other, the cake can be personalized to fit the occasion. From the choice of cake flavors to the selection of fillings and toppings, number cakes allow you to express your creativity and cater to the preferences of the honoree.
For example, a little one’s birthday number cake might feature colorful buttercream frosting, bright candies, and cartoon character toppers, while an elegant anniversary number cake might be adorned with delicate edible flowers, gold leaf, and refined piping.
Essential Ingredients and Tools for Baking a Number Cake
Creating a stunning number cake requires more than just a good recipe; it’s about using the right ingredients and tools to ensure your cake is not only delicious but also holds its shape and looks professionally made. Whether you’re a seasoned baker or just starting, knowing the essentials will make the process much smoother.
Key Ingredients for a Perfect Number Cake
To create the perfect number cake, choosing the right ingredients is essential. Each component—from the cake base to the filling and decorations—plays a vital role in both flavor and appearance. Let’s explore these ingredients in more detail:
1. Cake Base: The Foundation of Your Number Cake
The cake base is what gives structure to your number cake and sets the tone for its flavor. You’ll need a cake that’s sturdy enough to support the layers of filling and decorations, yet moist and light to ensure it’s not too heavy. Here are some popular options for your cake base:
- Vanilla Cake: This classic choice offers a neutral and light base that pairs beautifully with almost any flavor of frosting or filling. It’s versatile and perfect for both simple and elaborate decorations. A well-made vanilla cake can bring a soft, sweet flavor that complements fresh fruits and creamy fillings.
- Chocolate Cake: For a richer and more indulgent number cake, a chocolate cake base can add depth and contrast to lighter fillings and decorations. It’s especially delicious if you’re pairing the cake with fruity fillings or a tangy cream cheese frosting.
- Sponge Cake: Known for its light, airy texture, sponge cake is a great choice for a fluffy and delicate base. It holds up well under the layers of filling and is perfect if you’re aiming for a light, less dense cake. Sponge cake also offers a wonderful balance to heavier, richer fillings like mascarpone or whipped cream.
2. Filling: Moisture and Flavor Boost
The filling inside your number cake isn’t just about adding flavor; it’s what gives the cake moisture and creaminess, making it indulgent and delightful. The choice of filling plays a crucial role in the overall taste and texture of your cake. Here are some popular filling options:
- Buttercream Frosting: A timeless and classic choice, buttercream is rich and stable, making it perfect for cake layers. You can flavor buttercream in endless ways, from vanilla and chocolate to fruit infusions like strawberry or raspberry. Its creamy texture helps hold the cake layers together and provides a sweet contrast to more refreshing fillings like fruit compotes.
- Whipped Cream: If you’re after a lighter and fluffier texture, whipped cream is the way to go. It provides a soft, airy filling that’s less heavy than buttercream. Whipped cream can be used on its own or paired with other fillings to create layers of contrasting textures. It’s perfect for summer-themed cakes or lighter flavor combinations like lemon or strawberry.
- Mascarpone or Cream Cheese Frosting: For a tangy yet creamy filling, mascarpone or cream cheese frosting is a great option. These fillings offer a luxurious, velvety texture and can help balance out the sweetness of your cake, providing a more complex flavor. They pair wonderfully with fruits like raspberries, blackberries, or even citrus.
- Fruit Compote or Jam: If you prefer a fruity twist, adding a layer of fruit compote or jam can elevate your number cake with vibrant flavors. Popular choices include strawberry, raspberry, blueberry, or apricot jam. These fruity fillings add sweetness and moisture while enhancing the flavor profile of the cake.
3. Decoration: Unleash Your Creativity
The decoration is where you can really let your creativity shine, turning your number cake into a stunning work of art. Whether you want something elegant or playful, there are endless options for decorating your number cake. Here are some ideas:
- Fresh Fruit: Fresh fruits not only add natural sweetness and moisture to your cake but also provide a pop of color. Berries like strawberries, blueberries, and raspberries are favorites, but you can also use exotic fruits like kiwi, passion fruit, or mango slices. Citrus fruits, such as lemon or orange, can add brightness, while tropical fruits like pineapple or papaya bring a refreshing touch.
- Meringue: Mini meringue kisses or piped meringue accents can add an airy, crunchy texture to your number cake. Meringue is light, sweet, and visually striking, making it a popular choice for decorative elements. Its crisp, delicate appearance contrasts beautifully with the softness of the cake.
- Edible Flowers: For a more refined and elegant design, edible flowers are an excellent choice. Flowers such as pansies, violets, and marigolds can create a romantic or sophisticated look, perfect for weddings, anniversaries, or milestone birthdays. Be sure to choose flowers that are safe to eat and non-toxic, like lavender, chamomile, or nasturtiums.
- Sprinkles, Chocolate Chips, or Candies: For a fun, colorful approach, sprinkles, chocolate chips, or candies are great options. These elements can add texture and playfulness, making them perfect for children’s birthday cakes or any celebration where you want to make a statement. Use a variety of shapes, colors, and sizes to create a whimsical, festive look.
- Fondant: If you’re looking for a sleek, smooth finish, fondant is your go-to decoration. It gives a polished and professional look to your cake, especially when you want a uniform and smooth texture. You can also use fondant to make decorative accents like flowers, ribbons, or intricate designs, ensuring a flawless, picture-perfect finish.
Essential Tools You’ll Need for a Number Cake
Baking and decorating a number cake requires the right tools to ensure everything comes together perfectly. Whether you’re preparing the cake base, assembling the layers, or adding the final touches, having the proper equipment can make the entire process easier and more efficient. Here’s a breakdown of the essential tools you’ll need to create a stunning number cake:
1. Cake Pans: The Foundation of Your Cake Shape
The right cake pan is key to getting the perfect number shape, whether you’re using a pre-designed number pan or shaping it yourself. Here are the tools you’ll need:
- Number-Shaped Cake Pans: These specialty pans come pre-shaped with the numbers 0 through 9, making it easy to bake your number cake without any cutting or shaping required. If you’re aiming for a specific number design, using one of these pans is the easiest and most effective solution.
- Round Cake Pans: If you don’t have a number-shaped pan, you can create the shape yourself by baking a few round cakes and then cutting them into the number design. You’ll need round cake pans to bake your layers, after which you’ll use a template or freehand cutting to achieve the right number shape. This set of high-quality round cake pans is perfect for ensuring your layers are baked evenly and come out of the pan with ease. Made from durable materials, these pans are designed to provide consistent heat distribution, making them a reliable choice for baking cakes of any shape.
2. Piping Bags and Tips: For Precise Frosting and Decoration
Piping bags and tips are crucial for adding those beautiful details to your number cake. They allow you to apply frosting smoothly, create decorative textures, and even write personalized messages. Here’s what you’ll need:
- Piping Bags: These are essential for applying frosting, whipped cream, or decorative details such as rosettes, borders, and intricate designs. Choose reusable or disposable piping bags depending on your preference.
- Piping Tips: The variety of piping tips available will help you achieve different effects, from textured decorations to smooth finishes. Some essential tips include:
- Star Tip (1M, 2D): This is perfect for creating rosettes, ruffles, and textured swirls on your number cake. It’s great for adding volume and dimension to your decorations.
- Round Tip: Ideal for writing messages, creating smooth borders, or adding delicate, fine details to your cake.
- Leaf Tip: This tip helps you pipe beautiful leaf-like decorations with frosting, perfect for adding greenery or soft embellishments to your cake’s design.
3. Spatulas: Essential for Frosting and Smoothing
A good spatula, especially an offset spatula, is one of the most important tools for achieving a professional finish on your number cake. It helps you apply frosting smoothly and evenly to your layers and ensures sharp, clean edges.
- Offset Spatula: This tool is ideal for spreading frosting evenly across the cake. It’s designed with an angled blade that gives you more control when smoothing the frosting, particularly around the edges. The offset spatula is also useful for lifting and repositioning cake layers without damaging them.
4. Cake Boards: To Support and Present Your Cake
A cake board is a sturdy base on which you’ll assemble and display your number cake. These boards are typically made from cardboard or wood, ensuring the cake has enough support to hold its shape during assembly and transport.
- Cake Boards: Choose a board that’s large enough to support the size of your number cake. If you’re making a larger number (such as 2 or 3), you’ll need a board that’s both sturdy and appropriately sized. Cake boards come in various thicknesses, so pick one that can handle the weight of your decorated cake without buckling or bending.
5. Turntable: For Smooth, Even Decorating
A turntable or rotating cake stand is a fantastic tool for decorating your number cake evenly and efficiently. It allows you to rotate the cake while working on it, which makes it much easier to achieve smooth frosting and perfect piping.
- Turntable: With a rotating cake stand, you can spin the cake as you work, ensuring an even, consistent look. This tool is especially helpful when you need to frost large sections of the cake or pipe intricate details. It also makes decorating much less strenuous, as you don’t have to move around the cake.
6. Knife or Cake Cutter: For Shaping Your Cake
When you’re shaping your number cake from round layers, a sharp knife or cake cutter is essential for cutting the cake into the precise number shape. This step is crucial if you’re not using a pre-shaped number pan.
- Knife or Cake Cutter: Use a sharp knife or cake cutter to trim your cake layers into the correct shape. For clean, sharp edges, make sure to use a serrated knife or a specialized cake cutter. This tool is important for achieving clean lines and precise shapes.
7. Template (Optional): To Ensure Accuracy in Shaping
If you’re cutting your own number shape, a template can be a helpful tool to guide your cutting and ensure the shape is accurate. Templates are especially useful if you’re trying to replicate a specific number design.
- Template: Simply print out the number you need and use it as a guide. Place the template over the cake, trace it with a knife, and cut along the lines to achieve the exact number shape. This step is optional but can be helpful, especially if you’re new to cake shaping.
Additional Tips for Success
- Chill the cake layers: After baking, chill the cake layers before frosting to make them easier to work with and to prevent the frosting from sliding off.
- Don’t overload the filling: Be careful not to use too much filling, as it can cause the layers to collapse or make the cake too messy to assemble.
- Keep decorations simple and balanced: A little goes a long way. Choose a few key decorations to highlight the number without overwhelming the design.
Guide to Baking and Assembling Your Number Cake
Now that you’re familiar with the key ingredients and essential tools, it’s time to dive into the step-by-step process of baking and assembling your number cake. From baking your layers to filling and decorating, here’s how you can create a beautiful and delicious number cake that will wow your guests.
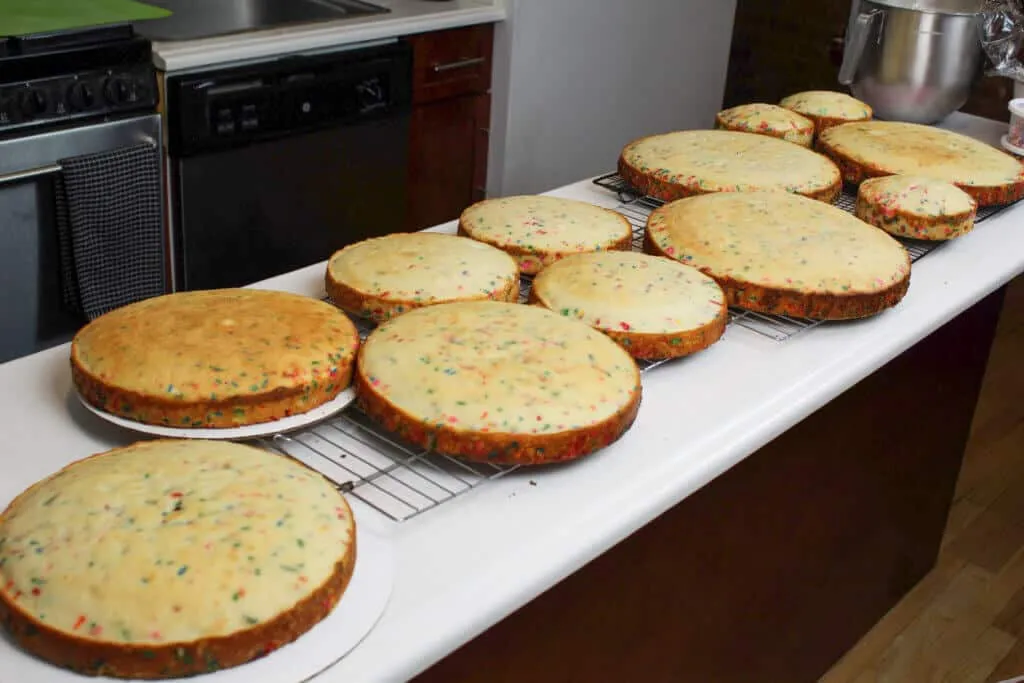
Step 1: Preparing and Baking the Cake Layers
The foundation of your number cake lies in the cake layers, so it’s important to ensure they are baked correctly. Follow these steps for a successful bake:
- Prepare Your Cake Pan or Template: If you have a number-shaped cake pan, it’s time to grease and flour it to prevent the cake from sticking. If you don’t have a number-shaped pan, you can bake the cake in standard round pans and use a template (printed number) to guide you when cutting the cake into the desired number shape.
- Batter Preparation: Whether you’re making a vanilla, chocolate, or sponge cake, make sure to follow the recipe carefully for the best results. Mix your dry ingredients (flour, baking powder, salt) and wet ingredients (butter, sugar, eggs, milk) separately before combining. Don’t overmix the batter, as this can result in a dense cake.
- Baking the Layers: Pour the prepared cake batter into the pan and smooth it out with a spatula. Bake according to your recipe’s instructions, usually at 350°F (175°C). It’s important to keep an eye on the cake while it bakes and perform a toothpick test (insert a toothpick into the center, and if it comes out clean, the cake is done).
- Cooling: Once baked, remove the cake from the oven and let it cool in the pan for 10 minutes. Then transfer it to a wire rack to cool completely. Cooling the cake layers is crucial for a smooth frosting application and to prevent the cake from crumbling when you assemble it.
Step 2: Cutting the Cake into Number Shapes
If you didn’t use a number-shaped pan, you’ll need to cut the cake into the desired number shape. Here’s how you can do it:
- Using a Template: Print out the number or shape you want to use for the cake. Cut the number out and place it on top of the cooled cake. Use a sharp knife or cake cutter to trim around the edges of the number template, creating a perfect shape. Make sure to go slowly and follow the lines carefully for a clean cut.
- Cutting Multiple Layers: If your number cake is going to have multiple layers, use a serrated knife to slice the cake into even layers. You can choose to layer your number cake with a single thick layer or multiple thinner layers, depending on the height and look you want to achieve.
Step 3: Filling and Frosting Your Number Cake
Once the cake layers are cut into the number shape, it’s time to fill and frost. Here’s how to achieve a beautiful finish:
- Prepare the Filling: Whether you’re using buttercream, whipped cream, or mascarpone, make sure the filling is smooth, light, and easy to pipe. If you want a firmer texture, consider chilling your frosting for a few minutes before using it.
- Layering the Cake: Place your first layer of cake on a cake board or serving platter. Pipe or spread a generous amount of frosting or filling on top of this first layer, making sure to cover the edges for a smooth look. Add your second layer of cake on top and repeat the process with frosting and more layers.
- Crumb Coat: Once the layers are stacked, apply a thin layer of frosting over the entire cake to seal in any crumbs (called a crumb coat). This coat doesn’t need to be perfect; it’s just to create a smooth surface for the final layer of frosting. Chill the cake in the fridge for 15–20 minutes to firm up the crumb coat.
- Final Frosting Layer: After the crumb coat is set, apply a thicker layer of frosting or filling over the entire cake. Use an offset spatula to smooth it out and create a clean, even surface. For a sleek look, you can even use fondant to cover the cake, though this step is optional.
Step 4: Decorating Your Number Cake
The decoration is where your creativity shines! Here are some decoration ideas to make your number cake extra special:
- Piping: Use different piping tips to create various textures and designs on your cake. For example:
- Rosettes: Pipe beautiful, soft swirls with a star tip.
- Borders: Use a small round tip to pipe delicate borders around the edges of the cake.
- Writing: Use a fine round tip to write messages or the name of the person being celebrated on the cake.
- Adding Fresh Fruit: Fresh fruit can add a burst of color and flavor to your number cake. Arrange berries, kiwi slices, or citrus wedges in an artful pattern on top of the cake. You can also add more tropical fruits like mango, passion fruit, or pineapple for a fresh twist.
- Meringue and Edible Flowers: For an elegant touch, scatter mini meringue kisses or piped meringue around the number cake. Edible flowers such as pansies, violets, or marigolds can also add a sophisticated touch, especially for weddings or anniversaries.
- Candies and Chocolate: For a more playful vibe, add some colorful candies, chocolate shavings, or chocolate chips. These are great for children’s birthdays or for a fun, festive look.
- Gold or Silver Leaf: If you’re aiming for a luxurious look, edible gold or silver leaf can be added to the cake’s surface. This works wonderfully with white or pastel-colored cakes.
Step 5: Serving and Storing Your Number Cake
Once your number cake is beautifully decorated, it’s ready to be served!
- Serving: When cutting the cake, make sure to use a sharp serrated knife to ensure each slice is neat and clean. Number cakes are typically served in slices that correspond to the size of the number, so be sure to cut the portions accordingly.
- Storing: If you have leftovers, store the cake in an airtight container in the fridge. Since number cakes often use whipped cream or other perishable fillings, they should be kept cool and consumed within 2-3 days for the best taste and texture.
Creative Ideas for Decorating Your Number Cake
The decoration of your number cake is what truly brings it to life, making it a memorable centerpiece for any celebration. From elegant floral arrangements to fun and playful toppings, the possibilities are endless. Whether you’re making a birthday cake, anniversary cake, or a celebratory treat for any special occasion, here are some creative decorating ideas to elevate your number cake and make it stand out.
1. Fresh Fruits for a Vibrant Touch
Fresh fruits are a fantastic way to add color, texture, and a refreshing flavor contrast to the richness of the cake. Here’s how you can use fruits creatively in your number cake:
- Berries: Strawberries, raspberries, blueberries, and blackberries are excellent choices for adding a pop of color. Arrange them in clusters, lines, or swirls to decorate the number cake.
- Citrus Slices: Thin slices of oranges, lemons, or grapefruits bring a bright, citrusy flair. They are especially lovely for spring and summer occasions.
- Tropical Fruits: Mango, pineapple, and kiwi slices give your number cake an exotic, vibrant look. They also offer a burst of tropical flavor that pairs beautifully with lighter cake flavors like vanilla or coconut.
- Stone Fruits: Peaches, plums, and nectarines, when sliced thinly, can be arranged to add both texture and color.
- Pomegranate Seeds: These jewel-like seeds add a festive touch to your number cake, especially during the holidays or celebratory moments like New Year’s Eve.
You can arrange the fruits in a specific pattern (such as concentric circles around the number) or let them spill organically across the surface for a more relaxed, natural look.
2. Flowers and Floral Accents for Elegance
Edible flowers not only make your cake look stunning, but they also bring an air of elegance and sophistication. Here are some ideas for incorporating flowers into your number cake:
- Edible Flowers: Flowers like pansies, violets, marigolds, and lavender are edible and safe to use as decorations. These flowers add a beautiful touch, especially for formal celebrations such as weddings or bridal showers.
- Sugar Flowers: If you want a more elaborate, detailed floral design, consider using sugar flowers. These handcrafted, edible creations are perfect for adding intricate details to your cake, and you can choose from roses, peonies, or orchids.
- Flower Petals: Fresh flower petals can also be scattered around the number shape to add a soft, romantic touch. Opt for larger petals like those from roses or smaller blooms such as daisies.
- Botanical Accents: Adding sprigs of fresh herbs like mint, rosemary, or thyme can also provide a beautiful green contrast, especially when paired with fruit.
Arranging these flowers delicately around the edges of the number or in the center can turn your cake into a visually stunning masterpiece.
3. Sweet and Playful Candies
For a fun and whimsical approach, consider using candies to decorate your number cake. These can be particularly effective for children’s birthday parties or celebratory events with a playful vibe. Here are some ideas for candy-inspired decorations:
- Gummy Candies: Colorful gummy bears, gummy worms, or gummy fruit slices can create an eye-catching and fun design. Arrange them in a rainbow pattern or use them to accentuate the shape of the number.
- Chocolate Candies: Chocolate-covered almonds, M&Ms, or mini chocolate bars can add a rich and indulgent touch. Mix and match the colors of the candies to make the number cake more visually interesting.
- Lollipops: Mini lollipops or even larger decorative ones can be placed strategically around the cake to create height and add a cheerful effect. For an extra layer of fun, add swirl patterns or colorful candy sticks.
- Candy Flowers: Create floral arrangements from colorful candies like jelly beans, pastel-colored chocolate balls, or even candy-coated chocolates to form petals and leaves.
Candies are a great way to make your number cake more interactive and enjoyable, especially for kids’ celebrations.
4. Meringue Kisses for a Delicate, Whimsical Touch
Meringue kisses are delicate, light, and airy—perfect for decorating number cakes with a touch of elegance. Here’s how to incorporate them into your design:
- Piped Meringue: Use a piping bag with a star tip to create small meringue kisses. Arrange these meringues in clusters along the edges or even scattered across the surface of the cake for a whimsical, dreamlike effect.
- Colorful Meringue: Add food coloring to the meringue mixture to create soft pastel or bold, vibrant meringue kisses. These colorful bites will look stunning against a white or light-colored cake base.
- Meringue Swirls: Instead of just piping small meringue kisses, you can create swirl-like meringue shapes for a more artistic and modern design.
These tiny, crunchy treats provide a delightful contrast to the softness of the cake and filling.
5. Metallic Touches for a Luxe Look
For a luxurious and sophisticated cake, incorporating metallic elements like gold and silver can take your number cake to the next level. Here are some ideas to get you started:
- Edible Gold and Silver Leaf: A little edible gold or silver leaf goes a long way in creating an elegant, high-end look. You can place it on top of the cake or add small flecks around the edges to create a shimmering effect.
- Gold Dust or Luster Dust: Gold dust is another way to add a metallic sheen to your cake. Use a brush to gently dust the surface or certain areas of the cake for a glimmering, elegant effect.
- Metallic Candies or Sprinkles: For a less elaborate but still stylish look, use metallic-colored candies, sprinkles, or pearls. These can be scattered across the cake or placed on top of the frosting to add a chic shine.
Metallic accents pair wonderfully with elegant themes, such as bridal showers, anniversaries, or New Year’s Eve parties.
6. Whipped Cream and Buttercream Artistry
Sometimes, simplicity is key. You can create beautiful, minimalist designs using whipped cream and buttercream. Here are some ideas for achieving a sleek and artistic look:
- Textured Buttercream: Use a spatula to create textured effects on the frosting. This could be a simple swirl effect, ruffled edges, or even a smooth, ombré color transition.
- Piping Buttercream Flowers: Pipe small buttercream flowers using a petal tip to create a beautiful, layered floral design. Buttercream flowers can be made in many colors, from pastels to vibrant hues.
- Whipped Cream Layers: For a lighter touch, use fluffy whipped cream to decorate the number cake. You can pipe soft swirls of whipped cream on top, forming gentle curves or even small peaks.
Whipped cream and buttercream allow you to create a soft and refined look, perfect for more subtle or understated events.
7. Themed Decorations for Specific Occasions
To make your number cake even more special, tailor the decorations to the theme of the occasion. Some ideas include:
- Birthday Themes: Use the birthday person’s favorite colors, hobbies, or interests. You could decorate the number with small edible versions of the person’s favorite items, like tiny toy cars for a child’s birthday or elegant pearls for a milestone birthday.
- Wedding and Anniversary Themes: Go for soft, romantic designs with pastel flowers, delicate sugar lace, or sophisticated edible pearls to fit the romantic theme of the event.
- Seasonal Themes: Incorporate seasonal touches into the decorations. For instance, use autumn leaves, cinnamon sticks, and nuts for a fall-themed number cake, or snowflakes and silver sprinkles for a winter wonderland design.


