The Best Fluffy Pancakes recipe you will fall in love with. Full of tips and tricks to help you make the best pancakes.
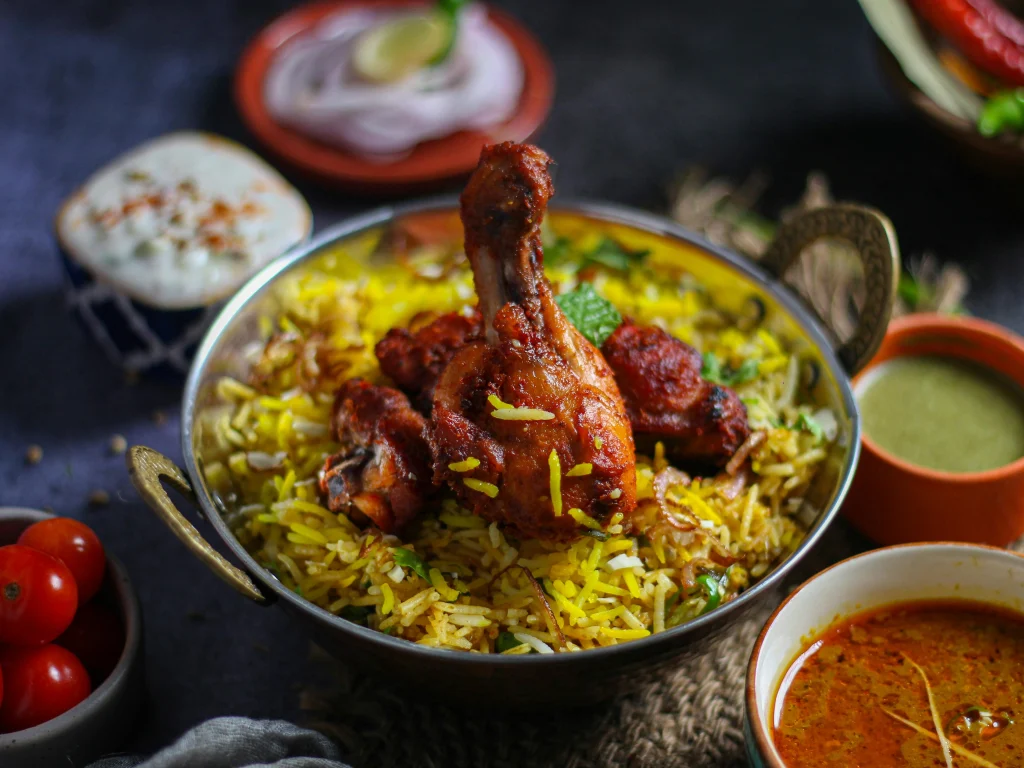
There’s something magical about a well-made chicken biryani—the way the spices cling to tender, marinated chicken, how each grain of basmati rice holds its own while soaking in flavor, and the aroma that fills your kitchen as everything steams to perfection. More than just a dish, biryani is a culinary tradition layered with history, love, and bold flavor.
Whether you’re a seasoned cook or just starting your kitchen journey, mastering chicken biryani is a skill worth savoring. In this guide, we’ll take you step-by-step through everything you need to create the perfect biryani at home—from selecting the right ingredients and marinating your chicken to layering with saffron-kissed rice and slow-cooking it “dum-style” for that authentic finish.
Ready to layer up some love? Let’s dive into the art and science of making chicken biryani like a true pro.
The Origins and Essence of Chicken Biryani
Chicken Biryani isn’t just a meal—it’s a story told in layers, passed down through generations, and cherished across continents. Its roots are steeped in rich history and culinary evolution, making it one of the most iconic dishes in Indian cuisine and beyond.
A Royal Legacy: Biryani’s Historical Roots
The word biryani is believed to have been derived from the Persian words birian (fried before cooking) and birinj (rice). While its precise origin is debated, many agree that biryani was introduced to the Indian subcontinent by Persian and Mughal influences. It was originally created as a regal dish, meant to nourish soldiers and royalty alike, blending rich spices, rice, and meat into a satisfying and complete meal.
Over time, biryani evolved through regional interpretations, from the spicy Hyderabadi biryani of South India to the fragrant Lucknowi (Awadhi) biryani of the North. Each version tells a unique story, shaped by local ingredients, cooking methods, and cultural traditions.
Why Chicken Biryani Captivates So Many
While biryani can be made with lamb, beef, fish, or even vegetables, chicken biryani stands out for its wide appeal. Chicken cooks quickly, absorbs spices beautifully, and balances the rich rice and ghee with its lean, tender texture. It’s a go-to option for both everyday meals and celebratory feasts.
Moreover, chicken biryani offers the perfect canvas for creativity—you can make it fiery and bold or mild and aromatic. Whether it’s for a family gathering or a weeknight dinner, its comforting warmth makes it universally loved.
The Layered Love Story
At its core, biryani is all about layers—each one adding depth and complexity. It starts with aromatic basmati rice, soaked and half-cooked to retain its bite. Then comes marinated chicken, infused with yogurt, ginger, garlic, and a medley of whole and ground spices. Fried onions, mint, and coriander are scattered in between, and saffron milk drizzled over the top completes the visual and flavor palette.
The dish is then sealed and cooked slowly—a method known as dum—allowing the steam to weave the flavors together in harmony. It’s this delicate, loving layering that makes biryani more than a dish—it becomes a labor of love, a tradition, and a celebration in itself.
Essential Ingredients That Build Bold Flavor
Great chicken biryani is more than the sum of its parts—it’s the result of thoughtfully chosen ingredients that work together to create bold, unforgettable flavor. Each component plays a crucial role, from the rice that forms the base to the spices that awaken your senses. Let’s break down the essentials that turn ordinary ingredients into a layered masterpiece.
Basmati Rice: The Heart of Every Biryani
No biryani is complete without long-grain basmati rice. Known for its fragrance, length, and ability to stay separate after cooking, basmati rice provides the perfect structure for layering. Choose aged basmati rice for the best results—its lower moisture content and nutty aroma enhance the dish’s flavor and texture. Always soak the rice for at least 30 minutes before cooking to help the grains elongate beautifully.
Marinated Chicken: Flavor from the Inside Out
Marination is where the magic begins. Chicken is typically marinated in a mixture of plain yogurt, ginger-garlic paste, chili powder, turmeric, garam masala, and salt. The yogurt tenderizes the meat while the spices seep in, ensuring every bite is juicy and flavorful. For maximum depth, marinate the chicken for at least an hour—overnight is even better.
Spices and Whole Aromatics: The Soul of the Dish
Biryani is known for its complex spice profile, which includes both whole spices and ground blends:
- Whole spices like cloves, green and black cardamom, cinnamon sticks, bay leaves, cumin seeds, and star anise add subtle layers of warmth.
- Ground spices such as garam masala, coriander, chili powder, and turmeric create intensity and depth.
- Biryani masala (either homemade or store-bought) is often added for a signature flavor that ties everything together.
Tempering these spices in oil or ghee before layering them into the dish enhances their aroma and releases their full potential.
Garnishes That Elevate: Fragrance, Color, and Texture
What truly sets biryani apart is the final flourish of carefully selected garnishes. These not only add visual appeal but also elevate flavor and texture:
- Fried onions (also known as birista) offer sweetness and crunch.
- Saffron milk, soaked in warm milk and drizzled over the top, adds rich golden hues and a floral aroma.
- Fresh mint and coriander leaves add brightness and balance the spices with a touch of freshness.
- A spoonful of ghee or butter layered between the rice and chicken adds richness and ensures every bite is indulgent.
Step-by-Step Guide to Mastering Chicken Biryani
Mastering chicken biryani may seem intimidating at first, but once you break it down into clear steps, it becomes a rewarding process full of aroma, flavor, and pride. The secret lies in patience, layering, and knowing when to let the ingredients do the work. Whether you’re making biryani for a family dinner or a special gathering, here’s a foolproof guide to getting it right every time.
Step 1: Prepare and Soak the Basmati Rice
Begin by rinsing 2 cups of aged basmati rice under cold water until the water runs clear. This removes excess starch and helps prevent clumping. Soak the rice in water for at least 30 minutes—this allows the grains to elongate beautifully during cooking.
In a large pot, bring water to a boil with whole spices (like cloves, bay leaves, cinnamon, and green cardamom) and a bit of salt. Add the soaked rice and cook it until it’s 70–80% done—firm with a slight bite. Drain and set aside.
Step 2: Marinate the Chicken
In a large bowl, mix together:
- 500g–750g bone-in chicken (skinless)
- 1 cup plain yogurt
- 1 tbsp ginger-garlic paste
- 1 tsp red chili powder
- ½ tsp turmeric
- 1 tsp garam masala
- Salt to taste
- A squeeze of lemon juice
Optional additions: fried onions (birista), chopped mint, and coriander leaves.
Let the chicken marinate for at least 1 hour (overnight in the fridge is even better for deeper flavor).
Step 3: Cook the Marinated Chicken
Heat oil or ghee in a heavy-bottomed pot or Dutch oven. Add the marinated chicken and cook over medium-high heat until the chicken is browned on the outside and about 80% cooked through. You don’t need to fully cook it at this stage, as it will finish cooking during the “dum” process.
Important tip: Avoid overcooking the yogurt mixture—it should reduce and coat the chicken but not become dry.
Step 4: Layering the Biryani
Now comes the most crucial and satisfying part: layering.
- Bottom Layer – Add a small amount of ghee to the pot, then spread a layer of the partially cooked chicken (with its juices).
- Middle Layer – Add half of the cooked rice on top of the chicken.
- Garnish – Sprinkle a mix of fried onions, chopped mint, coriander, saffron milk (a pinch of saffron soaked in ¼ cup warm milk), and a spoonful of ghee.
- Repeat – Add another layer of chicken and finish with the remaining rice and garnishes.
Use the back of a spoon to gently press down the layers—don’t mix!
Step 5: Dum Cooking (Sealing and Steaming)
This final step brings everything together in aromatic harmony.
- Cover the pot with a tight-fitting lid. You can seal the edges with dough or place a heavy object (like a cast iron pan) on top to trap the steam.
- Cook over low heat for 20–25 minutes. If you’re worried about burning the bottom, place the biryani pot on a flat griddle (tava) over the stove for even, gentle heat.
- After cooking, let it rest (covered) for another 10 minutes before serving. This allows the flavors to settle and the rice to fluff up.
Tips and Tricks for Pro-Level Biryani
Once you’ve mastered the basic method of making chicken biryani, it’s time to elevate your game. These tips and tricks—gathered from seasoned home cooks and professional chefs—will help you achieve restaurant-quality biryani every time. From rice texture to spice balance, every detail matters when you’re aiming for perfection.
1. Use Aged Basmati Rice for the Best Aroma and Texture
Fresh rice can be too starchy or soft. Aged basmati rice (preferably 1 to 2 years old) has lower moisture content, cooks more evenly, and holds its shape better. This results in that classic biryani hallmark: long, fluffy, non-sticky grains that don’t clump together.
Pro tip: Look for labels that mention “extra long grain” or “aged basmati” when shopping.
2. Marinate Chicken with Acid and Dairy
Yogurt is key to tenderizing the chicken while also infusing it with rich flavor. Adding a splash of lemon juice or vinegar enhances the marinade’s acidity, which helps break down protein for a melt-in-your-mouth bite.
Pro tip: For extra flavor, mix in a bit of ground green chili or a spoonful of biryani masala into the marinade.
3. Master the “Dum” Technique
Dum cooking (slow-steaming in a sealed pot) is what separates good biryani from great biryani. It allows the spices and juices from the chicken to steam into the rice, infusing it with deep flavor.
- Seal the pot using roti dough or aluminum foil to lock in steam.
- Use a heavy-bottomed pot to avoid burning.
- Heat control is crucial: high heat for 5 minutes to generate steam, then low heat for 20–25 minutes.
Pro tip: Place a tawa (flat griddle) under the biryani pot to distribute heat evenly and prevent scorching.
4. Don’t Overload on Spices
Biryani is about balance, not heat. Avoid adding too many ground spices, which can make the dish muddy. Instead, rely on whole spices for fragrance and use powdered spices with a light hand.
Pro tip: Toast whole spices in ghee before adding them to the rice for extra aroma.
5. Elevate Garnishes for Texture and Aroma
Little details like fried onions (birista), saffron milk, ghee, and chopped herbs can dramatically enhance the flavor and presentation of your biryani.
- Fried onions add sweetness and crunch.
- Saffron milk gives color and a luxurious aroma.
- Mint and coriander add brightness that balances the richness of the dish.
Pro tip: Soak saffron in warm milk or rose water for 10–15 minutes before drizzling.
6. Rest Before Serving
After dum cooking, give the biryani 10 minutes to rest with the lid on. This lets the flavors settle and the rice to fully absorb the moisture, making each spoonful more cohesive and delicious.
Pro tip: Never stir biryani aggressively. Use a wide spatula to gently scoop from the bottom to preserve the layers.
Serving, Pairings, and Storing Leftovers
Once your chicken biryani is perfectly cooked and layered, the next step is just as important—how to serve it, what to serve it with, and how to store any leftovers without losing flavor. A good biryani deserves a thoughtful presentation and accompaniments that complement its rich, aromatic profile. Here’s how to do it right:
Serving Chicken Biryani Like a Pro
Presentation plays a big role in enhancing the biryani experience. Traditionally, biryani is served straight from the pot (known as a handi), allowing guests to enjoy its beautiful layers and aroma as the lid is lifted. You can also plate it individually with careful scooping to maintain the rice and chicken layers.
Tips for serving:
- Use a wide spatula to gently lift from the bottom up, so each plate gets both rice and chicken.
- Garnish each serving with a sprinkle of freshly chopped cilantro and mint, extra fried onions, and a drizzle of saffron milk or ghee for extra visual and flavor appeal.
- Serve biryani hot—directly after resting for 10–15 minutes post-dum—for best taste and texture.
Best Pairings with Chicken Biryani
A complete biryani meal is often about the sides that cut through or complement its richness. Here are classic and delicious pairings to round out your biryani feast:
1. Raita
A cooling yogurt-based side dish, raita balances the spice and brings creaminess. Try:
- Cucumber raita with cumin and mint
- Onion-tomato raita with a pinch of black salt
- Boondi raita for crunch and tang
2. Salad
Fresh, crisp salads help cleanse the palate between bites. Go for:
- Sliced onion rings with lemon juice and chili powder
- Kachumber salad (cucumber, tomato, onion, green chili)
- Mixed greens with a light vinaigrette
3. Hard-Boiled Eggs
A boiled egg on top is a beloved tradition in many regional biryanis, adding a creamy richness and visual pop. Serve halved eggs lightly dusted with biryani masala or black pepper.
4. Pickles and Chutneys
A spoonful of Indian mango pickle or green chutney offers tang and heat that contrasts beautifully with biryani’s mellow depth.
Optional drink pairing: A glass of sweet or salty lassi, or a refreshing glass of chilled mint lemonade (nimbu pudina sharbat).
Storing and Reheating Leftover Biryani
If you’re lucky enough to have leftovers, know that biryani often tastes even better the next day, as the flavors continue to deepen. Here’s how to store and reheat it properly:
Storing:
- Cool completely before refrigerating. Place it in an airtight container to prevent drying out.
- Store in the fridge for up to 3 days or freeze in portions for up to 2 months.
- For freezing, divide into single-serving containers to make future reheating simple.
Reheating:
- Stovetop method: Add a splash of water or milk to a pan, cover with a lid, and gently reheat on low until steaming hot.
- Microwave method: Add a bit of moisture, cover loosely with a lid or microwave-safe wrap, and heat in 1-minute intervals.
- Avoid stirring too much to maintain the layered texture.
Pro tip: Reheat only the portion you plan to eat to maintain the best flavor and texture with every serving.


[…] Add minced garlic and halved potatoes. Sauté for 2 minutes until fragrant.Deglaze the Pot: Pour in chicken broth, scraping the bottom to release browned bits.Pressure Cook: Return chicken to the pot, […]