The Best Fluffy Pancakes recipe you will fall in love with. Full of tips and tricks to help you make the best pancakes.
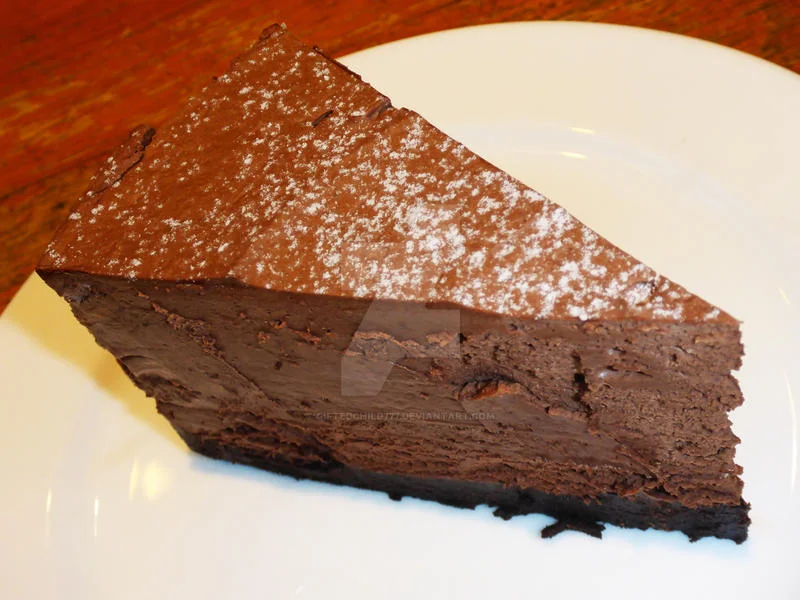
There is nothing more indulgent than a Chocolate Mousse Cake, a dessert that combines the richness of chocolate cake with the light, airy texture of chocolate mousse. With its silky layers and deep cocoa flavor, this cake is a true delight for chocolate lovers.
Whether you prefer a baked or no-bake version, a perfect chocolate mousse cake should have the right balance of creamy, fluffy, and decadent textures. The secret lies in using high-quality dark chocolate, whipped cream, and a delicate mousse that melts in your mouth.
In this guide, you will learn how to make the perfect chocolate mousse cake every time, from selecting the best ingredients to achieving a flawless, restaurant-quality finish.
What Makes a Chocolate Mousse Cake Perfect?
Creating the perfect Chocolate Mousse Cake requires more than just mixing ingredients. The key to success lies in achieving the right balance of flavors, textures, and techniques. Here’s what makes a chocolate mousse cake truly exceptional.
The Balance of Flavors
A great chocolate mousse cake delivers a deep, rich chocolate flavor without being overly sweet or heavy. The key is to use high-quality dark chocolate with at least 60–70% cocoa. The slight bitterness of dark chocolate balances the sweetness of the mousse and enhances the complexity of the cake.
To elevate the flavor, some bakers add:
- A pinch of sea salt to intensify the chocolate taste
- A splash of espresso or coffee extract to deepen the cocoa notes
- A touch of vanilla or liqueur (such as Grand Marnier or Baileys) for extra depth
The Right Texture
A perfect chocolate mousse cake should be light yet rich, creamy yet structured. The goal is to achieve a mousse that is airy and smooth while still holding its shape. This requires:
- Properly whipped egg whites or cream to create a light, fluffy texture
- Gelatin or melted chocolate to stabilize the mousse without making it too dense
- Chilling time to allow the mousse to set properly before slicing
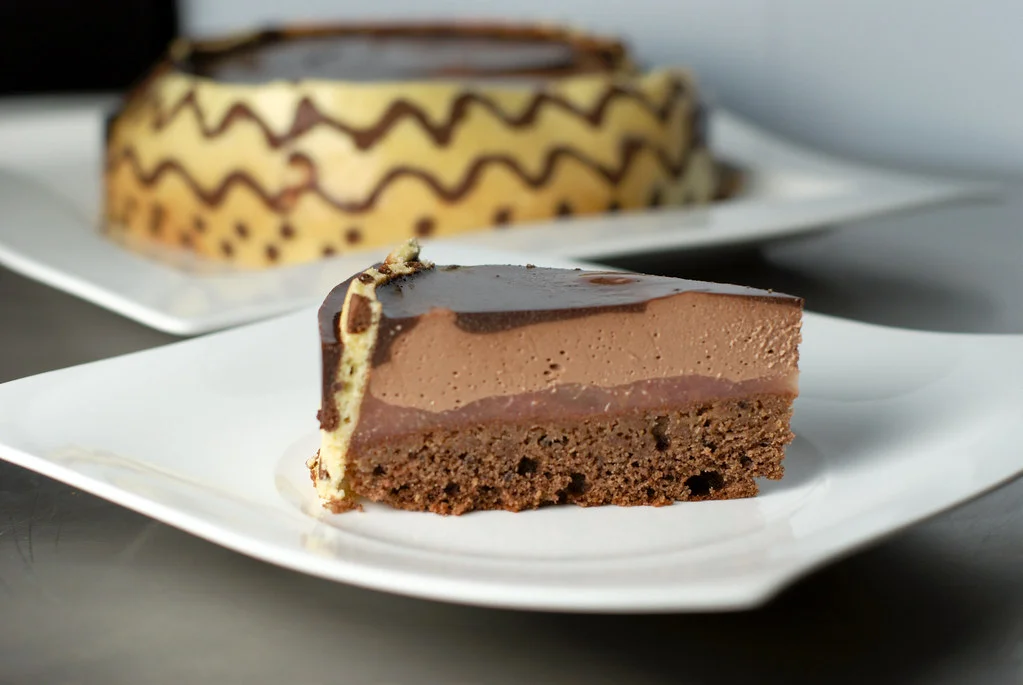
Each layer of the cake should contribute to a harmonious texture—whether it’s a soft sponge cake base, a crunchy biscuit crust, or a flourless chocolate layer.
Baking vs. No-Bake Versions
There are two main types of chocolate mousse cakes: baked and no-bake. Each has its unique appeal:
- Baked Chocolate Mousse Cake – This version often includes a flourless chocolate cake or sponge cake base, which adds structure and a deep, fudgy texture. Some recipes involve baking the mousse itself to create a soufflé-like consistency.
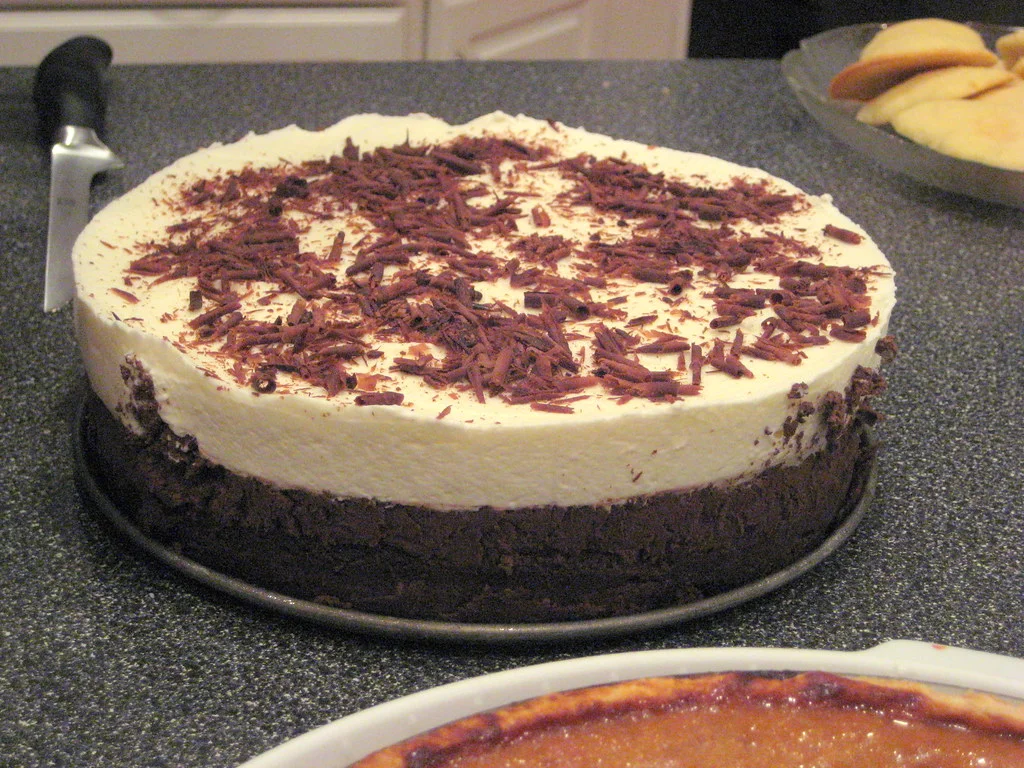
- No-Bake Chocolate Mousse Cake – This variation relies solely on chilling to set the mousse, resulting in an ultra-light and creamy texture. It’s often layered over a cookie or biscuit crust and topped with a silky chocolate ganache.
Both versions can be equally delicious, and the choice depends on personal preference and occasion. If you want something light and creamy, go for a no-bake mousse cake. If you prefer a denser, more intense chocolate experience, a baked version might be your best bet.
Mastering these elements will ensure that your Chocolate Mousse Cake turns out perfectly every time, with the right balance of flavors, textures, and techniques.
Ingredients for the Best Chocolate Mousse Cake
A truly decadent chocolate mousse cake starts with the right ingredients. Every component plays a crucial role in achieving the perfect flavor, texture, and structure. Using high-quality ingredients will elevate your cake from ordinary to extraordinary. Here’s everything you need to make the ultimate chocolate mousse cake.

Essential Ingredients
To create a perfectly balanced chocolate mousse cake, you will need the following key ingredients:
- To create a perfectly balanced chocolate mousse cake, you will need the following key ingredients:
- Dark Chocolate – 200g (7 oz), high-quality with at least 60–70% cocoa for a deep, intense chocolate flavor.
- Heavy Cream (or Whipping Cream) – 480ml (2 cups), divided for the mousse and whipped topping.
- Eggs (Whites & Yolks) – 3 large eggs, separated. Yolks add richness, while whipped whites provide structure and airiness.
- Granulated Sugar – 100g (½ cup), to sweeten the mousse.
- Unsalted Butter – 60g (4 tbsp), melted for a silky-smooth texture.
- Gelatin (Optional but Recommended) – 1 ½ tsp (or 5g), bloomed in 2 tbsp cold water to help stabilize the mousse.
- Vanilla Extract – 1 tsp, to enhance the overall flavor and balance the bitterness of dark chocolate. balances the bitterness of dark chocolate.
Optional Additions for Extra Flavor
For those who want to elevate their chocolate mousse cake with deeper flavors, consider adding:
- Espresso or Coffee Extract – 1 tsp of strong brewed espresso or ½ tsp instant coffee dissolved in 1 tbsp hot water. Enhances the chocolate flavor.
- Liqueurs (Grand Marnier, Baileys, Kahlúa, or Amaretto) – 1 tbsp for a sophisticated touch.
- Sea Salt – A small pinch (⅛ tsp) to balance the sweetness and enhance the depth of chocolate.
Choosing the Best Chocolate
The quality of chocolate makes or breaks a chocolate mousse cake. Here’s how to choose the best one:
- Couverture Chocolate – 200g (7 oz), the best option for a professional-quality mousse cake due to its high cocoa butter content.
- Chocolate Bars vs. Chocolate Chips – Always use chocolate bars rather than chocolate chips. Chocolate chips contain stabilizers that prevent them from melting smoothly.
- Bittersweet vs. Semi-Sweet Chocolate – Bittersweet chocolate (70% cocoa and above) gives a more intense chocolate flavor, while semi-sweet (50–60% cocoa) provides a slightly sweeter taste. Choose based on your preference.
Step-by-Step Guide: How to Make Chocolate Mousse Cake
Creating a chocolate mousse cake requires precision, patience, and the right technique to achieve the perfect balance of richness and lightness. Follow this step-by-step guide to make a flawless chocolate mousse cake every time.
Step 1: Prepare the Cake Base
The base of a chocolate mousse cake can vary depending on your preference. You can use a chocolate sponge cake, a flourless chocolate cake, or a cookie crust for a no-bake version.
Option 1: Chocolate Sponge Cake
- Preheat your oven to 170°C (340°F). Grease and line a springform pan with parchment paper.
- In a mixing bowl, whisk together eggs and sugar until light and fluffy.
- Melt dark chocolate and butter together until smooth, then let it cool slightly.
- Fold the melted chocolate into the egg mixture, then gently sift in flour and cocoa powder.
- Pour the batter into the prepared pan and bake for 15–20 minutes, or until a toothpick inserted comes out clean.
- Let the cake cool completely before adding the mousse layer.
Option 2: No-Bake Cookie Crust
- Crush chocolate cookies or graham crackers into fine crumbs.
- Mix with melted butter and press firmly into the base of a springform pan.
- Chill in the refrigerator for 30 minutes while preparing the mousse.
Step 2: Make the Chocolate Mousse
A light and airy chocolate mousse is the heart of this cake. Proper technique is key to getting a smooth and stable texture.
- Melt the Chocolate – Chop high-quality dark chocolate and melt it gently using a double boiler or microwave in 30-second intervals, stirring until smooth. Let it cool slightly.
- Whip the Cream – In a separate bowl, whip heavy cream until soft peaks form. Do not overwhip, as it should still be foldable.
- Prepare the Eggs – Separate the egg yolks and whites. Beat the egg yolks with a small amount of sugar, then mix them into the melted chocolate for a rich, creamy texture.
- Whip the Egg Whites – In another clean bowl, whip the egg whites with sugar until stiff peaks form. This adds lightness to the mousse.
- Fold Everything Together – Gently fold the whipped egg whites into the melted chocolate, followed by the whipped cream. Use a spatula and fold carefully to keep the mixture airy.
Step 3: Assemble the Cake
- Layer the Mousse Over the Cake Base – If using a sponge cake, place it in a springform pan and pour the mousse over the top, spreading it evenly. If using a cookie crust, simply pour the mousse over the chilled crust.
- Smooth the Surface – Use a spatula to even out the top for a clean finish.
- Chill the Cake – Refrigerate for at least 4 hours or, for best results, overnight. This allows the mousse to set and develop its flavors.
Step 4: Add the Chocolate Ganache Topping (Optional)
A glossy chocolate ganache can add an extra layer of indulgence.
- Heat Heavy Cream – Warm ½ cup of heavy cream until just simmering.
- Add Chocolate – Pour the hot cream over ½ cup of chopped dark chocolate and let it sit for a minute. Stir until smooth.
- Pour Over the Cake – Once the cake is fully set, pour the ganache over the top and spread it evenly.
Step 5: Garnish and Serve
- Remove the cake from the springform pan carefully.
- Garnish with cocoa powder, chocolate shavings, or fresh berries for an elegant finish.
- Slice with a hot knife for clean cuts and serve chilled.
By following these steps, you’ll achieve a perfectly balanced chocolate mousse cake with a smooth, airy texture and a rich chocolate flavor.
Common Mistakes to Avoid When Making Chocolate Mousse Cake
Even experienced bakers can run into issues when making chocolate mousse cake. Since this dessert relies on precise techniques to achieve a light, airy mousse and a stable structure, certain mistakes can lead to a cake that is too dense, grainy, or fails to set properly. Here are the most common mistakes and how to avoid them.
1. Using Low-Quality Chocolate
Chocolate is the main ingredient in a chocolate mousse cake, so using the wrong type can significantly affect the flavor and texture.
Mistake: Using cheap or low-quality chocolate with excessive sugar and fillers can result in a mousse that lacks depth and richness.
Solution: Choose high-quality dark chocolate with at least 60-70% cocoa. Avoid chocolate chips, as they contain stabilizers that prevent smooth melting. Opt for couverture chocolate for the best results.
2. Overheating or Burning the Chocolate
Melting chocolate incorrectly can lead to grainy texture or seized chocolate, which makes it difficult to incorporate into the mousse.
Mistake: Applying direct heat or overheating the chocolate can cause it to seize (turn thick and clumpy) or burn, ruining its smooth consistency.
Solution: Always melt chocolate using a double boiler (bain-marie) or in the microwave in short 30-second intervals, stirring in between. If the chocolate becomes too thick, add a small amount of warm cream to loosen it.
For an even smoother mousse, it’s important to temper your chocolate properly. Reference this detailed guide on how to temper chocolate to ensure a glossy, well-emulsified texture in your mousse.
3. Over- or Under-Whipping the Cream
The whipped cream is what gives the mousse its light and airy texture, so it’s important to get it just right.
Mistake: Under-whipping leads to a runny mousse that won’t hold its shape, while over-whipping can result in a dense and grainy consistency.
Solution: Whip cold heavy cream until soft peaks form. The cream should be thick but still foldable. If you accidentally overwhip, add a small amount of fresh cream and gently fold it in to restore smoothness.
4. Mixing Ingredients Too Quickly or Aggressively
Proper mixing techniques are crucial for maintaining the mousse’s light and airy texture.
Mistake: Stirring the chocolate into the eggs too quickly or folding the whipped cream too aggressively can deflate the mousse, making it dense instead of fluffy.
Solution: When adding melted chocolate to egg yolks or whipped egg whites, temper the mixture by adding a small amount first and stirring gently before incorporating the rest. When folding in whipped cream, use a gentle folding motion with a spatula to avoid deflating the mixture.
5. Not Allowing Enough Time for the Mousse to Set
Rushing the setting process can result in a mousse that doesn’t hold its shape when sliced.
Mistake: Cutting into the cake too soon before it has fully set will cause the mousse to collapse.
Solution: Refrigerate the cake for at least 4 hours, but preferably overnight, to allow the mousse to firm up properly. This also enhances the flavor and texture.
6. Skipping Gelatin (If Needed for Stability)
Gelatin is sometimes used to help stabilize the mousse, ensuring that it holds its shape once set.
Mistake: If your mousse tends to be too soft or runny, skipping gelatin could result in a mousse that doesn’t hold up when slicing.
Solution: If your recipe calls for gelatin, bloom it in cold water before dissolving it in warm liquid (such as melted chocolate or warm cream). Then, mix it in gently to stabilize the mousse.
7. Removing the Cake from the Mold Too Early
Chocolate mousse cakes are delicate, and unmolding them too soon or incorrectly can ruin their presentation.
Mistake: Trying to remove the cake from the mold while it’s still soft can cause cracks, uneven edges, or a collapsed structure.
Solution: Use a springform pan lined with parchment paper. Before unmolding, run a warm knife along the edges to help release the cake smoothly.
8. Not Using the Right Knife for Slicing
Even if your mousse is perfectly set, using the wrong knife can result in messy slices.
Mistake: A dull or cold knife can drag through the mousse, ruining the clean layers.
Solution: Use a sharp knife dipped in hot water and wipe it clean between slices for professional-looking cuts.
Conclusion
Chocolate Mousse Cake is the ultimate indulgence—rich, creamy, and perfect for special occasions. Whether you’re making it for a celebration or simply treating yourself, following the right steps ensures a flawless dessert every time.
However, if you’re short on time or craving a quick chocolate fix, you don’t have to wait hours to satisfy your sweet tooth. Try this quick 5 minute chocolate mug cake for a delicious, hassle-free alternative. It’s an easy, microwaveable treat that delivers instant chocolate satisfaction!


