The Best Fluffy Pancakes recipe you will fall in love with. Full of tips and tricks to help you make the best pancakes.
Nothing says springtime elegance quite like a Cherry Blossom Cake—a delicate and flavorful dessert inspired by the beauty of Sakura (Japanese cherry blossoms). This cake combines a light and fluffy vanilla sponge with subtle hints of cherry extract, creating a perfectly balanced sweetness that melts in your mouth.
Not only does it taste amazing, but its stunning floral design makes it a showstopper for any occasion. Whether you’re celebrating a special event or simply want to bring the charm of cherry blossoms into your kitchen, this cake is the perfect choice. In this guide, you’ll learn step-by-step how to bake, frost, and decorate your own Cherry Blossom Cake at home, using simple ingredients and easy techniques. Let’s get started!
Ingredients You’ll Need for a Cherry Blossom Cake
Before you start baking, it’s essential to have all your ingredients ready. This Cherry Blossom Cake combines a light, fluffy vanilla sponge with cherry extract for a subtle floral-fruity flavor. The frosting and decorations will bring the beautiful Sakura-inspired look to life. Below, we break down the key ingredients into three categories: the cake base, the frosting, and the decorations.
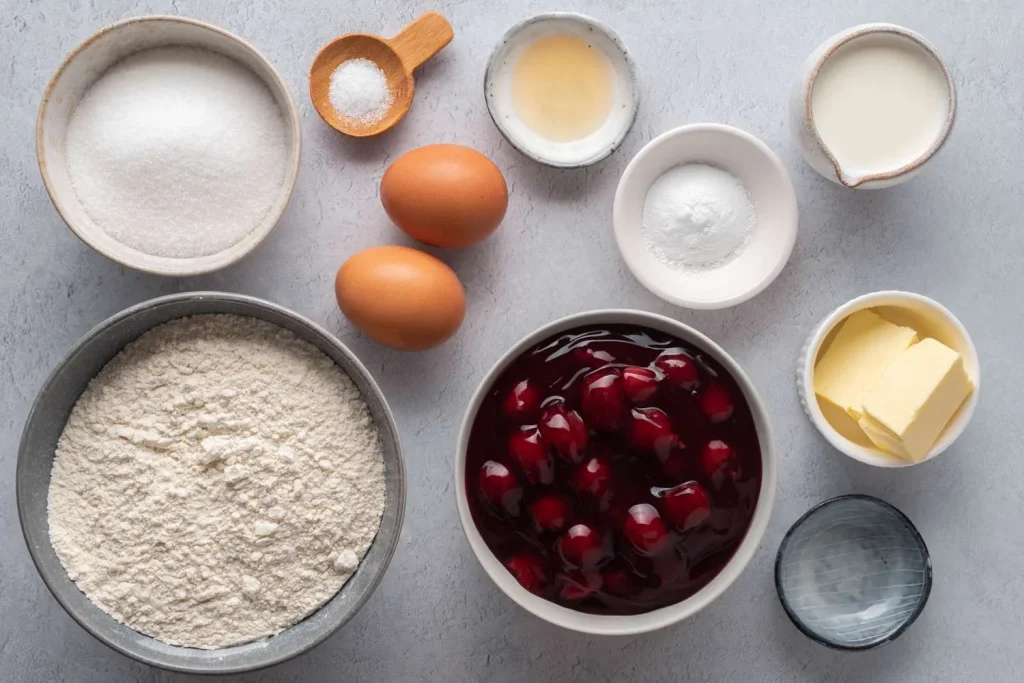
1. Ingredients for the Cake
A moist and airy sponge cake is the foundation of this dessert. Using the right ingredients ensures the perfect texture and flavor.
- Cake flour (2 ½ cups) – Provides a softer, more delicate crumb compared to all-purpose flour.
- Baking powder (2 tsp) – Helps the cake rise and stay light and fluffy.
- Granulated sugar (1 ½ cups) – Sweetens the cake and contributes to a tender texture.
- Unsalted butter (¾ cup, softened) – Adds richness and moisture to the cake.
- Eggs (4 large eggs) – Provide structure and help create a tender crumb.
- Vanilla extract (2 tsp) – Enhances the overall flavor with a sweet and aromatic touch.
- Cherry extract (1 tsp, optional) – Adds a subtle cherry flavor that complements the theme.
- Whole milk (1 cup, room temperature) – Ensures a smooth and even batter consistency.
- Pink food coloring (a few drops, optional) – Gives the cake a soft pink hue, reminiscent of cherry blossoms.
2. Ingredients for the Buttercream Frosting
A silky, smooth buttercream frosting ties the cake together and serves as the base for decorating.
- Unsalted butter (1 cup, softened) – The key to a creamy and rich frosting.
- Powdered sugar (4 cups, sifted) – Sweetens and thickens the buttercream.
- Heavy cream (2-3 tbsp) – Helps achieve the perfect frosting consistency.
- Vanilla extract (1 tsp) – Balances the sweetness with a mild, fragrant taste.
- Pink food coloring (a few drops, optional) – Creates a soft cherry blossom shade for the frosting.
3. Ingredients for Decoration
The final touch is all about making the cake visually stunning. These decorative elements help bring the cherry blossom theme to life.
- Fondant cherry blossoms – Pre-made or handcrafted from fondant to decorate the cake beautifully.
- Piping bags with floral tips – Essential for creating buttercream cherry blossom designs.
- Edible pearls or sprinkles – Adds an elegant finishing touch.
- Gold or pearl dust (optional) – Enhances the cake with a soft shimmer.
By gathering all these ingredients ahead of time, you’ll be fully prepared to create a stunning and delicious Cherry Blossom Cake. Now, let’s move on to the baking process!
Step-by-Step Guide to Baking the Perfect Cherry Blossom Cake
Now that you have gathered all your ingredients, it’s time to bring your Cherry Blossom Cake to life! This step-by-step guide will walk you through the baking process, ensuring your cake turns out light, fluffy, and full of delicate cherry-vanilla flavor. Follow these instructions carefully for the best results.
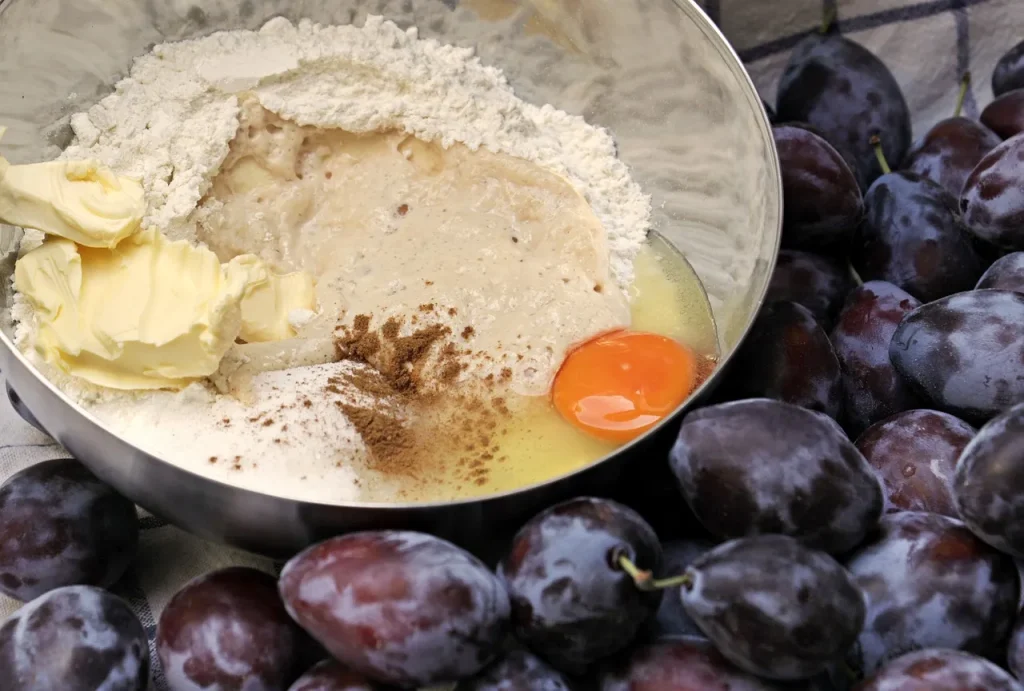
Step 1: Preparing the Cake Batter
A well-mixed batter is key to achieving a soft and airy texture. Here’s how to do it:
- Preheat your oven to 350°F (175°C). Grease and line two 8-inch round cake pans with parchment paper to prevent sticking.
- In a medium bowl, whisk together dry ingredients:
- Cake flour (2 ½ cups)
- Baking powder (2 tsp)
- A pinch of salt
This ensures the leavening agents are evenly distributed.
- In a separate large bowl, cream the butter and sugar:
- Using a hand or stand mixer, beat ¾ cup unsalted butter and 1 ½ cups granulated sugar until light and fluffy (about 3-5 minutes).
- Add the eggs one at a time, mixing well after each addition. This helps create a smooth, stable batter.
- Incorporate flavors by adding 2 tsp vanilla extract and 1 tsp cherry extract for a subtle floral-fruity taste.
- Alternate adding dry ingredients and milk:
- Start by adding ⅓ of the dry ingredients to the butter mixture and mix on low speed.
- Pour in ½ cup of whole milk, mix again.
- Repeat until all the flour and milk are incorporated.
- If you want a soft pink hue, mix in a few drops of pink food coloring until you reach your desired shade.
Step 2: Baking the Cake Layers
Proper baking technique ensures an even rise and a moist texture.
- Divide the batter evenly between the two prepared cake pans. Use a spatula to smooth out the tops.
- Tap the pans gently on the counter to remove air bubbles.
- Bake for 25-30 minutes, or until a toothpick inserted into the center comes out clean.
- Cooling process:
- Let the cakes cool in the pans for about 10 minutes before transferring them to a wire rack.
- Allow them to cool completely before frosting to prevent melting.
For a perfectly baked Cherry Blossom Cake, using a reliable and efficient oven is essential. This smart double oven features advanced convection technology, a built-in thermometer, and a sealing system to retain moisture, ensuring even baking and precise temperature control. Whether you are preparing delicate cake layers or other baked goods, this versatile countertop oven delivers consistent results.
Check it out here: Smart Double Oven on Amazon
Once the cake batter is evenly distributed in the pans, place them in the oven and bake for the recommended time. Avoid opening the oven door frequently to maintain consistent heat and ensure the cake layers rise evenly.
Step 3: Leveling and Layering the Cake
A well-assembled cake creates a professional and polished appearance.
- Trim the tops of each cake layer with a serrated knife to make them even.
- Apply a thin layer of buttercream frosting between the layers to act as “glue.”
- Stack the cake layers gently, ensuring they align perfectly.
Step 4: Applying the Base Frosting
The buttercream base serves as a smooth canvas for your Cherry Blossom Cake design.
- Crumb Coat – Apply a very thin layer of frosting to trap loose crumbs. Chill the cake for 15-20 minutes in the refrigerator.
- Final Coat – Using an offset spatula, spread a generous, even layer of soft pink buttercream frosting over the cake.
- Smooth the surface – Use a bench scraper to create a clean, polished look.
Decorating Your Cake with Cherry Blossom Designs
Now that your cake is baked, layered, and frosted, it’s time to bring it to life with stunning cherry blossom decorations! The goal is to create a cake that not only tastes amazing but also looks like a piece of edible art. This section will guide you through different decoration techniques, from buttercream piping to fondant cherry blossoms, so you can achieve a gorgeous, sakura-inspired cake that’s perfect for any special occasion.
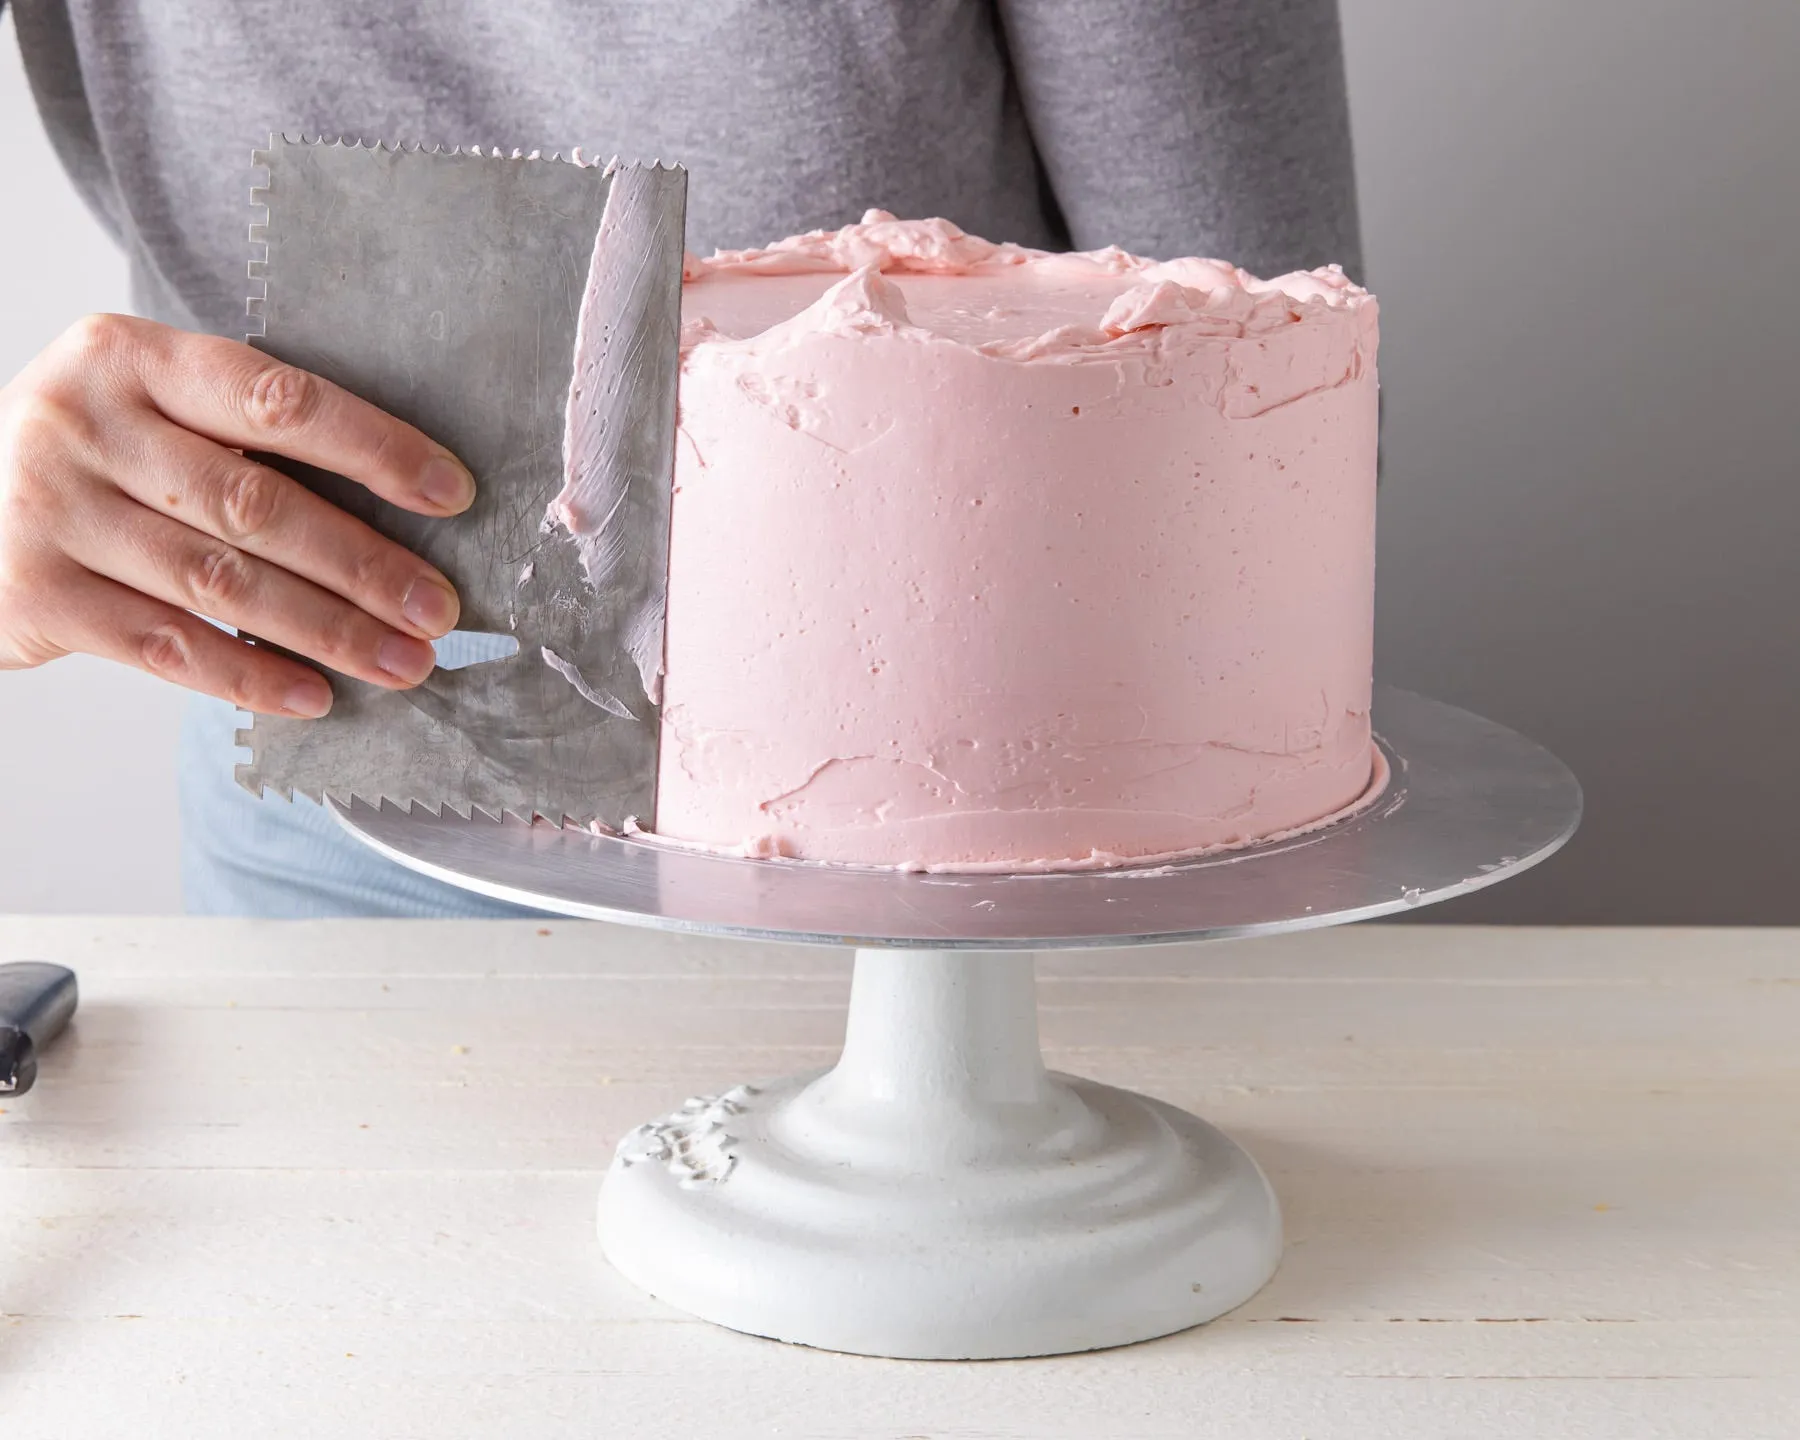
Step 1: Creating a Smooth Pink Frosting Base
Before adding decorations, it’s important to ensure your cake has a flawless buttercream finish.
- Apply the Final Frosting Layer – Using a spatula or bench scraper, spread a smooth and even layer of pink buttercream over the entire cake.
- Chill the Cake – Refrigerate for 15–20 minutes to firm up the frosting and make decorating easier.
- Optional Ombre Effect – For an elegant look, blend darker pink at the base and gradually lighten the shade as you move upwards.
Step 2: Piping Buttercream Cherry Blossoms
If you love the look of handcrafted floral designs, piping buttercream cherry blossoms is a great way to add detail to your cake.
Tools Needed:
- Piping bags
- Petal piping tip (Wilton 104 or 125) for cherry blossom petals
- Round piping tip (Wilton 3 or 5) for stamens and branch details
How to Pipe Cherry Blossoms:
- Prepare the Buttercream Colors – Use a mix of light pink and white buttercream for realistic blossoms. You can also add a tiny bit of brown or black buttercream for branches.
- Pipe the Blossoms:
- Hold the piping bag at a 45-degree angle and gently squeeze out five petals to form a flower.
- Use a small round tip to add a yellow or white dot in the center of each blossom.
- Pipe tiny branches using brown buttercream to mimic cherry tree branches.
- Cluster the Flowers: Scatter blossoms across the cake, focusing on one side or the top for a natural flow.
Step 3: Adding Fondant Cherry Blossoms for an Elegant Touch
If you prefer 3D edible decorations, fondant cherry blossoms create a delicate and lifelike effect.
How to Make Fondant Cherry Blossoms:
- Roll Out Pink Fondant – Use a rolling pin to flatten soft pink fondant to about ⅛-inch thick.
- Cut Out Flowers – Use a cherry blossom cookie cutter or a small flower cutter to create the shapes.
- Shape the Blossoms:
- Use a ball tool to slightly curl the edges for a natural look.
- Let them dry for 15–30 minutes to hold their shape.
- Attach to the Cake:
- Lightly brush the back of each fondant blossom with a tiny bit of water or edible glue.
- Arrange them in a cascading pattern down the side of the cake or around the edges.
Step 4: Final Touches for a Stunning Look
To make your Cherry Blossom Cake truly eye-catching, finish with these elegant final details:
- Edible Pearls or Sprinkles: Scatter white or gold pearls in the center of the blossoms for added dimension.
- Gold or Pearl Dust: Lightly dust gold shimmer powder over the blossoms to create a subtle glow.
- Cherry Blossom Branch Effect: Use a thin paintbrush dipped in edible brown food coloring to create realistic-looking branches.
- Delicate Sugar Flowers: If you have extra time, use gum paste flowers for a more intricate design.
Final Look & Presentation
Once your cherry blossoms are perfectly placed, step back and admire your work! Your Cherry Blossom Cake should now be a stunning floral masterpiece, perfect for spring gatherings, birthdays, or Japanese-inspired celebrations.
Serving and Storing Your Cherry Blossom Cake
After all the effort you’ve put into baking and decorating your Cherry Blossom Cake, it’s time to serve and enjoy it! Whether you’re celebrating a special occasion or simply indulging in a homemade treat, proper serving techniques ensure you get clean, beautiful slices, while the right storage methods keep your cake fresh and delicious for as long as possible.
Step 1: How to Serve Your Cherry Blossom Cake
1. The Perfect Slicing Technique
To maintain the cake’s delicate structure and preserve the beauty of your decorations, follow these tips for slicing:
- Use a sharp, serrated knife – This prevents the cake from squishing and helps you cut clean slices.
- Wipe the knife between cuts – A damp cloth or warm knife removes excess frosting, giving neater slices.
- Cut slowly and evenly – Avoid pressing too hard to keep the layers intact.
2. Best Ways to Present Your Cake
A stunning cake deserves an equally beautiful presentation. Here’s how to make it look even more special:
- Serve on a cake stand – Elevating the cake makes it the centerpiece of any table.
- Garnish with extra cherry blossoms – Scatter a few edible flowers or fresh cherries around the plate for a spring-inspired touch.
- Pair with complementary drinks – Serve with green tea, jasmine tea, or a light rosé wine to enhance the cherry blossom theme.
3. When to Serve for the Best Flavor
For the best taste and texture, serve the cake:
- At room temperature – Cold buttercream can be too firm, so let the cake sit out for 30–45 minutes before serving.
- Freshly made or within 24 hours – This is when the flavors and texture are at their peak.
Step 2: How to Store Your Cherry Blossom Cake
If you have leftovers or want to prepare your cake in advance, proper storage will keep it fresh and delicious for days.
1. Storing at Room Temperature (Short-Term Storage)
If you plan to eat the cake within 24 hours, it can be stored at room temperature.
- Keep it in a cake dome or airtight container – This prevents it from drying out.
- Avoid direct sunlight or heat sources – This can cause buttercream decorations to melt.
2. Refrigerating the Cake (For 3–5 Days)
If storing for a few days, refrigeration is best:
- Cover the cake loosely with plastic wrap – This prevents it from absorbing fridge odors.
- Place in an airtight container or cake carrier – This helps retain moisture and freshness.
- Before serving, bring it to room temperature – Let the cake sit out for 30–60 minutes for the best texture.
3. Freezing the Cake (For Long-Term Storage – Up to 3 Months)
For long-term storage, freezing is a great option:
- Freeze individual slices – Wrap slices in plastic wrap, then in aluminum foil, and store in a ziplock bag.
- Freeze whole cakes (undecorated) – Wrap the layers separately and frost them after thawing for the freshest taste.
- To thaw, transfer to the fridge overnight – Then let sit at room temperature before serving
Final Tips for Serving & Storing
- For maximum freshness, consume within 3 days if refrigerated and within 3 months if frozen.
- Use a cake box for transportation if bringing the cake to an event.
- Refresh refrigerated cake by adding a fresh layer of frosting before serving.
For an extra burst of cherry flavor, serve slices with a spoonful of cherry pie filling on the side. If you love cherry-based desserts, explore more ideas here: From Pies to Bars: The Best Cherry Pie Filling Desserts.
This keeps the link relevant and valuable for your readers. Let me know if you’d like another placement.


I really like your writing style, wonderful information, thankyou for putting up : D.