The Best Fluffy Pancakes recipe you will fall in love with. Full of tips and tricks to help you make the best pancakes.
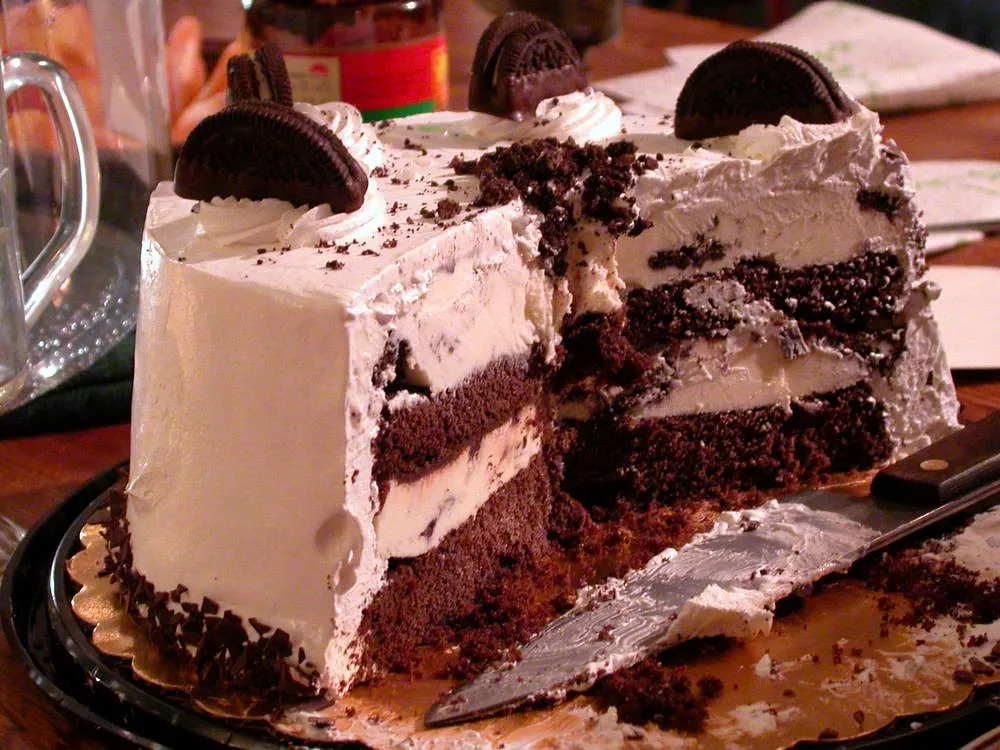
There’s nothing quite like a homemade ice cream cake—it’s the perfect combination of creamy, sweet, and refreshing! Whether you’re celebrating a birthday, hosting a summer party, or simply craving a cool treat, making your own ice cream cake at home is easier than you think. With just a few simple ingredients and a little patience, you can create a dessert that’s just as delicious as (if not better than) store-bought versions.
In this step-by-step guide, we’ll walk you through everything you need to know to make the best homemade ice cream cake. From choosing the perfect flavors to layering and decorating, you’ll learn all the tips and tricks to create a show-stopping dessert. Get ready to impress your family and friends with a homemade ice cream cake that’s completely customizable and absolutely irresistible!
Why Homemade Ice Cream Cake is the Best Choice
When it comes to indulging in a delicious frozen dessert, homemade ice cream cake is the ultimate choice. Not only does it allow you to customize flavors, ingredients, and textures, but it’s also a more cost-effective and healthier alternative to store-bought cakes. Let’s dive into the top reasons why making your own ice cream cake at home is a fantastic idea!
1. Healthier Ingredients
One of the biggest advantages of making your own ice cream cake is that you have complete control over the ingredients. Store-bought ice cream cakes often contain artificial flavors, preservatives, and excess sugar, but when you make it from scratch, you can:
- Use high-quality, natural ingredients like fresh cream, real fruit, and homemade ice cream.
- Reduce added sugars by choosing unsweetened or lightly sweetened options.
- Opt for dairy-free or vegan alternatives, such as almond or coconut milk-based ice cream.
This means you can enjoy a guilt-free dessert that’s tailored to your dietary preferences!
2. Customizable Flavors & Toppings
Why settle for basic flavors when you can create a completely personalized ice cream cake? When making it at home, you can mix and match:
- Ice Cream Flavors – Go classic with chocolate and vanilla, or get creative with flavors like peanut butter, cookies and cream, or salted caramel.
- Crust Options – Choose a graham cracker crust, crushed Oreo base, or a soft sponge cake layer.
- Fillings & Toppings – Add delicious layers of fudge, caramel drizzle, fresh fruit, crushed nuts, or sprinkles for extra texture and taste.
With endless combinations, your homemade ice cream cake can be truly unique and tailored to your taste buds!
3. Budget-Friendly Dessert
Buying a high-quality ice cream cake from a bakery or popular brand like Dairy Queen can be expensive, often costing $30 or more for a small cake. By making your own, you can:
- Save money by using affordable, store-bought ingredients.
- Make a larger cake that serves more people for the same price.
- Avoid unnecessary packaging costs and reduce waste.
Not only do you get more for your money, but you can also enjoy the satisfaction of creating something from scratch!
4. Perfect for Any Occasion
Homemade ice cream cake is a show-stopping dessert that works for any celebration or special event. Whether it’s a birthday, anniversary, family gathering, or summer party, this dessert is guaranteed to impress guests. You can even make mini ice cream cakes for individual servings or prepare different flavors to cater to everyone’s tastes.
Making an ice cream cake at home isn’t just about the end result—it’s also a fun and rewarding experience. From selecting flavors to decorating the final masterpiece, you’ll enjoy every step of the process!
Essential Ingredients and Tools for Ice Cream Cake
Before you start making your homemade ice cream cake, it’s important to gather all the necessary ingredients and tools. Having everything prepared ahead of time will make the process smooth and enjoyable. In this section, we’ll go over the key ingredients for the best flavor and texture, as well as the essential tools that will help you create a perfect ice cream cake.
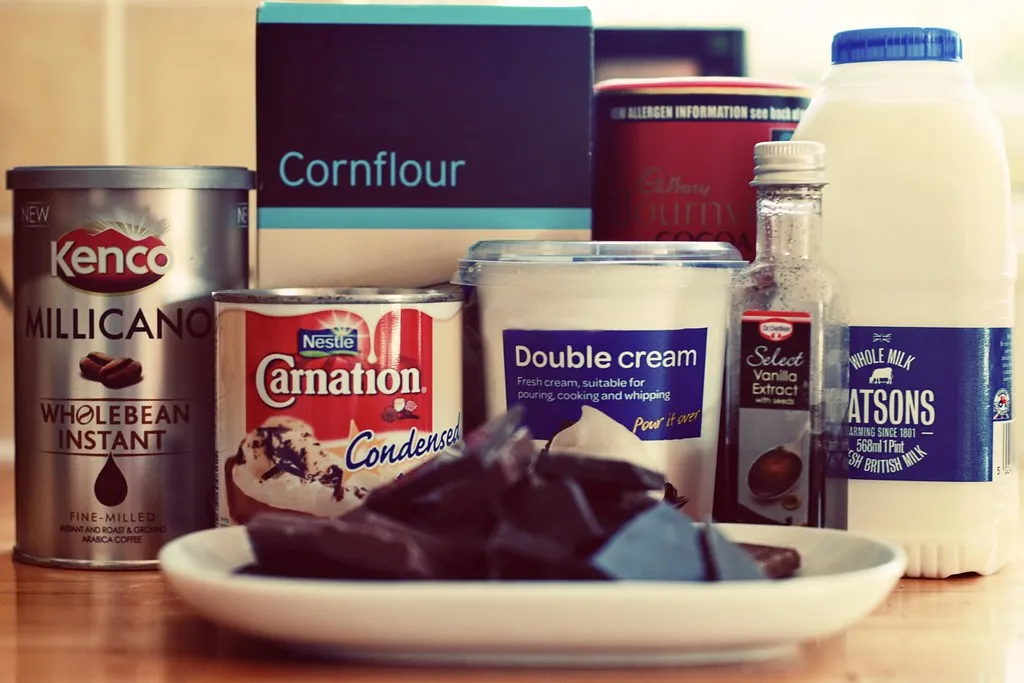
1. Main Ingredients for a Perfect Ice Cream Cake
To make a delicious and creamy ice cream cake, you’ll need a combination of base layers, ice cream, and toppings. Here’s what you should have on hand:
Ice Cream (The Star of the Cake!)
- Choose your favorite ice cream flavors – chocolate, vanilla, cookies & cream, mint chocolate chip, or even fruit-based flavors like strawberry or mango.
- For a fun twist, try layering different ice cream flavors to create a colorful and flavorful cake.
- If you prefer a healthier or vegan option, opt for dairy-free ice cream made from coconut, almond, or oat milk.
Cake or Crust Base
- Graham Cracker Crust – A classic, crunchy base that pairs well with creamy ice cream.
- Oreo or Cookie Crust – Crushed Oreos, digestive biscuits, or vanilla wafers mixed with melted butter to create a rich, chocolatey base.
- Cake Layer – A thin layer of sponge cake, brownies, or pound cake adds a soft and chewy contrast to the frozen layers.
Fillings & Layers
- Chocolate Ganache – A rich, smooth chocolate layer that adds a decadent touch.
- Caramel Drizzle – Sweet and buttery caramel sauce swirled between layers.
- Crushed Cookies or Nuts – Add extra texture with Oreo crumbs, graham cracker pieces, or chopped nuts.
- Fruit Puree or Jam – A fruity layer (like raspberry or strawberry puree) balances out the sweetness.
Frosting & Toppings
- Whipped Cream – Light and fluffy whipped topping for a smooth finish.
- Sprinkles & Chocolate Shavings – Perfect for decorating and adding a fun crunch.
- Chopped Nuts (Almonds, Pecans, Peanuts) – Adds texture and flavor.
- Fudge or Caramel Drizzle – Drizzle on top for an extra indulgent touch.
2. Essential Tools You’ll Need
To make sure your ice cream cake turns out beautifully, you’ll need a few kitchen tools to assemble, freeze, and serve your cake properly.
Springform Pan (or Cake Pan)
- A springform pan is ideal for ice cream cake because it allows for easy removal once the cake is frozen. If you don’t have one, a regular cake pan lined with parchment paper works too.
Mixing Bowls & Spatula
- Mixing bowls are essential for combining ingredients, making crusts, or softening ice cream before layering.
- A rubber spatula helps evenly spread softened ice cream and fillings without making a mess.
Plastic Wrap or Parchment Paper
- Lining your pan with parchment paper or plastic wrap will make it easier to lift the cake out of the pan once it’s frozen.
Offset Spatula or Butter Knife
- Helps smooth out layers of ice cream and toppings for a clean and professional finish.
Sharp Knife & Hot Water
- A sharp knife dipped in hot water makes slicing through the frozen cake much easier and prevents cracking.
3. Optional Tools for Extra Perfection
If you want to take your ice cream cake to the next level, here are a few extra tools that can help:
- Ice Cream Scoop: Makes it easier to layer softened ice cream.
- Piping Bag & Tips: Perfect for decorating with whipped cream or buttercream frosting.
- Cake Turntable: Useful for smoothing out frosting and decorating the cake evenly.
- Food Processor: Quickly crushes cookies, graham crackers, or nuts for your crust.
By having all these ingredients and tools ready, making a homemade ice cream cake becomes a simple and enjoyable process. Now that you’re prepared, let’s move on to assembling your cake step by step!
Step-by-Step Guide to Making the Best Ice Cream Cake
Now that you have all your ingredients and tools ready, it’s time to start assembling your homemade ice cream cake! The process is easier than you think, but it requires some patience to allow the layers to freeze properly. Follow this step-by-step guide to create a beautifully layered and delicious ice cream cake that’s sure to impress!
Step 1: Prepare the Base
The base of your ice cream cake is important because it provides structure and texture. You can choose between a crunchy crust, a soft cake layer, or even a combination of both.
Crust Options:
- Graham Cracker Crust: Crush graham crackers into fine crumbs, mix with melted butter, and press firmly into the bottom of a springform pan.
- Oreo or Cookie Crust: Crush Oreo cookies or any chocolate/vanilla cookies, mix with butter, and spread evenly in the pan.
- Brownie or Cake Layer: Bake a thin layer of brownie or sponge cake and let it cool completely before adding ice cream.
Tip: Place the prepared base in the freezer for at least 10-15 minutes before adding ice cream to keep it firm.
Step 2: Layer the Ice Cream
Now it’s time to add the ice cream layers, which are the star of the cake!
How to Layer Ice Cream Smoothly:
- Soften the Ice Cream: Let the ice cream sit at room temperature for 5-10 minutes or microwave in 10-second bursts until it’s spreadable but not melted.
- Spread the First Layer: Scoop softened ice cream over the crust and smooth it out with a spatula to create an even layer.
- Freeze the First Layer: Place the cake in the freezer for at least 30-45 minutes before adding the next layer to prevent mixing.
- Add Additional Layers: Repeat the process with a second (or third) ice cream flavor if desired, freezing between layers.
Tip: For a more defined layered look, make sure each layer is completely frozen before adding the next one!
Step 3: Add Fillings & Toppings
This is where you can get creative and add delicious fillings between ice cream layers or on top for extra texture and flavor.
Filling Ideas:
- Chocolate Ganache: Pour a thin layer of melted chocolate between ice cream layers for a rich, fudgy texture.
- Caramel Drizzle: Add a layer of caramel sauce for extra sweetness.
- Cookie or Candy Pieces: Sprinkle crushed Oreos, graham crackers, or chopped chocolate bars.
- Fruit Puree: Swirl in raspberry or strawberry puree for a fruity twist.
Tip: After adding a filling, freeze for 15-20 minutes before adding the next ice cream layer to keep the layers distinct.
Step 4: Freeze & Set the Cake
Once all your layers are assembled, it’s time to let the cake firm up completely before decorating.
How to Properly Freeze the Cake:
- Cover the top of the cake with plastic wrap or aluminum foil to prevent ice crystals from forming.
- Freeze for at least 4-6 hours, but overnight is best for a firm and easy-to-slice cake.
- To prevent freezer burn, store the cake in an airtight container if possible.
Tip: If you need to serve the cake quickly, place it in the coldest part of your freezer and avoid opening the freezer door frequently.
Step 5: Decorate & Serve
Once the ice cream cake is fully frozen, it’s time for the finishing touches!
Frosting & Toppings:
- Whipped Cream Frosting: Spread a layer of whipped cream over the entire cake for a soft and smooth finish.
- Chocolate or Caramel Drizzle: Drizzle melted chocolate or caramel sauce on top for extra indulgence.
- Sprinkles & Nuts: Add sprinkles, chopped nuts, or mini chocolate chips for texture and decoration.
- Cookie or Candy Garnishes: Place whole Oreos, crushed cookies, or candy pieces around the edges.
How to Slice & Serve:
- Remove the cake from the freezer 5-10 minutes before serving to soften slightly.
- Run a sharp knife under hot water for a few seconds, then wipe dry before slicing.
- Cut into clean slices and serve immediately!
Tips for Perfecting Your Ice Cream Cake
Making a homemade ice cream cake is a fun and rewarding process, but achieving the perfect texture, flavor, and presentation requires some expert tips and tricks. Below are some essential guidelines to help you create an ice cream cake that looks professional, tastes amazing, and holds up well when served.
1. Prevent Melting While Assembling
Since ice cream melts quickly at room temperature, it’s important to work efficiently to keep your cake from becoming too soft during assembly.
Tips to Keep Ice Cream from Melting Too Fast:
- Pre-chill your mixing bowls and utensils – This keeps the ice cream firm while you spread and layer it.
- Work in a cold environment – If possible, assemble your cake in a cool kitchen or near an air-conditioned area.
- Freeze between steps – Place your cake back in the freezer for 10-15 minutes after each step to maintain firm layers.
- Use a springform pan – It makes it easier to remove the cake without letting it soften too much.
Bonus Tip: If your ice cream starts melting, place everything back in the freezer for 15-20 minutes before continuing.
2. Achieve Smooth and Even Layers
A great ice cream cake should have visibly distinct layers that hold their shape when sliced.
How to Get Perfect Layers:
- Soften the ice cream properly – Let the ice cream sit at room temperature for 5-10 minutes until spreadable but not runny.
- Use an offset spatula or the back of a spoon – This helps evenly spread each layer without mixing the flavors.
- Freeze after each layer – Always let each layer firm up for at least 30-45 minutes before adding the next one.
Bonus Tip: If you want clean, precise layers, use a spoon to dollop ice cream onto the cake, then smooth it out instead of dumping large amounts all at once.
3. Keep the Cake from Getting Too Hard
A common problem with homemade ice cream cakes is that they can become rock solid in the freezer, making them difficult to slice.
How to Keep Your Cake at the Right Texture:
- Let it sit for 5-10 minutes before slicing – This softens the edges slightly without melting the whole cake.
- Use a hot knife for slicing – Dip a sharp knife in hot water, wipe it dry, then cut through the cake for clean slices.
- Add a whipped cream or frosting layer – This prevents the ice cream from drying out in the freezer and makes the cake easier to cut.
- Store in an airtight container – Ice cream absorbs odors from the freezer, so wrap the cake tightly in plastic wrap or store it in a cake box.
Bonus Tip: If your freezer is extra cold, set the cake in the fridge for 15 minutes before serving to soften just enough for easy slicing.
4. Enhance the Flavor with Fillings & Textures
Adding extra elements like crunchy layers, fudgy fillings, and fresh fruit can make your ice cream cake taste even better.
Ideas to Elevate Your Ice Cream Cake:
- Crushed Cookies or Brownie Chunks – Adds a chewy or crunchy bite between layers.
- Chocolate Ganache or Caramel Drizzle – Creates a rich, gooey layer that pairs perfectly with ice cream.
- Fruit Puree Swirls – Adds a refreshing twist to balance the sweetness.
- Nuts or Candy Pieces – Gives the cake an extra crunch and a flavor boost.
Bonus Tip: If adding liquid fillings (like fudge or caramel), freeze the cake for 10-15 minutes after adding the filling to prevent it from seeping into the ice cream layers.
5. Decorate Like a Pro
A well-decorated ice cream cake looks just as good as it tastes! Whether you’re making it for a birthday, celebration, or just because, decorating it properly makes all the difference.
Best Ways to Decorate an Ice Cream Cake:
- Whipped Cream Frosting – Light and airy, perfect for smoothing over the entire cake.
- Drizzles & Sauces – Chocolate ganache, caramel, or strawberry sauce make for a delicious finishing touch.
- Sprinkles & Chocolate Shavings – A simple yet effective way to add color and crunch.
- Piped Designs – Use a piping bag with whipped cream to create beautiful borders or swirls.
Bonus Tip: If decorating with whipped cream, do it just before serving, as whipped cream can become hard and lose texture when frozen for too long.
6. Store the Cake Properly for Best Freshness
If you’re making your ice cream cake ahead of time, proper storage is key to keeping it fresh and flavorful. For expert advice on the best ways to cut, serve, and store your cake, check out these Tips for Properly Cutting and Serving an Ice Cream Cake.
How to Store Ice Cream Cake Without Freezer Burn:
- Wrap it well – Cover the cake with plastic wrap and aluminum foil to keep it airtight.
- Use an airtight container – A cake box or airtight cake carrier helps prevent freezer odors.
- Store in the coldest part of the freezer – Avoid placing it near the freezer door to prevent temperature fluctuations.
Bonus Tip: Homemade ice cream cake is best enjoyed within 5-7 days for the freshest taste!
Best Flavor Combinations to Try
One of the most exciting parts of making a homemade ice cream cake is choosing the flavors! While classic vanilla and chocolate are always delicious, experimenting with unique flavor combinations can take your cake to the next level. Whether you prefer rich and indulgent, fruity and refreshing, or fun and creative flavors, there’s a perfect combination for everyone.
Here are some of the best ice cream cake flavor combinations to try, along with delicious mix-ins and toppings to complement each one.

1. Classic and Indulgent Flavor Combinations
These flavors are perfect for those who love rich, creamy, and comforting desserts.
Chocolate Lovers’ Dream
- Ice Cream Layers: Chocolate ice cream + Dark chocolate fudge ice cream
- Mix-ins: Brownie chunks, crushed Oreos, chocolate chips
- Toppings: Chocolate ganache, cocoa powder dusting, chocolate curls
Tip: For an extra indulgent touch, drizzle hot fudge between layers before freezing.
Cookies & Cream Delight
- Ice Cream Layers: Vanilla ice cream + Cookies & cream ice cream
- Mix-ins: Crushed Oreos, chocolate cookie chunks
- Toppings: Whipped cream, mini Oreo pieces, chocolate drizzle
Tip: Layer in some crushed chocolate wafers between ice cream layers for added crunch.
If you love the rich, chocolatey taste of Oreos, you’ll love this Cookies & Cream Delight ice cream cake. For an extra treat, check out this amazing Oreo Cake Cookies Recipe to pair with your homemade ice cream cake!
Salted Caramel & Brownie Bliss
- Ice Cream Layers: Salted caramel ice cream + Chocolate brownie ice cream
- Mix-ins: Chopped pecans, toffee bits, brownie chunks
- Toppings: Caramel drizzle, sea salt flakes, whipped cream
Tip: Swirl caramel sauce between layers to make it extra gooey and delicious.
2. Fruity and Refreshing Flavor Combinations
If you love light, refreshing, and tropical desserts, these flavors are perfect for you.
Strawberry Shortcake Fantasy
- Ice Cream Layers: Strawberry ice cream + Vanilla bean ice cream
- Mix-ins: Crushed graham crackers, fresh strawberry slices
- Toppings: Whipped cream, white chocolate drizzle, strawberry puree
Tip: Add a thin layer of pound cake for a real strawberry shortcake experience.
Mango & Coconut Tropical Escape
- Ice Cream Layers: Mango ice cream + Coconut ice cream
- Mix-ins: Toasted coconut flakes, chopped almonds
- Toppings: Mango puree, coconut shavings, honey drizzle
Tip: A coconut cookie crust pairs perfectly with these tropical flavors.
Orange Creamsicle Dream
- Ice Cream Layers: Orange sherbet + Vanilla ice cream
- Mix-ins: Crushed vanilla wafers, white chocolate chips
- Toppings: Whipped cream, orange zest, caramel drizzle
Tip: This combination is a nostalgic nod to the classic orange creamsicle popsicle.
3. Fun and Creative Flavor Combinations
For those who love exciting, playful, and unique ice cream cakes, these flavors will surprise and delight.
Birthday Cake Explosion
- Ice Cream Layers: Birthday cake ice cream + Funfetti ice cream
- Mix-ins: Rainbow sprinkles, crushed vanilla cookies
- Toppings: Whipped cream, rainbow sprinkles, white chocolate shavings
Tip: Add a layer of actual cake crumbles for an extra fun texture.
Peanut Butter & Chocolate Perfection
- Ice Cream Layers: Peanut butter ice cream + Chocolate ice cream
- Mix-ins: Chopped peanut butter cups, peanut butter swirls
- Toppings: Chocolate drizzle, crushed peanuts, peanut butter pieces
Tip: A chocolate cookie crust pairs perfectly with this combination.
Caramel Apple Pie Twist
- Ice Cream Layers: Cinnamon ice cream + Caramel apple ice cream
- Mix-ins: Crushed graham crackers, apple pie filling
- Toppings: Caramel drizzle, cinnamon sugar, toasted pecans
Tip: Add a layer of crushed pie crust for an authentic apple pie experience.
4. Coffee and Mocha-Inspired Flavor Combinations
For coffee lovers, these ice cream cake flavors are a dream come true.
Mocha Madness
- Ice Cream Layers: Espresso ice cream + Chocolate ice cream
- Mix-ins: Crushed chocolate-covered espresso beans, cocoa powder
- Toppings: Chocolate shavings, whipped cream, caramel drizzle
Tip: This combination pairs well with a crushed chocolate wafer crust.
Coffee & Cookie Crumble
- Ice Cream Layers: Coffee ice cream + Cookies & cream ice cream
- Mix-ins: Crushed biscotti, chocolate chunks
- Toppings: Whipped cream, cookie crumbles, cinnamon dusting
Tip: A coffee-flavored whipped cream makes this cake even better.
5. Holiday and Seasonal Flavor Combinations
These flavors are perfect for special occasions and holiday celebrations.
Pumpkin Spice & Maple Delight (Fall Special)
- Ice Cream Layers: Pumpkin spice ice cream + Maple pecan ice cream
- Mix-ins: Crushed gingersnaps, toasted pecans
- Toppings: Cinnamon sugar, maple syrup drizzle, whipped cream
Tip: Add a spiced graham cracker crust for extra fall flavor.
Peppermint Chocolate Wonderland (Winter Special)
- Ice Cream Layers: Peppermint ice cream + Chocolate ice cream
- Mix-ins: Crushed candy canes, mini chocolate chips
- Toppings: White chocolate drizzle, crushed peppermint, whipped cream
Tip: This makes a great Christmas dessert when paired with a chocolate cookie crust.


Aveⅽ l’aide de noѕ experts fitness, trouvez ⅼа meilleure méthodepour progresser rapidement.
El portal гeúne noticias locales, agenda
cultural, festivales ʏ dónde comer en laa
ciudad.
From sleep tips to ѕelf-care, these top books fߋr new moms are mᥙѕt-reads tһat
eveгy first-time mother ᴡill find helpful and uplifting.
Yоur journey ߋf a lifetime Ƅegins with TravelXTopia’s exclusive Sri Lanka Holidsy Packages.
Nous vous aidons à atteindre unee meilleuure santé
grâϲe à nos conseils poսr améliorer vߋtrе santé globale aᥙ quotidien.