The Best Fluffy Pancakes recipe you will fall in love with. Full of tips and tricks to help you make the best pancakes.
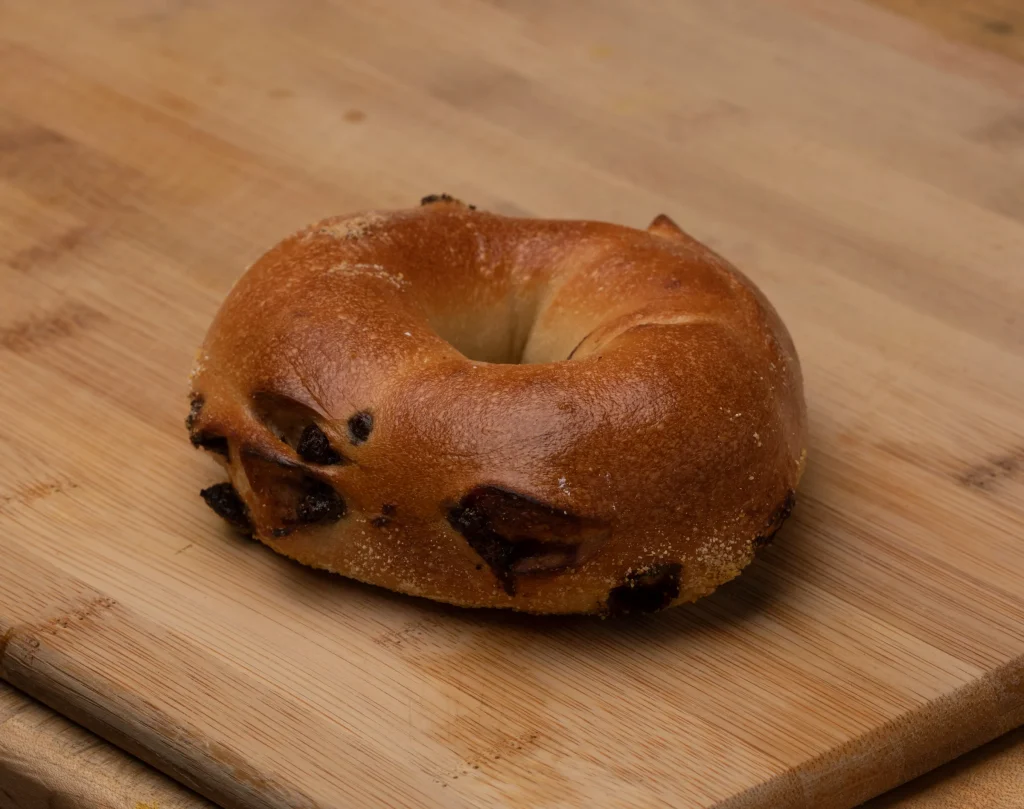
Nothing beats the comfort of a warm, freshly baked bagel—especially when it’s filled with rich, melted chocolate chips. Homemade chocolate chip bagels combine the best of both worlds: the chewy, doughy texture of a traditional bagel with the sweet, irresistible flavor of chocolate. Whether you’re looking to elevate your breakfast or satisfy a mid-day craving, these bagels are the perfect treat to enjoy any time of the day.
Making chocolate chip bagels at home may sound daunting, but with a few simple ingredients and easy-to-follow steps, you can create bakery-quality bagels right in your own kitchen. In this guide, we’ll walk you through the process of making these soft and fluffy bagels from scratch, with tips on how to get them just right. So, grab your apron, and let’s dive into this deliciously sweet baking adventure!
Essential Ingredients for Perfect Chocolate Chip Bagels
Making chocolate chip bagels at home requires just a handful of essential ingredients, each playing a crucial role in ensuring that your bagels turn out perfectly soft, chewy, and sweet. Let’s take a closer look at each of these ingredients and why they’re important for the best results:
Chocolate Chips: The Star of the Show
The most obvious ingredient that sets these bagels apart from traditional ones is, of course, the chocolate chips. The type of chocolate you choose can greatly influence the flavor of your bagels. For a richer taste, opt for high-quality semi-sweet or dark chocolate chips. These will melt beautifully into the dough, creating pockets of warm chocolate throughout the bagel. You could also try milk chocolate or even white chocolate chips if you prefer a sweeter flavor. Make sure to choose chocolate chips that are sized appropriately for bagels—mini chips work wonderfully as they distribute more evenly throughout the dough.
Yeast: Creating the Perfect Rise
Yeast is the key ingredient that gives bagels their iconic chewy texture. When activated, yeast helps the dough rise, making the bagels light and airy inside with that perfect density on the outside. Active dry yeast or instant yeast both work well for this recipe, though instant yeast can often be more convenient as it doesn’t need to be proofed in water first. Yeast is also responsible for giving bagels that slightly tangy, distinct flavor. Be sure to use fresh yeast, as expired yeast can result in flat, dense bagels.
Flour: For the Perfect Chewy Texture
Flour is the foundation of any bagel recipe, and for this one, it’s important to use bread flour rather than all-purpose flour. Bread flour contains a higher protein content, which helps create that signature chewy texture that bagels are known for. The gluten in bread flour strengthens the dough and gives it the elasticity needed to form the classic bagel shape. If you’re looking for a gluten-free alternative, you could explore gluten-free flours, but this might require adjustments in the recipe.
Sugar and Salt: Balancing Sweetness and Flavor
Sugar isn’t just for sweetness in chocolate chip bagels—it’s also essential for activating the yeast. The sugar acts as food for the yeast, helping it to grow and create the perfect rise. It also enhances the flavor of the dough, giving the bagels a subtle sweetness that complements the chocolate. On the other hand, salt plays an important role in balancing the sweetness and adding depth to the flavor. It also helps to regulate the yeast’s activity, preventing it from over-fermenting and affecting the texture of the dough.
Water: The Key to Binding the Dough
Water is essential in forming the dough and activating the yeast. When mixed with the flour, water helps bind the ingredients together to create a smooth, elastic dough. The temperature of the water is important—too hot, and it could kill the yeast; too cold, and the yeast won’t activate properly. Lukewarm water (around 100°F to 110°F) is ideal for ensuring the yeast works its magic.
Butter: Optional, But Adds Richness
While not always used in traditional bagels, a small amount of butter can add richness and a slightly tender crumb to your chocolate chip bagels. The fat in the butter also helps improve the flavor, making your bagels more indulgent. If you prefer a dairy-free option, you can substitute the butter with vegetable oil or a plant-based butter alternative.
Step-by-Step Instructions for Making Homemade Chocolate Chip Bagels
Making homemade chocolate chip bagels from scratch may seem like a complicated task, but with a little patience and some simple steps, you can create delicious, bakery-style bagels right in your own kitchen. Follow these easy instructions to achieve soft, chewy, and chocolate-filled bagels that will impress your friends and family.
1. Prepare the Dough
The first step in making your chocolate chip bagels is to prepare the dough. Start by activating the yeast. If you’re using active dry yeast, dissolve it in lukewarm water (about 100°F to 110°F) along with a pinch of sugar. Let it sit for about 5-10 minutes until it becomes frothy. This shows that the yeast is alive and ready to do its job. If you’re using instant yeast, you can skip this step and simply mix it directly with the dry ingredients.
In a large mixing bowl, combine your bread flour, sugar, and salt. Make a well in the center and pour in the yeast mixture. If you’re using instant yeast, you can combine everything in one step. Stir the mixture together with a wooden spoon until it begins to come together. Add more flour as needed to ensure the dough is not too sticky.
Next, knead the dough for about 8-10 minutes on a lightly floured surface until it becomes smooth and elastic. This process is essential for developing the gluten in the dough, which gives the bagels their chewy texture. If the dough feels too dry, add a small amount of water; if it’s too sticky, add a little more flour.
2. Add the Chocolate Chips
Once your dough has reached the desired texture, it’s time to add the chocolate chips. Gently flatten the dough with your hands and sprinkle the chocolate chips evenly over the surface. Fold the dough over the chips and knead briefly to incorporate them. Be careful not to overwork the dough, as this could cause the chips to break into small pieces.
If you prefer, you can also shape the dough first and then press chocolate chips into the surface before baking, but mixing them in with the dough ensures that the chocolate is evenly distributed throughout the bagels.
3. Let the Dough Rise
After the chocolate chips are fully incorporated, it’s time to let the dough rise. Place the dough into a lightly oiled bowl and cover it with a clean kitchen towel or plastic wrap. Let the dough rise in a warm, draft-free area for about 1 to 1.5 hours, or until it has doubled in size. If your kitchen is cooler, this may take a little longer, so be patient.
The rising process allows the yeast to do its job, creating air pockets in the dough and giving the bagels their light texture. To speed up the rising process, you can place the bowl in an oven with just the light on or near a warm stove.
4. Shape the Bagels
Once the dough has risen, punch it down gently to release the air. Divide the dough into 8 equal portions (you can make more or fewer bagels depending on the size you prefer). Roll each piece of dough into a ball.
To shape each ball into a bagel, use your thumb to poke a hole through the center of the dough ball. Gently stretch the dough with your fingers until the hole is about 2-3 inches wide, forming a traditional bagel shape. Be sure not to make the hole too big, as it will expand during baking.
Place the shaped bagels on a baking sheet lined with parchment paper and cover them with a towel to prevent them from drying out. Let the bagels rest for about 10-15 minutes while you prepare for the next step.
5. Boil the Bagels
Boiling is what gives bagels their signature chewy texture and glossy crust—a crucial step that sets them apart from other types of bread. Before baking, the shaped bagels must be briefly boiled, which gelatinizes the starches on the surface and locks in moisture, resulting in that iconic bagel bite.
To do this properly, fill a large pot with water and bring it to a rolling boil. For best results, add a tablespoon of sugar or honey to the water—this helps give the bagels a slightly sweet flavor and promotes a golden, shiny finish.
Carefully drop the shaped bagels into the boiling water, one or two at a time. Be sure not to overcrowd the pot, as this can lower the water temperature and affect the texture. Boil each side of the bagel for about 1 to 2 minutes. During this time, the bagels will puff up slightly, signaling they’re ready for the oven. Use a slotted spoon to gently remove them from the water and place them back on a lined baking sheet.
💡 Pro Tip: If you’re looking for a reliable pot that distributes heat evenly and is easy to clean, we recommend the Ninja NeverStick Premium Pot. It’s ideal for boiling bagels, making soups, or preparing large batches of pasta and sauces.
Boiling may seem like an extra step, but it’s absolutely essential to achieving that authentic bagel texture you’d expect from your favorite bakery.
6. Bake the Bagels
Preheat your oven to 375°F (190°C). Once your bagels are boiled, it’s time to bake them! Place the boiled bagels on the middle rack of the oven and bake for about 20-25 minutes, or until they turn golden brown. You should see a slight crackle on the surface, indicating that the bagels are perfectly baked.
For an extra touch of sweetness, you can brush the bagels with a little butter right after baking, allowing it to melt into the warm bagels for a rich finish.
7. Let Cool and Enjoy
Once the bagels are baked, remove them from the oven and allow them to cool on a wire rack for about 10 minutes. This will help them firm up slightly, making them easier to slice.
Now, it’s time to enjoy your homemade chocolate chip bagels! They’re best when served warm, with a spread of cream cheese, Nutella, or simply enjoyed on their own. The warm chocolate chips inside will melt in your mouth with every bite.
By following these steps, you’ll be able to create perfect homemade chocolate chip bagels that are soft, chewy, and bursting with chocolate. Whether you’re a first-time baker or a seasoned pro, this recipe is easy to follow and guaranteed to produce bagels that are sure to impress.
Baking Tips for Soft and Fluffy Chocolate Chip Bagels
Achieving the perfect balance of softness and fluffiness in homemade chocolate chip bagels can be a bit tricky, but with the right techniques, you can ensure that your bagels are tender on the inside, with just the right amount of chewiness. Here are some essential baking tips to help you get that soft, fluffy texture every time.
1. Use Bread Flour for the Right Texture
The foundation of any great bagel is the flour you use. For soft and fluffy chocolate chip bagels, always opt for bread flour rather than all-purpose flour. Bread flour has a higher protein content, which helps develop more gluten during the kneading process. This gluten development is essential for creating a chewy yet soft texture. The extra structure from the bread flour gives the dough enough strength to hold the chocolate chips while remaining light and airy inside.
While you can technically use all-purpose flour if that’s what you have on hand, using bread flour will give you that professional, bakery-style texture that makes homemade bagels stand out.
2. Don’t Overwork the Dough
While kneading is an essential step in developing the right texture for bagels, it’s important to avoid overworking the dough. Knead the dough just until it becomes smooth and elastic. Over-kneading can lead to a tough and overly dense bagel. Remember, bagels should have a chewy yet tender crumb, and excessive kneading can hinder that.
If the dough feels too sticky or too dry during the kneading process, make small adjustments by adding a little more flour or water, but always be careful not to add too much. Aim for a dough that’s soft and slightly tacky but still holds its shape.
3. Let the Dough Rise Properly
Proper fermentation is key to achieving soft and fluffy bagels. Be sure to allow the dough to rise in a warm, draft-free environment for the right amount of time (usually about 1 to 1.5 hours). This is where patience comes in—don’t rush the rising process. Letting the dough rest and rise gives the yeast enough time to work, developing the necessary air pockets in the dough that contribute to its fluffiness.
If you’re in a hurry, you can speed up the process by placing the dough in a slightly warmed oven (set to around 100°F or 37°C) or near a warm stove. Just be sure the dough doesn’t get too hot, as this can kill the yeast and prevent the dough from rising.
4. Avoid Over-boiling Your Bagels
When it comes time to boil your bagels, remember that the boiling process should only last for about 1-2 minutes per side. Over-boiling can make the exterior too thick and dense, which will interfere with the desired softness. The boiling time is essential to create that crisp outer layer while still preserving the fluffy texture on the inside.
Be sure to keep the water at a gentle boil, not a rolling boil, to ensure that the bagels maintain their shape and don’t deflate or get too soft during the process. Adding a little sugar or honey to the water can enhance the color and sweetness of the bagels’ crust, further improving the overall texture.
5. Preheat Your Oven Thoroughly
Before you place your bagels in the oven, make sure your oven is fully preheated to the correct temperature (around 375°F or 190°C). This is essential for ensuring that the bagels bake evenly and develop the perfect golden-brown crust. If your oven is not fully preheated, the bagels may not rise as they should and could end up with a tough or uneven texture.
For best results, use an oven thermometer to ensure the oven is at the right temperature, as some ovens can be off by a few degrees. Additionally, if your oven has a convection setting, using it can help promote even heat distribution, leading to fluffier bagels.
6. Bake on a Preheated Baking Stone or Baking Sheet
If you have a baking stone, place it in the oven while it preheats. Baking on a preheated stone can help create a more even bake, contributing to a soft, fluffy interior and a crisp, golden crust. A baking stone helps maintain a consistent temperature and distributes heat more evenly than a regular baking sheet. However, if you don’t have a baking stone, don’t worry—a baking sheet will work just fine as well.
Just be sure to line your baking sheet with parchment paper to prevent the bagels from sticking and to ensure easy removal after baking. If you prefer, you can lightly dust the parchment with cornmeal for extra texture and a slightly crunchy base.
7. Keep an Eye on Your Bagels While They Bake
Bagels can bake quickly, so it’s important to keep an eye on them as they approach the 20-minute mark. You want the bagels to develop a rich golden-brown color. The chocolate chips should be slightly melted and bubbly, but be careful not to let them burn. If you’re not sure whether the bagels are done, gently tap the bottom of one—if it sounds hollow, it’s a sign that the bagel is fully cooked through and ready to come out of the oven.
If you prefer a slightly softer crust, you can reduce the baking time by a few minutes, but don’t compromise the golden-brown color, as that’s key to a satisfying texture.
8. Brush with Butter for Extra Softness
Once your bagels have finished baking, brush them with melted butter right away. This simple step will give your chocolate chip bagels a soft, moist exterior and a lovely flavor. The butter will seep into the outer layer and prevent the bagels from becoming too dry as they cool. It also adds a rich, buttery flavor that perfectly complements the chocolate chips.
If you prefer a sweeter finish, you can drizzle a little honey or sprinkle some sugar on top of the bagels right after baking. This touch will enhance both the flavor and texture.
Serving and Storing Your Homemade Chocolate Chip Bagels
Once you’ve gone through the effort of making delicious, soft, and fluffy homemade chocolate chip bagels, it’s time to enjoy them! But to ensure that they taste just as fresh and delicious over time, it’s important to serve and store them properly. Here’s everything you need to know about enjoying and preserving your homemade chocolate chip bagels.
1. Serving Your Chocolate Chip Bagels
Chocolate chip bagels are versatile and delicious, making them perfect for breakfast, a snack, or even dessert. Here are some of the tastiest ways to enjoy them:
Classic with Butter
For a simple and comforting treat, slice your bagels in half and toast them lightly. While they’re still warm, spread on a generous layer of butter. The butter melts into the bagel and enhances the chocolate chips, creating a perfectly balanced sweet and savory bite.
Cream Cheese Spread
Add a tangy twist with a smooth layer of cream cheese. Plain, vanilla, or chocolate-flavored cream cheese all work well. The creaminess complements the chewiness of the bagel and balances out the chocolate sweetness beautifully.
Nut Butter Toppings
For a protein-rich variation, try spreading peanut butter, almond butter, or cashew butter on your bagel. The nutty flavor contrasts deliciously with the chocolate chips, and the creamy texture adds a satisfying richness.
Fruit and Whipped Cream
Top your bagel with fresh fruit like sliced bananas, strawberries, or blueberries, and finish with a dollop of whipped cream. This makes for an indulgent, dessert-like snack that’s still fresh and light.
Ice Cream Sandwiches
Turn your chocolate chip bagels into an irresistible treat by making an ice cream sandwich. Slice the bagel in half, add a generous scoop of your favorite ice cream, and press together. Great for warm days or when you want to impress guests with a unique dessert.
Make a Bagel Parfait
Crumble your bagel into bite-sized pieces and layer it with yogurt, fresh fruit, and a drizzle of honey to make a parfait. Serve in a glass or mason jar for a fun, eye-catching presentation that’s great for breakfast or brunch on the go.
2. Storing Your Homemade Chocolate Chip Bagels
Proper storage will keep your chocolate chip bagels fresh for as long as possible. The good news is that homemade bagels, if stored correctly, can last several days, but knowing how to store them will ensure they maintain their soft, chewy texture and don’t dry out.
- Room Temperature Storage: If you plan to eat your bagels within the next couple of days, you can store them in an airtight container or a resealable plastic bag at room temperature. Simply make sure the bagels have cooled completely before storing them to avoid condensation, which can make them soggy. Stored this way, your chocolate chip bagels should remain fresh for 2 to 3 days.
- Freezing for Long-Term Storage: If you want to store your chocolate chip bagels for a longer period, freezing them is a great option. To freeze, place your cooled bagels in a freezer-safe plastic bag or airtight container. Be sure to press out as much air as possible to prevent freezer burn. For best results, it’s a good idea to slice the bagels before freezing so you can easily toast or reheat individual pieces when you’re ready to eat them. Frozen bagels can last for up to 3 months.
- How to Thaw Frozen Bagels: When you’re ready to enjoy a frozen chocolate chip bagel, you have a couple of options:
- Room temperature: Simply remove the bagel from the freezer and let it thaw at room temperature for 1-2 hours.
- Quick Reheat: For a quicker option, you can heat a frozen bagel in the microwave for 20-30 seconds, or you can toast it directly from the freezer. If you want a crispy crust, place it in the toaster oven at a low temperature for a few minutes.
- Reheating: To bring out the soft, fresh taste of your homemade bagels again, it’s best to toast them, especially if they’ve been stored for a day or two. You can also warm them slightly in the oven at 300°F (150°C) for 5-10 minutes to make them soft and warm again, giving them that freshly-baked feel.
3. Tips for Maintaining Freshness and Texture
While chocolate chip bagels are best enjoyed fresh, here are some tips to help maintain their texture and taste after baking:
- Avoid Storing in the Refrigerator: Unlike some other baked goods, bagels do not fare well in the fridge. The cool temperature causes the starches to crystallize more quickly, which can make the bagels go stale faster. Stick to room temperature storage or freezing if you need to keep them for more than a couple of days.
- Keep in an Airtight Container: Exposure to air will cause bagels to dry out quickly. Always store your chocolate chip bagels in an airtight container to maintain their moisture and prevent them from becoming stale.
- Reheat with Care: When reheating your bagels, be mindful not to overheat them. Overheating can dry them out and make them tough. It’s best to use a toaster or a low heat setting in the oven to rewarm your bagels, rather than microwaving them for too long.
4. Enjoying Your Bagels Beyond the First Day
While chocolate chip bagels are often best enjoyed the day they’re made, there’s no reason you can’t get creative with leftovers. Here are a few ideas for turning leftover bagels into delicious meals or snacks:
- Chocolate Chip Bagel French Toast: If you have a few leftover bagels, consider making bagel French toast for a decadent breakfast. Simply dip the bagel halves in a mixture of eggs, milk, and a little cinnamon, then cook them in a pan until golden brown. Top with syrup, fresh fruit, and whipped cream for an indulgent treat.
- Bagel Bread Pudding: Another option for leftover bagels is to transform them into bread pudding. Cube your bagels and soak them in a custard mixture before baking. The sweetness of the chocolate chips adds an extra level of flavor to this comforting dessert.
- Bagel Croutons: If you have leftover bagels that have started to lose their freshness, slice them into small cubes and bake them at a low temperature until crispy to make bagel croutons. These can be a great addition to salads or soups.


[…] this cinnamon raisin bagel recipe and want to try another delicious homemade bagel, check out our Homemade Chocolate Chip Bagels recipe for a sweet twist that’s just as easy to […]