The Best Fluffy Pancakes recipe you will fall in love with. Full of tips and tricks to help you make the best pancakes.
There’s just something magical about a warm, golden apple crisp coming out of the oven — that buttery oat topping, the soft cinnamon-kissed apples, the smell that basically hugs your whole kitchen. This homemade version takes everything you love about the classic fall dessert and makes it even better: crispier topping, juicier apples, and richer flavor in every single bite.
Whether you’re craving a simple weeknight treat, planning a cozy weekend bake, or hunting for the perfect fall dessert to impress a crowd, this apple crisp delivers. Made with real ingredients — like Granny Smith or Honeycrisp apples, brown sugar, rolled oats, cinnamon, and a generous amount of butter — it’s the kind of recipe that feels nostalgic, comforting, and just a little bit irresistible.
The Magic of Homemade Apple Crisp
There’s something undeniably comforting about a warm, freshly baked apple crisp. The magic lies in its perfect balance of sweet, tart, and crunchy textures—a golden, buttery topping that contrasts beautifully with tender, spiced apples beneath. Unlike store-bought desserts, homemade apple crisp allows you to control every element, from the type of apples you use to the level of sweetness and spice. This simple yet timeless dessert is not only a treat for the taste buds but also evokes feelings of nostalgia, family gatherings, and cozy autumn afternoons.
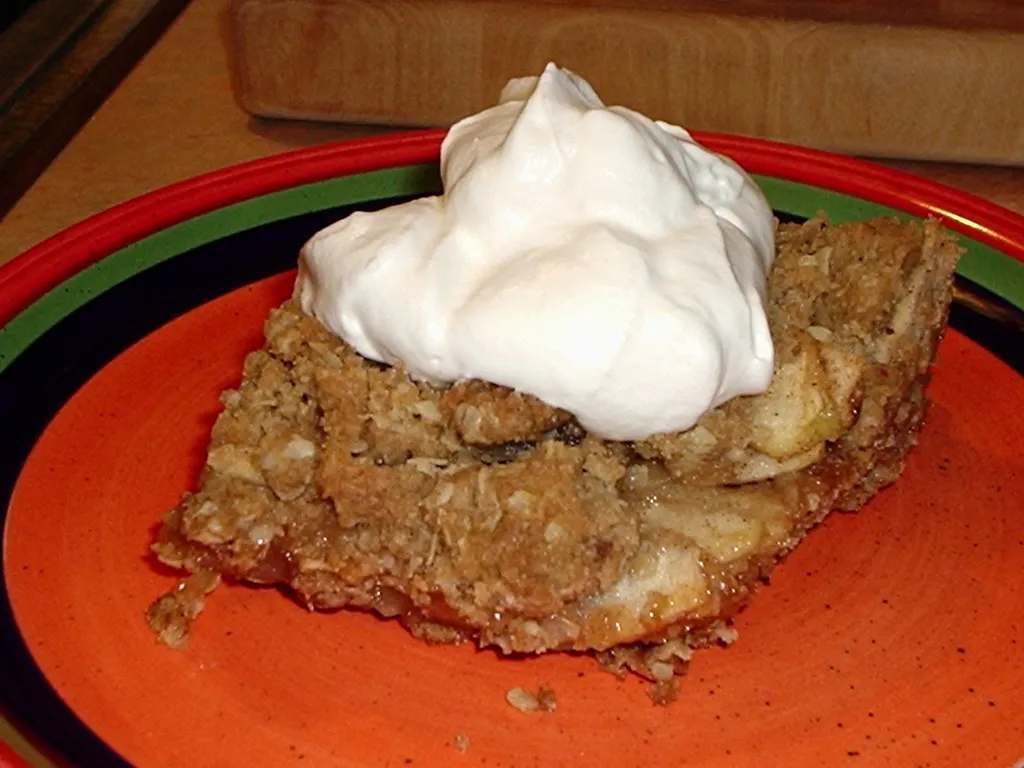
The real charm comes from its versatility. You can enjoy it straight from the oven, topped with a scoop of vanilla ice cream, or even paired with a dollop of whipped cream for a decadent finish. Each bite captures the essence of home baking, making it a dessert that’s as heartwarming as it is delicious.
By making your apple crisp from scratch, you also unlock the opportunity to experiment with flavors—adding a pinch of cinnamon, nutmeg, or even a splash of caramel or bourbon can elevate this classic dish to a whole new level. The magic of homemade apple crisp is not just in the recipe itself but in the joy of creating it, sharing it, and savoring every golden, crunchy, gooey bite.
Ingredients You’ll Need
Creating a perfect homemade apple crisp starts with selecting the right ingredients. Each component plays a crucial role in achieving that golden, crispy topping and tender, flavorful apple filling. Here’s everything you’ll need, with precise measurements for a standard 9×9-inch baking dish:
For the Apple Filling:
- 6 cups of peeled and sliced apples (about 6 medium apples, Granny Smith or Honeycrisp work best for a balance of tartness and sweetness)
- 1/3 cup granulated sugar – to lightly sweeten the fruit
- 1/4 cup brown sugar – adds depth and a hint of caramel flavor
- 1 teaspoon ground cinnamon – essential for that warm, cozy aroma
- 1/4 teaspoon ground nutmeg – optional but enhances the spice profile
- 1 teaspoon lemon juice – brightens the flavors and prevents apples from browning
- 2 teaspoons cornstarch – helps thicken the apple juices as they bake
For the Crisp Topping:
- 1 cup old-fashioned rolled oats – provides a hearty, chewy texture
- 1/2 cup all-purpose flour – binds the topping together
- 1/2 cup packed brown sugar – caramelizes beautifully in the oven
- 1/2 teaspoon ground cinnamon – complements the apple filling
- 1/4 teaspoon salt – balances the sweetness
- 1/2 cup unsalted butter (1 stick), cold and cut into small cubes – creates a rich, crumbly topping
Optional additions to customize your apple crisp:
- 1/4 cup chopped nuts (walnuts or pecans) – adds crunch and nuttiness
- 1/4 cup raisins or dried cranberries – adds bursts of sweet-tart flavor
With these ingredients in hand, you’re ready to assemble a homemade apple crisp that’s bursting with flavor and texture. Measuring accurately ensures every bite has the perfect balance of sweet, tart, and crunchy goodness.
Step-by-Step: How to Make the Best Apple Crisp
Making a homemade apple crisp is simpler than it seems, and following these steps will ensure a golden, bubbly dessert every time.
1. Preheat and Prepare
- Preheat your oven to 350°F (175°C).
- Grease a 9×9-inch baking dish lightly with butter or non-stick spray to prevent sticking.
2. Prepare the Apple Filling
- Peel, core, and slice 6 medium apples into thin, even slices for uniform baking.
- In a large mixing bowl, combine the apples with:
- 1/3 cup granulated sugar
- 1/4 cup brown sugar
- 1 teaspoon ground cinnamon
- 1/4 teaspoon ground nutmeg
- 1 teaspoon lemon juice
- 2 teaspoons cornstarch
- Toss gently to coat the apple slices evenly with the sugar and spices.
3. Assemble the Apple Layer
- Spread the apple mixture evenly in the prepared baking dish.
- Make sure the apples are in a single layer for even cooking and consistent texture.
4. Prepare the Crisp Topping
- In a separate bowl, mix together:
- 1 cup old-fashioned rolled oats
- 1/2 cup all-purpose flour
- 1/2 cup packed brown sugar
- 1/2 teaspoon cinnamon
- 1/4 teaspoon salt
- Add 1/2 cup cold, cubed unsalted butter. Use a pastry cutter, two forks, or your fingers to blend until the mixture resembles coarse crumbs.
- Optional: Stir in 1/4 cup chopped nuts for added crunch.
5. Assemble the Crisp
- Sprinkle the topping evenly over the apples, covering all areas completely.
- Press lightly with your fingers to ensure the topping adheres to the fruit but remains crumbly.
6. Bake to Perfection
- Bake in the preheated oven for 40–45 minutes, until the topping is golden brown and the apple filling is bubbling around the edges.
- For extra crispiness, broil for 1–2 minutes at the end, watching closely to avoid burning.
7. Serve and Enjoy
- Let the apple crisp cool for at least 10 minutes before serving.
- Serve warm with vanilla ice cream, whipped cream, or a drizzle of caramel sauce for an irresistible treat.
Pro Tips for the Best Apple Crisp
- Choose a mix of tart and sweet apples for depth of flavor.
- Don’t overmix the topping; keeping the butter cold ensures a crisp, crumbly texture.
- Make it a day ahead: the flavors deepen overnight and taste even better the next day.
Tips, Variations & Common Mistakes
Making the perfect apple crisp isn’t just about following a recipe—it’s also about knowing the little tricks that elevate your dessert and avoiding common pitfalls that can turn it soggy or bland.
Tips for a Perfect Apple Crisp
- Use a mix of apple varieties: Combining tart apples like Granny Smith with sweeter varieties like Honeycrisp or Fuji creates a balanced, flavorful filling.
- Keep butter cold: When making the crisp topping, cold butter ensures a crumbly, golden texture rather than a greasy, dense topping.
- Don’t overmix: Gently toss the apples with sugar and spices and blend the topping just until crumbly—overmixing can make the texture heavy.
- Layer evenly: Spread the apple filling and topping evenly in the baking dish for consistent baking and browning.
Creative Variations
- Add nuts: Chopped pecans or walnuts in the topping add crunch and a nutty flavor.
- Spice it up: Experiment with ginger, cardamom, or cloves for a unique twist.
- Mix fruits: Add berries, pears, or peaches alongside apples for a fruity medley.
- Caramel drizzle: Pour a little caramel sauce over the apples before baking for a richer dessert.
Common Mistakes to Avoid
- Skipping the cornstarch: Without it, your apple filling may be too watery.
- Using only sweet apples: The crisp may taste overly sugary and lack depth.
- Overbaking: Baking too long can dry out the topping and make the apples mushy.
- Neglecting cooling time: Serving immediately can cause the topping to fall apart—let it rest for 10–15 minutes for the best texture.
By keeping these tips in mind and experimenting with variations, you can create a homemade apple crisp that’s always perfectly balanced, flavorful, and irresistible.
Serving, Storing & Reheating
Once your homemade apple crisp is baked to golden perfection, it’s time to enjoy it—and knowing the best ways to serve, store, and reheat it ensures every bite is just as delicious as the first.
Serving Suggestions
- Warm and comforting: Serve your apple crisp warm straight from the oven for the ultimate cozy dessert experience.
- With toppings: Add a scoop of vanilla ice cream, a dollop of whipped cream, or a drizzle of caramel sauce for extra indulgence.
- Creative pairings: Try serving it alongside pancakes or waffles for a decadent brunch twist, or with cheddar cheese for a sweet-and-savory flavor contrast.
Storing Your Apple Crisp
- Room temperature: Cover leftover apple crisp with plastic wrap or foil and store at room temperature for up to 2 days.
- Refrigeration: For longer storage, keep it in an airtight container in the refrigerator for up to 4–5 days.
- Freezing: You can freeze apple crisp either before or after baking. If freezing before baking, cover tightly with foil and bake from frozen—add 5–10 extra minutes to the baking time. If freezing after baking, cool completely, wrap tightly, and freeze for up to 3 months.
Reheating Tips
- Oven method (recommended): Preheat oven to 350°F (175°C) and warm the crisp for 15–20 minutes until heated through and the topping is crisp.
- Microwave method: Microwave individual servings for 30–60 seconds, though the topping may be slightly softer than freshly baked.
- Crisp revival: To restore crunch after refrigeration or freezing, place under a preheated broiler for 1–2 minutes, watching closely to prevent burning.
By following these serving, storing, and reheating tips, your apple crisp will stay delicious and fresh for days, making it perfect for family gatherings, meal prep, or simply enjoying a sweet treat anytime.