The Best Fluffy Pancakes recipe you will fall in love with. Full of tips and tricks to help you make the best pancakes.
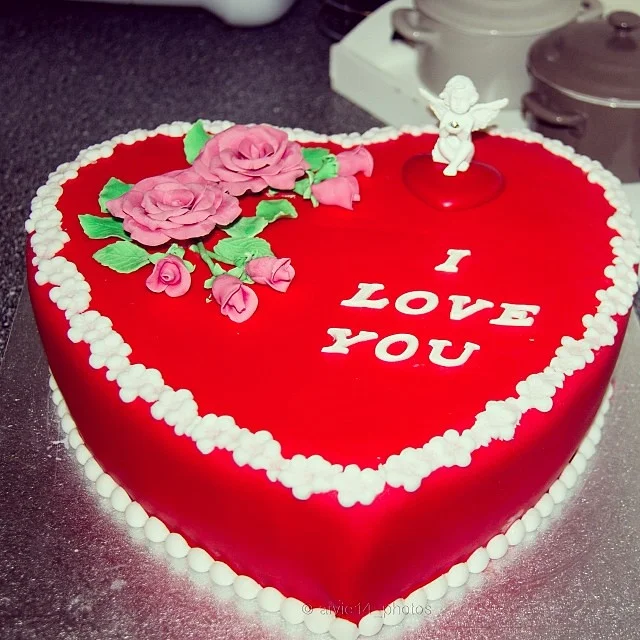
Nothing says love and affection quite like a homemade heart-shaped cake. Whether you’re celebrating Valentine’s Day, an anniversary, a wedding, or a special date night, baking a DIY heart cake is the perfect way to show your love through a sweet, homemade treat.
This easy heart-shaped cake recipe is not only fun to make but also allows you to add a personal touch with delicious flavors, rich frostings, and creative decorations. From classic vanilla and chocolate heart cakes to elegant red velvet or strawberry-infused delights, the possibilities are endless!
In this guide, we’ll walk you through step-by-step instructions on how to bake the perfect romantic heart cake from scratch. Whether you’re a beginner or an experienced baker, you’ll find pro tips, decorating ideas, and expert techniques to make your cake look stunning and taste amazing. Get ready to impress your loved ones with a heartfelt dessert that’s as beautiful as it is delicious!
Why a HeartCake is Perfect for Romantic Occasions
A heart-shaped cake is more than just a delicious dessert—it’s a heartfelt gesture that symbolizes love, affection, and celebration. Whether you’re baking for Valentine’s Day, an anniversary, a wedding, or a special date night, a homemade heart cake adds a personal touch that store-bought treats can’t match. Here’s why this sweet creation is perfect for romantic occasions.
For more dessert ideas to celebrate a special occasion, visit BBC Good Food – Romantic Dessert Recipes, where you’ll find perfect recipes for love and celebrations.
The Symbolism of a Heart Cake in Romantic Celebrations
The heart shape universally represents love and passion, making it the ideal dessert for any romantic event. Sharing a homemade heart cake with your loved one is a sweet way to express your feelings, turning a simple meal into a memorable experience.
Perfect for Valentine’s Day, Anniversaries, and More
A heart-shaped cake is a go-to dessert for occasions like:
- Valentine’s Day: The ultimate love-themed celebration deserves a romantic treat.
- Anniversaries: Whether it’s your first or fiftieth, a homemade heart cake is a thoughtful way to mark your journey together.
- Weddings & Engagements: Mini heart cakes make elegant wedding desserts or bridal shower centerpieces.
- Date Nights & Special Moments: Sometimes, a homemade cake is the perfect surprise for no reason at all—just to say “I love you.”
Customizing Your Heart Cake for a Personal Touch
One of the best things about baking your own heart-shaped cake is the ability to customize it to your partner’s taste. You can choose flavors like:
- Chocolate – Rich and indulgent, perfect for a romantic evening.
- Red Velvet – A classic symbol of love, with its deep red color and velvety texture.
- Strawberry – Light, fruity, and naturally pink for a love-themed touch.
- Vanilla or Lemon – Elegant and refreshing flavors that pair well with fruit toppings.
The Joy of Baking and Sharing Together
Baking a heart cake can also be a fun activity to do as a couple. From mixing the batter to decorating with buttercream and sprinkles, it’s a great way to bond and create sweet memories together. If you’re planning a surprise, the moment of cutting the cake and revealing the beautiful layers inside adds to the excitement.
Whether you’re celebrating a special occasion or simply want to show your love through baking, a heart-shaped cake is always a deliciously romantic choice.
Essential Ingredients and Tools for a Homemade Heart Cake
Before you start baking your DIY heart-shaped cake, having the right ingredients and tools is crucial for a successful and visually stunning dessert. Whether you’re making a classic vanilla cake, a rich chocolate delight, or a romantic red velvet masterpiece, the foundation of your cake starts with quality ingredients and proper baking equipment.
Key Ingredients for a Soft and Fluffy Heart Cake
The ingredients you choose can make a huge difference in the texture, flavor, and overall success of your cake. Here’s what you’ll need:
Base Cake Ingredients
- Flour – All-purpose flour works well, but for a lighter texture, you can use cake flour.
- Sugar – Granulated sugar sweetens the cake and contributes to its moisture.
- Eggs – Provide structure, stability, and richness to the cake.
- Butter or Oil – Butter gives a rich flavor, while oil makes the cake extra moist.
- Baking Powder/Baking Soda – Leavening agents help the cake rise.
- Milk or Buttermilk – Adds tenderness and moisture; buttermilk enhances flavor and texture.
- Vanilla Extract – Enhances the cake’s aroma and gives a warm, sweet flavor.
Flavor Variations for a Romantic Touch
- Chocolate Cake: Add cocoa powder or melted dark chocolate for a decadent treat.
- Red Velvet Cake: Combine cocoa powder, buttermilk, and red food coloring for a velvety texture.
- Strawberry or Berry Cake: Use strawberry puree or extract for a naturally fruity flavor.
Frosting and Decoration Essentials
The right frosting and decorations make your heart cake extra special. Here are some essentials:
- Buttercream Frosting – A classic choice that’s easy to spread and pipe.
- Cream Cheese Frosting – Perfect for red velvet and berry-flavored cakes.
- Whipped Cream – Light and airy, great for a fresh, delicate finish.
- Fondant – Ideal for creating smooth, professional-looking heart cakes.
- Food Coloring – Pink, red, or ombre effects enhance the romantic theme.
- Decorations – Sprinkles, edible pearls, chocolate shavings, or fresh berries add elegance.
Must-Have Tools for a Perfect Heart Cake
Using the right tools ensures your cake bakes evenly and looks professionally decorated. Here’s what you need:
Baking Equipment
- Heart-Shaped Cake Pan – The easiest way to achieve a perfect heart cake.
- Round & Square Cake Pans (Alternative Method) – If you don’t have a heart pan, you can carve a heart using a combination of a round and square cake.
- Mixing Bowls – For combining ingredients efficiently.
- Measuring Cups & Spoons – Ensures accuracy in ingredient proportions.
- Electric Mixer or Whisk – Helps achieve a smooth and fluffy batter.
- Spatula & Whisk – Essential for mixing and folding ingredients properly.
Decorating Tools
- Offset Spatula – For smoothly spreading frosting.
- Piping Bags & Tips – Ideal for creating elegant swirls and borders.
- Cake Turntable – Helps with even frosting application.
- Fondant Smoother – If using fondant, this tool gives a flawless finish.
Final Touch: Optional Additions for Extra Flair
- Cake Topper – “Love” or “Happy Anniversary” toppers add a finishing touch.
- Edible Glitter or Gold Leaf – Adds a luxurious and elegant effect.
- Fresh Flowers or Fruits – A natural, beautiful way to decorate.
Step-by-Step Guide to Baking a Heart Cake from Scratch
Baking a heart-shaped cake from scratch is a fun and rewarding experience that lets you create a delicious, romantic dessert for a special occasion. Whether you’re making it for Valentine’s Day, an anniversary, a wedding, or a surprise date night, the process is easy when you follow the right steps. Below is a detailed, step-by-step guide to help you bake a perfect heart cake from scratch.
Step 1: Gather Your Ingredients and Tools
Before starting, ensure you have all the essential ingredients and baking tools ready.
Ingredients for a Classic Vanilla or Chocolate Heart Cake:
- 1 ½ cups all-purpose flour (or cake flour for a softer texture)
- 1 cup granulated sugar
- ½ cup unsalted butter (room temperature) or ½ cup vegetable oil
- 2 large eggs (room temperature)
- ¾ cup milk or buttermilk (adds moisture)
- 1 ½ tsp baking powder (helps the cake rise)
- ½ tsp baking soda (for extra fluffiness)
- ¼ tsp salt (enhances flavor)
- 1 tsp vanilla extract (for a warm aroma)
- ½ cup cocoa powder (only if making a chocolate cake)
Tools You’ll Need:
- Heart-shaped cake pan (or round and square pans if shaping manually)
- Mixing bowls
- Electric mixer or whisk
- Measuring cups and spoons
- Spatula and whisk
- Parchment paper (to prevent sticking)
- Cooling rack
Step 2: Prepare the Cake Batter
- Preheat your oven to 175°C (350°F) and grease your heart-shaped cake pan with butter or non-stick spray. If you don’t have a heart pan, prepare one round pan and one square pan for shaping later.
- In a large mixing bowl, cream the butter and sugar together until light and fluffy. If using oil instead of butter, whisk it with sugar until well combined.
- Add eggs one at a time, beating well after each addition. Stir in the vanilla extract.
- In a separate bowl, sift the flour, baking powder, baking soda, cocoa powder (for chocolate cake), and salt together.
- Gradually add the dry ingredients to the wet ingredients, alternating with milk (or buttermilk), mixing gently until a smooth batter forms. Be careful not to overmix!
Step 3: Bake the Cake
- Pour the batter into the greased heart-shaped pan or divide it between a round pan and a square pan if shaping manually.
- Place the pan in the preheated oven and bake for 25-30 minutes, or until a toothpick inserted in the center comes out clean.
- Once done, let the cake cool in the pan for 10 minutes, then transfer to a cooling rack to cool completely before decorating.
Alternative Method: How to Make a Heart Cake Without a Heart-Shaped Pan
- Bake one round cake and one square cake of the same size.
- Cut the round cake in half to create two semi-circles.
- Place the square cake like a diamond (rotated 45°) and attach the semi-circles to the top to form a heart shape.
- Use frosting to “glue” the pieces together and smooth out the edges.
Step 4: Level and Frost the Cake
- Once completely cool, use a serrated knife to trim the top of the cake if it has domed, creating a flat surface.
- Apply a crumb coat (a thin layer of frosting) and refrigerate for 15-20 minutes to set.
- Frost the entire cake with buttercream, whipped cream, or fondant for a smooth and polished look.
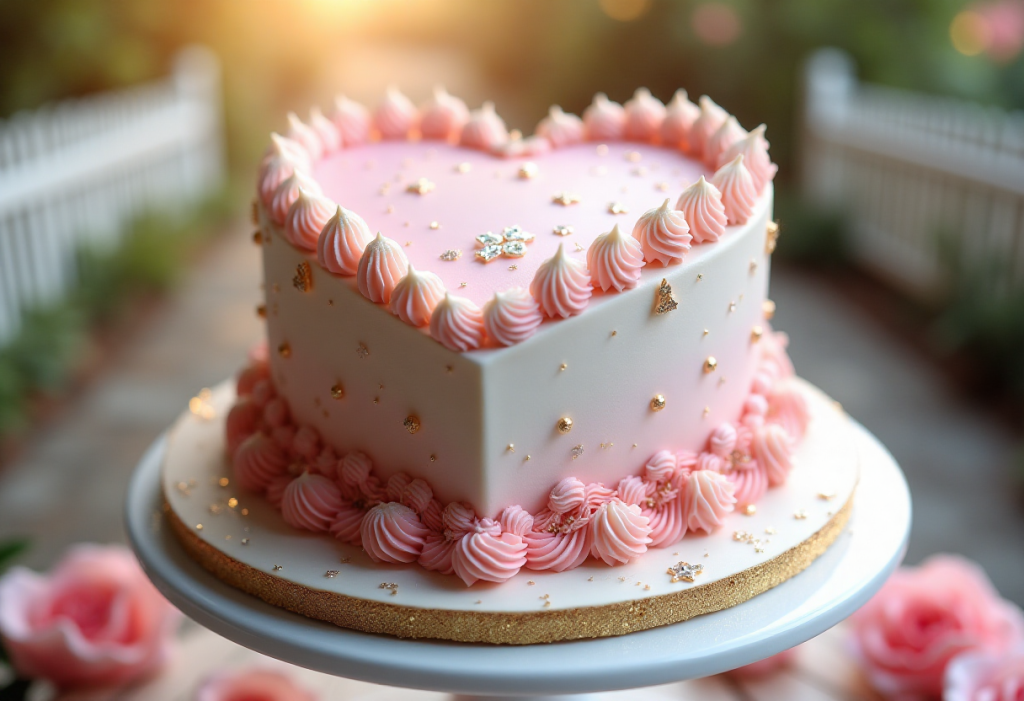
Step 5: Decorate and Add a Romantic Touch
Here’s where you can get creative! Try some of these romantic decorating ideas:
- Piping Designs: Use a piping bag with different nozzles to create rosettes or swirls.
- Sprinkles & Pearls: Add edible pearls, heart-shaped sprinkles, or glitter for elegance.
- Chocolate Drizzle: Drizzle melted dark or white chocolate for a fancy touch.
- Fresh Berries or Flowers: Strawberries, raspberries, or edible flowers give a natural, romantic feel.
- Personalized Cake Topper: Add a message like “Love You” or “Happy Anniversary.”
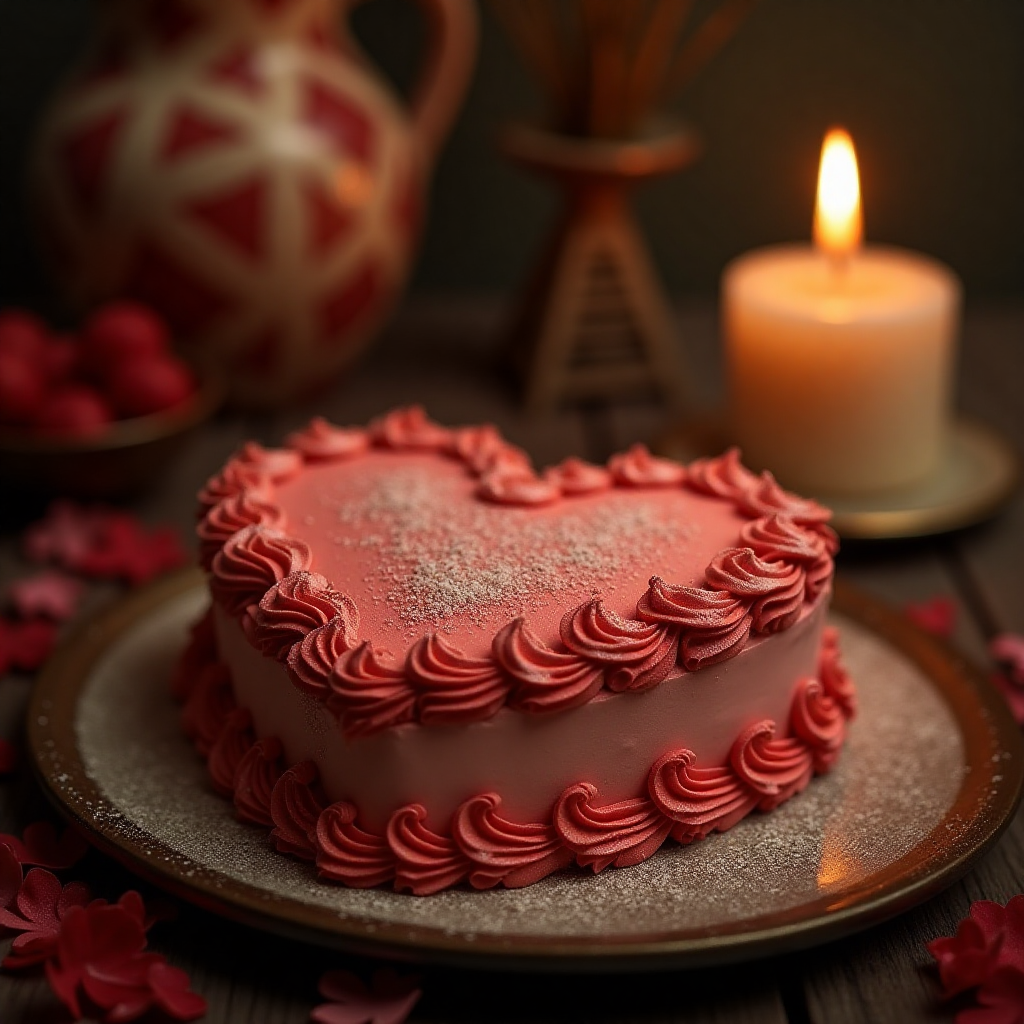
1. Classic Buttercream Piping for an Elegant Look
Buttercream frosting is a versatile and classic way to decorate your heart cake. With a piping bag and different nozzles, you can create elegant designs:
- Rosettes & Swirls: Use a star-shaped piping tip to create delicate rosettes or swirls around the cake’s edges.
- Pearl Borders: Pipe small buttercream dots along the edges for a pearl-like effect.
- Lace Patterns: Use a fine piping tip to create lace or filigree patterns for a sophisticated look.
Pro Tip: Use two shades of buttercream in the same piping bag for a two-tone ombre effect!
2. Fresh Berries and Fruits for a Natural Touch
Adding fresh fruits to your heart cake enhances both its appearance and flavor. Fruits add a vibrant pop of color and a juicy, refreshing taste. Some romantic fruit choices include:
- Strawberries: Slice them into hearts or place whole berries around the edges.
- Raspberries & Blueberries: Scatter them across the top for an elegant, rustic finish.
- Pomegranate Seeds: Their ruby-red color enhances the cake’s romantic appeal.
- Kiwi or Mango Slices: For a tropical, colorful touch.
Pro Tip: Lightly glaze the fruits with honey or fruit preserves for a glossy, fresh look!
3. Chocolate Drizzle or Ganache for a Luxurious Finish
A chocolate drizzle adds an indulgent, decadent touch to your cake. You can use:
- Dark Chocolate Ganache: Smooth, rich, and glossy, perfect for a sophisticated look.
- White Chocolate Drizzle: Creates an elegant contrast against red velvet or chocolate cakes.
- Milk Chocolate Swirls: Adds a warm, creamy touch.
Pro Tip: Let the ganache cool slightly before pouring so it flows smoothly but doesn’t melt the frosting.
4. Edible Gold Leaf, Glitter, and Sprinkles for a Magical Effect
If you want your heart cake to sparkle and shine, consider adding edible decorations:
- Gold or Silver Leaf: Adds a luxurious, elegant touch.
- Edible Glitter: Makes the cake shimmer under the light.
- Heart-Shaped Sprinkles: Perfect for a fun, playful look.
- Sugar Pearls or Dragees: Tiny edible pearls create a glamorous effect.
Pro Tip: Use a small brush to gently apply gold leaf for an effortless, artistic effect.
5. Fondant Decorations for a Professional Look
If you prefer a smooth, polished finish, covering your cake in fondant is a great option. You can:
- Roll out fondant to cover the entire cake for a flawless, professional appearance.
- Cut out fondant hearts in different sizes and layer them for a 3D effect.
- Stamp romantic messages like “Love You” or “Forever” onto fondant plaques.
Pro Tip: Knead a little gel food coloring into white fondant to create custom shades!
6. Floral Elegance with Edible Flowers or Fresh Blooms
Flowers instantly give a cake an elegant and romantic look. You can use:
- Edible Flowers: Such as violets, pansies, or rose petals for a delicate, natural beauty.
- Fresh Roses or Baby’s Breath: Arrange them around the edges for a breathtaking display.
- Dried Flower Petals: Gently scatter dried rose or hibiscus petals for a vintage-inspired touch.
Pro Tip: If using fresh flowers, make sure they are pesticide-free and safe for food contact!
7. Personalized Cake Toppers and Messages
Adding a custom cake topper makes your cake even more meaningful and unique. Some ideas include:
- Acrylic or Wooden Toppers: With romantic phrases like “Be Mine” or “Forever Love”.
- Handwritten Messages: Pipe a personal note or initials in chocolate or buttercream.
- Photo Toppers: Print a small edible image for a truly personal touch.
Pro Tip: If writing with chocolate, use a melted chocolate piping bag for precision!
Pro Tips for a Flawless DIY Heart Cake Every Time
Baking a heart-shaped cake is a fun and rewarding experience, but achieving a perfect texture, shape, and decoration requires careful attention to detail. Whether you’re a beginner or an experienced baker, these expert tips will help ensure that your cake turns out moist, beautifully shaped, and elegantly decorated every time.
1. Choose the Right Pan or Shape It Yourself
Using a heart-shaped cake pan is the easiest way to achieve the perfect shape, but if you don’t have one, you can create a heart shape using a round and square pan:
- Bake one round cake and one square cake of the same size.
- Cut the round cake in half and place the two halves against two adjacent sides of the square cake.
- Secure the pieces with frosting and smooth out the edges for a seamless heart shape.
Pro Tip: If you’re using this method, make sure the cakes have the same height to avoid uneven layers.
2. Use Room Temperature Ingredients for a Smoother Batter
Cold ingredients can make the batter lumpy and prevent proper mixing. Before baking, let key ingredients like:
- Butter
- Eggs
- Milk or buttermilk
Sit at room temperature for 20-30 minutes before mixing. This ensures a smoother batter and a more even texture.
Pro Tip: If you forget to take out your eggs in advance, place them in a bowl of warm water for 5 minutes to bring them to room temperature quickly.
3. Prevent a Dry Cake with the Right Moisture Balance
A heart cake should be soft, fluffy, and moist—not dry or dense. To achieve the perfect texture:
- Measure ingredients accurately: Too much flour will dry out the cake. Use the spoon-and-level method to measure flour instead of scooping directly with a cup.
- Use buttermilk or sour cream instead of regular milk for extra moisture.
- Do not overmix: Overworking the batter develops too much gluten, making the cake dense. Mix until just combined.
Pro Tip: If your cake turns out dry, brush it with simple syrup (equal parts sugar and water boiled together) before frosting. This keeps the cake extra moist!
4. Grease and Line Your Cake Pan Properly
To avoid your cake sticking to the pan:
- Grease the pan with butter or non-stick spray.
- Line the bottom with parchment paper for easy release.
- Lightly dust with flour (for butter cakes) or cocoa powder (for chocolate cakes) for extra non-stick protection.
Pro Tip: If using a heart-shaped pan, make sure to grease all the edges carefully, especially in the curved areas where batter tends to stick.
5. Bake Evenly with the Right Temperature and Timing
Heart cakes often have curved edges that may bake faster than the center. To ensure even baking:
- Preheat the oven properly before placing the cake inside.
- Bake at 175°C (350°F) for an even rise.
- Use an oven thermometer to check the actual temperature, as oven dials can be inaccurate.
- Rotate the cake halfway through baking to prevent uneven browning.
Pro Tip: If your cake is browning too quickly on top but still raw inside, loosely cover it with foil and continue baking.
6. Level Your Cake for a Perfectly Even Surface
Cakes naturally domed in the center while baking. For a flat, even surface:
- Let the cake cool completely before cutting.
- Use a serrated knife to slice off the domed top.
- If making a layered cake, cut the cake into even layers for a professional look.
Pro Tip: Place the cake in the freezer for 15-20 minutes before leveling—it makes cutting much easier!
7. Apply a Crumb Coat Before Final Frosting
A crumb coat is a thin layer of frosting that traps loose crumbs before applying the final layer. This ensures a smooth, clean finish:
- Spread a thin layer of frosting over the cake.
- Refrigerate for 15-20 minutes to set.
- Apply the final layer of frosting for a flawless look.
Pro Tip: Use an offset spatula or a bench scraper to smooth out the frosting for a bakery-style finish.
8. Use a Turntable for Professional Decorating
A turntable makes frosting and decorating much easier:
- Place the cake on a cake board or plate on the turntable.
- Rotate the cake as you spread the frosting evenly.
- Use a piping bag for precision when adding designs.
Pro Tip: If you don’t have a turntable, place the cake on a large, flat plate and rotate it manually while decorating.
9. Chill Your Cake Before Slicing for Clean Cuts
To avoid messy, crumbly slices, refrigerate the cake for 30 minutes to 1 hour before cutting. This helps:
- Firm up the frosting.
- Prevent layers from sliding.
- Create clean, neat slices when serving.
Pro Tip: Dip your knife in warm water, wipe it dry, and slice for perfectly clean edges!
10. Store Your Cake Properly for Maximum Freshness
If you’re not serving your heart cake immediately:
- Store it in an airtight container at room temperature for up to 2 days.
- If using perishable frosting (like whipped cream or cream cheese), refrigerate the cake and let it sit at room temperature for 30 minutes before serving.
- For longer storage, freeze individual slices wrapped in plastic wrap and foil for up to 3 months.
Pro Tip: To keep the cake moist in the fridge, place a small piece of bread against the cut edges—it helps retain moisture!