The Best Fluffy Pancakes recipe you will fall in love with. Full of tips and tricks to help you make the best pancakes.
Looking for a fun and easy dessert that’s sure to impress? No bake cookies and cream cake pops are the perfect solution! These bite-sized treats combine the irresistible flavor of Oreo cookies with the soft, moist texture of cake, all without turning on your oven. Whether you’re hosting a party, preparing a sweet snack for your family, or simply indulging in something decadent, these cake pops are quick to make and absolutely delicious. In this post, we’ll show you how to create these simple yet impressive no-bake treats, using just a few ingredients. Let’s dive into the world of cake pops and learn how to make these cookies and cream delights that everyone will love!
Essential Ingredients for No Bake Cookies and Cream Cake Pops
When it comes to making no bake cookies and cream cake pops, the magic lies in the simplicity and quality of the ingredients you choose. With just a few basic items, you can create a delicious treat that’s both indulgent and easy to make. Here’s a breakdown of the essential ingredients needed for these cake pops:
1. Oreo Cookies: The Key Ingredient for the Cookies and Cream Flavor
Oreo cookies are at the heart of this recipe, bringing that perfect balance of creamy filling and chocolatey crunch that everyone loves. For the cookies and cream flavor, you’ll need to crush the Oreos into fine crumbs, which will act as the base for the cake pops. The iconic flavor of Oreos adds richness and sweetness to the cake pop mixture, making them a crowd favorite. Feel free to use classic Oreos or experiment with different varieties like golden Oreos or flavored ones for a twist!
2. Cake Mix: Choosing the Right Cake Mix for Easy Preparation
Since this is a no-bake recipe, the cake mix serves as a convenient way to achieve the right texture and flavor without having to bake a full cake. Choose your favorite cake mix flavor, but vanilla and chocolate are the most commonly used for cookies and cream cake pops. You’ll mix the cake mix with frosting to create a dough-like consistency. The cake mix provides the perfect crumbly texture that holds the cake pops together while still being soft and delicious.
3. Frosting or Icing: How to Make Your Cake Pops Moist and Delicious
To bind the cake mix and Oreo crumbs together, frosting or icing is a must. The frosting adds moisture, making the cake pop mixture easy to shape and stick together. You can opt for store-bought frosting or make your own by whipping up some buttercream or cream cheese frosting. For a traditional cookies and cream taste, vanilla or chocolate frosting works beautifully, but you can get creative with flavored frostings too. If you’re looking to make the cake pops a bit richer, adding a splash of heavy cream to your frosting can give them an even smoother texture.
4. Cake Pop Sticks and Optional Toppings
To transform your mixture into the iconic cake pop, you’ll need cake pop sticks. These simple wooden sticks will not only make your cake pops easy to handle but also give them that signature presentation. You can find these sticks at most craft stores or baking supply shops. If you’re feeling extra creative, you can decorate the cake pops with additional toppings, such as mini chocolate chips, sprinkles, or even a drizzle of melted chocolate for added sweetness and texture. These toppings not only enhance the flavor but also add a fun, decorative touch.
Step-by-Step Instructions for Making No Bake Cookies and Cream Cake Pops
Making no bake cookies and cream cake pops is incredibly easy, and with these step-by-step instructions, you’ll have perfect cake pops ready in no time. This recipe requires minimal effort, so it’s ideal for beginners or anyone looking for a quick, no-bake treat. Let’s break down the process into simple, manageable steps.
1. Crushing the Oreo Cookies to Create the Base
Start by preparing the Oreo cookies, which form the base of your cake pops. Take about 15-20 Oreo cookies (depending on how many cake pops you want to make) and place them in a food processor. If you’re using the Ninja BN601 Professional Food Processor, it’s perfect for this job as its 1000 peak watts make quick work of grinding the cookies into fine crumbs. Simply pulse the cookies until they are finely crushed into crumbs.
If you don’t have a food processor, you can also place the cookies in a plastic bag and crush them with a rolling pin until you get a fine crumb consistency. The smaller the crumbs, the smoother and more cohesive your cake pop mixture will be. Set the crushed Oreo crumbs aside in a large bowl.
You can then continue with the rest of your recipe. The Ninja BN601 Professional Food Processor is indeed a great choice for making recipes like this because of its power and versatility. If you’d like more information, feel free to check it out using the link here.
2. Mixing the Cake Mix with Frosting for the Cake Pop Dough
Next, take your cake mix and add it to the crushed Oreos. You don’t need to bake the cake mix—just use it dry. Add in about 1 cup of frosting (store-bought or homemade, as you prefer) to the mixture. The frosting acts as the binder, holding the crushed Oreos and cake mix together to form a dough-like consistency. You can mix this together using a spoon, but if you want it to be quicker and easier, your hands are the best tool for the job. Once the mixture is fully combined, it should feel like a thick, pliable dough. If the mixture is too dry, add more frosting (a tablespoon at a time) until it reaches the right consistency. The dough should be moist enough to hold together but not too sticky.
3. Shaping the Dough into Perfect Balls and Inserting Cake Pop Sticks
Once your cake pop dough is ready, it’s time to shape it into balls. Take small portions of the dough (about 1 inch in diameter) and roll them between your hands until they form smooth, round balls. Make sure all the balls are roughly the same size for uniform cake pops.
Now it’s time to insert the cake pop sticks. Melt a small amount of chocolate or a little bit of frosting and dip the end of each stick into the melted chocolate before inserting it into the center of each cake pop ball. This will help the stick stay in place and prevent it from sliding out later. Gently push the stick into the center of each cake pop ball, making sure it doesn’t go all the way through. This step is crucial to ensure that your cake pops are stable and easy to handle when decorating later.
4. Refrigerating the Cake Pops to Set Them
Once all the cake pops are shaped and the sticks are inserted, it’s time to chill them. Place the cake pops on a baking sheet lined with parchment paper or a silicone mat. Make sure the cake pops aren’t touching each other to prevent them from sticking together. Refrigerate them for at least 30 minutes to an hour, or until they are firm. This step helps the cake pops set properly and ensures they won’t fall apart when you start decorating them.
While they’re chilling, this is a great time to prepare any additional toppings or decorations you plan to use, such as melted chocolate, sprinkles, or extra crushed Oreo crumbs.
Tips for Decorating and Customizing Your Cake Pops
Decorating your no-bake cookies and cream cake pops is where the real fun begins! Whether you’re making them for a special occasion, a holiday, or just for a fun treat, customizing the decoration can add a personal touch that takes your cake pops to the next level. Here are some creative and easy tips to make your cake pops not only delicious but visually stunning.
1. Adding Extra Crushed Oreos for Fun Texture
For an authentic cookies and cream experience, adding extra crushed Oreos as a topping is a simple way to enhance both the texture and flavor. After dipping your cake pops in melted chocolate or frosting, immediately roll them in extra crushed Oreo crumbs. The cookies’ crunch will contrast nicely with the soft, moist cake inside. You can choose to fully coat the cake pops in crushed Oreos, or just sprinkle a little on top for a subtle touch of flavor. This extra layer adds an eye-catching and indulgent element to each cake pop.
2. Dipping Cake Pops in Chocolate for an Extra Layer of Sweetness
One of the most popular ways to decorate cake pops is by dipping them in melted chocolate. This gives the cake pops a smooth, shiny finish and creates a delicious outer layer of sweetness. You can choose between dark chocolate, milk chocolate, or white chocolate depending on your preference. Simply melt the chocolate in the microwave or using a double boiler, then dip each cake pop into the melted chocolate, ensuring it’s fully coated. Gently tap off any excess chocolate and let the cake pops set.
For an extra touch, you can even drizzle another type of chocolate (e.g., white chocolate on milk chocolate) over the cake pops to create a marbled effect. Let the chocolate harden completely before moving on to other decorations.
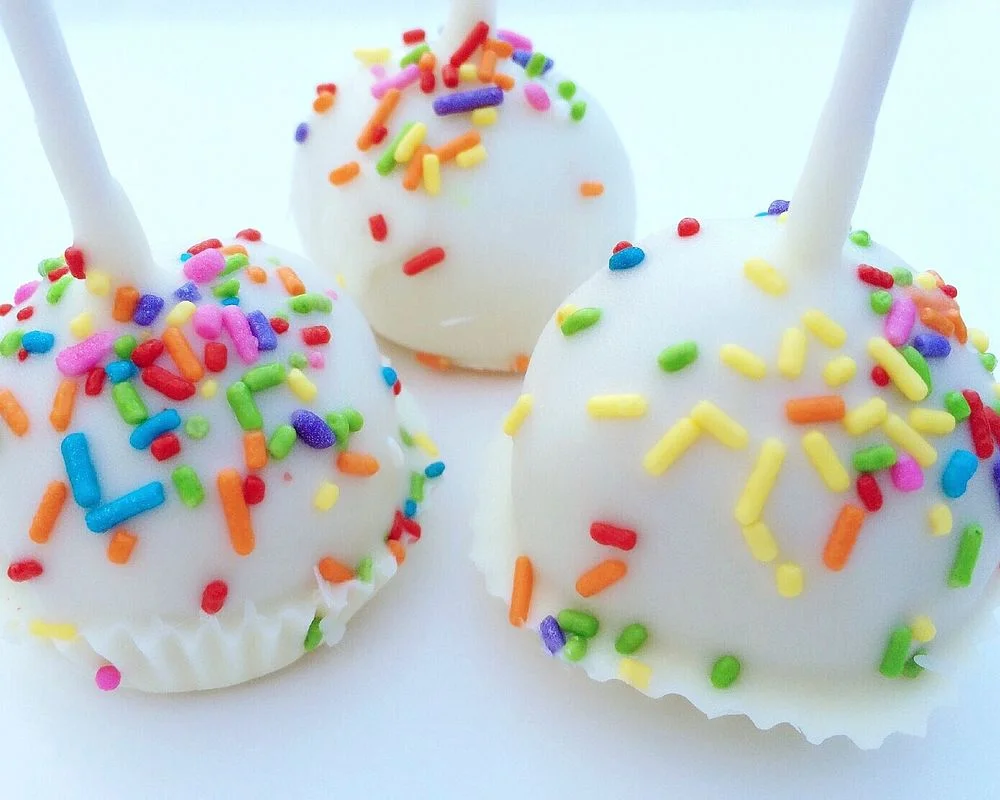
3. Using Sprinkles, Chocolate Chips, or Other Fun Toppings
If you want to take your cake pops’ appearance to the next level, sprinkles are a great option! You can use classic rainbow sprinkles, or go with themed sprinkles that fit the occasion. For instance, use pastel sprinkles for a baby shower or glittery gold and silver sprinkles for a New Year’s Eve party. Chocolate chips are another great topping for added texture and sweetness. Simply press a few mini chocolate chips into the chocolate coating while it’s still soft.
Other fun topping ideas include shredded coconut, colored sugar, or even small candy pieces like mini M&Ms. Get creative with the combinations! If you’re making cake pops for a holiday or themed party, you can even customize the colors of the sprinkles or chocolate to match the theme.
4. Fun Ideas for Party-Themed Cake Pops
Cake pops are the perfect treat for a wide variety of parties and special occasions, and you can easily customize them to fit the theme. Here are some fun ideas:
- Birthday Parties: Use colorful sprinkles, fun shaped candies, or edible glitter to make your cake pops stand out. You could even add a little birthday candle on top for a playful touch!
- Holiday Themes: For Christmas, try dipping the cake pops in red or green chocolate and adding festive sprinkles. For Halloween, dip them in dark chocolate and decorate with orange sprinkles or edible eyes for a spooky effect. For Valentine’s Day, dip the pops in pink or red chocolate and use heart-shaped sprinkles or candy decorations.
- Bridal or Baby Showers: Go for elegant white or pastel-colored cake pops with delicate decorations like edible pearls, silver sprinkles, or small flower toppers.
- Themed Parties (Sports, Movies, etc.): Customize your cake pops by incorporating colors, logos, or characters that fit the theme of the party. For a sports-themed event, use team colors for the coating and sprinkle in some edible glitter for added flair.
The possibilities for themed cake pops are endless, and they’re sure to make your treats a hit at any event!
5. Adding a Personalized Touch with Cake Pop Packaging
For an even more polished presentation, consider packaging your cake pops individually. This is a great option for party favors or gifts. You can wrap each cake pop in a clear cellophane bag and tie it with a colorful ribbon or twine. To personalize them further, you could even add a small tag with the guest’s name or a sweet message, turning them into a thoughtful, personalized treat. This adds an extra layer of charm and makes your cake pops feel special and unique!
Serving and Storing Your No Bake Cookies and Cream Cake Pops
Once you’ve crafted your delicious no-bake cookies and cream cake pops, the fun isn’t over! Proper serving and storage are essential to ensure that these sweet treats stay fresh, flavorful, and ready to delight your guests or family. Let’s explore the best ways to serve and store your cake pops for maximum enjoyment.
1. Serving No Bake Cookies and Cream Cake Pops
Cake pops are versatile and can be served in a variety of ways, depending on the occasion or your preference. Here are some tips on how to present your cake pops in a fun and appealing manner:
- Display on a Cake Pop Stand: If you’re hosting a party or gathering, a cake pop stand is the perfect way to showcase your creations. Cake pop stands come in many styles, including multi-tiered designs and simple individual holders, which can make your dessert table look elegant and organized. Simply place the cake pops on the stand with the sticks facing upward. This makes it easy for guests to grab a treat while also serving as a beautiful centerpiece.
- Individual Wrapping: For a more personalized touch, wrap each cake pop individually in clear cellophane bags and tie them with ribbons. This is especially great for party favors, gifts, or to serve as individual treats. You can customize the bags with stickers, tags, or labels for special occasions like birthdays or holidays.
- Plating with Decorative Touches: If you prefer a more casual serving style, simply place the cake pops on a serving platter or tray. Add a bit of flair by surrounding them with decorative elements like flowers, sprinkles, or themed props, depending on the occasion. This adds a playful and visually appealing touch to the presentation.
- Serve at the Right Temperature: No bake cookies and cream cake pops should be served chilled for the best taste and texture. After they’ve set in the refrigerator, they should be firm but soft enough to bite into. If you have refrigerated them for a longer period, you may want to let them sit at room temperature for about 10 minutes before serving to allow the chocolate coating to soften slightly.
2. Storing Your No Bake Cookies and Cream Cake Pops
Proper storage of cake pops ensures they remain fresh and maintain their delightful flavor and texture. Here’s how to store them:
- Refrigeration for Freshness: Cake pops are best stored in an airtight container in the refrigerator. The cool temperature helps preserve the moisture in the cake pop and keeps the frosting and chocolate coating firm. If you’ve added perishable ingredients like cream cheese frosting, refrigeration is essential to prevent spoilage. Place the cake pops in a single layer or on a tray lined with parchment paper to avoid them sticking together. If you have multiple layers of cake pops, separate each layer with wax paper.
- Freezing for Long-Term Storage: If you’ve made a large batch and want to store them for an extended period, freezing cake pops is a great option. To freeze, place the cake pops on a baking sheet and freeze them for about an hour until they are firm. Once frozen, transfer the cake pops to a freezer-safe bag or airtight container. This will help prevent them from sticking together or losing their shape. When you’re ready to enjoy them, simply remove the cake pops from the freezer and let them thaw at room temperature for about 30 minutes.
- Avoid Moisture: When storing cake pops, it’s important to keep them in a dry place, as excess moisture can cause the cake pops to lose their texture and become soggy. Be sure the cake pops are fully set and dry before storing them in any container to prevent smudging or unwanted melting of the chocolate coating.
- How Long Can They Be Stored? No bake cookies and cream cake pops can typically be stored for up to 1 week in the refrigerator. If frozen, they can last for up to 3 months, though they are best enjoyed within a month for the best texture and taste. Always check for any signs of spoilage, such as discoloration or an off smell, before consuming them.
3. Serving Cake Pops for Special Occasions
Cake pops are perfect for a wide variety of events and special occasions. Whether you’re serving them at a casual family gathering or a large celebration, they can be customized to fit the theme of your event. Here are a few ideas for incorporating your cake pops into different occasions:
- For Birthdays: Personalize your cake pops by adding birthday-themed decorations like candles, confetti sprinkles, or themed toppers (e.g., cartoon characters, party hats). You can also use brightly colored frosting or chocolate coatings that match the party theme.
- For Weddings or Baby Showers: Cake pops can double as elegant party favors for weddings, bridal showers, or baby showers. Use soft pastel-colored coatings, edible pearls, and delicate ribbon accents to make them fit the theme. Cake pops can also be arranged beautifully on a dessert table for guests to enjoy.
- For Holidays: Customize your cake pops for various holidays. For example, for Christmas, dip them in red and green chocolate and add festive sprinkles. For Halloween, use orange and black coatings, and top with spooky decorations. For Valentine’s Day, pink or red coatings with heart-shaped sprinkles are a romantic touch.
- For Corporate Events: Cake pops can also be used for corporate events or fundraisers. Customize the colors to match the company logo or theme, and package them beautifully to give as gifts or handouts. Adding business-related details like logo stickers on the packaging adds a professional touch.


[…] for more easy and delicious cookies-and-cream-inspired desserts? Check out these No-Bake Cookies and Cream Cake Pops for another fun and irresistible […]
[…] You’ll Love This Unbaked Cookie and Cream Cake Pop […]