The Best Fluffy Pancakes recipe you will fall in love with. Full of tips and tricks to help you make the best pancakes.
There’s something undeniably comforting about a rich, moist chocolate cake topped with creamy cream cheese icing. Whether you’re baking for a special occasion or simply craving a decadent dessert, this chocolate cake recipe is sure to become your go-to. The combination of a perfectly baked chocolate cake with the tangy sweetness of cream cheese icing creates a balance that is simply irresistible.
In this post, we’ll guide you step-by-step through the process of making the best chocolate cake with a creamy cream cheese icing from scratch. We’ll explore the key ingredients that make this cake so special, share tips for achieving the perfect texture, and show you how to finish off your creation with a smooth, delicious frosting. By the end of this guide, you’ll be able to bake a dessert that’s both indulgent and memorable. Let’s dive in!
Key Ingredients for the Best Chocolate Cake
To make the best chocolate cake, it’s essential to choose the right ingredients that not only create the perfect texture but also bring out the rich, indulgent flavor of the cake. Here are the key ingredients that contribute to a moist, flavorful cake and a creamy, smooth frosting.
1. Cocoa Powder: The Heart of the Chocolate Flavor
Cocoa powder is the foundation of any chocolate cake, providing the deep, rich flavor that every chocolate lover craves. For the best results, opt for high-quality unsweetened cocoa powder. The higher the quality of your cocoa, the more intense and smooth the chocolate flavor will be. Dutch-processed cocoa is a popular choice for cakes because of its smooth texture and mild flavor, which blends seamlessly into the batter.
2. Eggs and Butter: Essential for Moisture and Texture
Eggs and butter are the secret to a moist and tender chocolate cake. The eggs help bind the ingredients together while adding moisture and structure to the cake. The butter, on the other hand, adds richness and flavor, making the cake soft and fluffy. Always use room temperature eggs and butter to ensure they blend easily into the batter for the perfect texture.
3. Flour and Sugar: Balancing Structure and Sweetness
The combination of flour and sugar is key to achieving the right crumb and sweetness. All-purpose flour works perfectly for a tender yet sturdy cake. Be sure to sift the flour to remove any lumps and ensure an even texture throughout the batter. As for sugar, a mix of granulated sugar and brown sugar helps balance sweetness while adding a hint of molasses flavor that enhances the richness of the chocolate.
4. The Perfect Cream Cheese Icing: Creamy, Tangy, and Sweet
A luscious chocolate cake is nothing without its frosting, and cream cheese icing is the perfect complement to your cake. Cream cheese gives the frosting a tangy richness that cuts through the sweetness of the cake, creating a balanced flavor. To achieve the best creamy consistency, use full-fat cream cheese and room temperature butter. This will help create a smooth, spreadable frosting that isn’t too stiff. Powdered sugar adds the right amount of sweetness to balance the tang of the cream cheese, and a dash of vanilla extract brings out the flavor of both the cake and the icing.
5. Optional Flavor Boosters: Elevating the Taste
While the core ingredients are essential, there are a few optional add-ins that can take your chocolate cake to the next level. Consider adding a teaspoon of vanilla extract or a small amount of espresso powder to deepen the chocolate flavor. A pinch of salt in the cake batter will enhance the sweetness and bring out the richness of the cocoa, while a little heavy cream in the frosting will make it even smoother and more luxurious.
Step-by-Step Guide to Making Moist Chocolate Cake
Creating the perfect chocolate cake is an art, but with the right techniques, anyone can bake a deliciously moist and decadent cake. Follow these steps carefully to ensure your chocolate cake turns out light, fluffy, and bursting with flavor.
1. Prepare Your Cake Pans and Preheat the Oven
Start by preheating your oven to the correct temperature (usually 350°F or 175°C) and preparing your cake pans. Grease the pans with butter or cooking spray, then lightly dust them with flour to prevent the cake from sticking. You can also line the bottom of the pans with parchment paper for easy removal once the cake is baked. This simple preparation step ensures your cake bakes evenly and comes out of the pan smoothly.
2. Sift the Dry Ingredients Together
Sifting your dry ingredients—flour, cocoa powder, baking powder, and baking soda—is crucial for a light and tender cake. Sifting helps remove any lumps, evenly distributes the dry ingredients, and adds air to the mixture, which is key to achieving a fluffy cake texture. Once sifted, set the dry ingredients aside.
3. Cream the Butter and Sugar Together
In a separate mixing bowl, use an electric mixer or stand mixer to cream the butter and sugar together until light and fluffy. This step helps to incorporate air into the butter, which contributes to the cake’s lightness. Beat on medium-high speed for about 3-5 minutes. The mixture should be pale in color and have a smooth consistency. This is one of the most important steps in ensuring the cake is light and moist.
4. Add the Eggs One at a Time
Add the eggs to the butter and sugar mixture, one at a time, making sure each egg is fully incorporated before adding the next. Beating the eggs into the butter mixture helps build the structure of the cake. If you add the eggs too quickly, the batter may curdle, which could affect the final texture.
5. Combine Wet and Dry Ingredients
Now it’s time to combine the dry ingredients with the wet ingredients. Begin by alternating adding the dry ingredients and the wet ingredients (such as milk or buttermilk) into the butter-egg mixture. Start with the dry ingredients, adding about a third of the mixture, then follow with half of the milk or buttermilk. Continue alternating until everything is added. Mixing on low speed helps prevent overworking the batter, which can result in a dense cake.
6. Mix Until Just Combined
Once the wet and dry ingredients are fully incorporated, stop mixing. Overmixing the batter will lead to a tough, dense cake. You want to mix until everything is just combined, ensuring that no pockets of flour or cocoa powder remain.
7. Add Boiling Water (Optional)
For an ultra-moist cake, add a small amount of boiling water or hot coffee to the batter. The heat will activate the cocoa and create a softer, more moist crumb. Mix it in carefully until it’s fully incorporated, but be sure not to overmix.
8. Pour the Batter into the Prepared Pans
Divide the cake batter evenly between the prepared cake pans. Use a spatula or the back of a spoon to smooth the tops of the batter to ensure an even bake. Tapping the pans gently on the counter will also help remove any air bubbles trapped in the batter.
9. Bake the Cake Layers
Bake the cake in the preheated oven for about 30-35 minutes, or until a toothpick inserted into the center of the cakes comes out clean. Baking times can vary depending on your oven, so keep an eye on the cakes. If the edges begin to pull away from the sides of the pan, this is a good indication that the cake is done.
10. Cool the Cake Layers
Once the cakes are baked, allow them to cool in the pans for about 10 minutes. Then, carefully remove the cakes from the pans and transfer them to a wire rack to cool completely. Letting the cakes cool completely before frosting is crucial to prevent the frosting from melting or sliding off.
11. Level the Cake Layers (Optional)
If you want perfectly even layers, you can use a serrated knife to level the tops of the cakes once they’ve cooled. This step is optional but can help with the overall presentation of your cake, especially if you plan to layer the cake.
How to Make Creamy Cream Cheese Icing
Creamy cream cheese icing is the perfect complement to a rich, moist chocolate cake. The tangy flavor of the cream cheese balances the sweetness of the cake while adding a smooth, velvety texture. Follow these steps to create the perfect icing every time.
1. Choose the Right Cream Cheese
The quality of the cream cheese you use will directly affect the flavor and texture of your icing. For the best results, always use full-fat, block-style cream cheese. Avoid using the spreadable kind that comes in a tub, as it often contains too much water and will not result in the smooth consistency you’re aiming for. Let the cream cheese sit at room temperature for about 30 minutes before using it to ensure it mixes smoothly and evenly with the other ingredients.
2. Cream the Butter and Cream Cheese Together
To achieve a perfectly smooth frosting, start by creaming the softened butter and cream cheese together. Use an electric mixer or a stand mixer fitted with the paddle attachment to beat the two ingredients on medium speed. Continue mixing for about 3-5 minutes until the mixture is light and fluffy. This step is crucial, as it helps incorporate air into the icing, making it airy and easy to spread on your cake.
3. Add Powdered Sugar Gradually
Next, gradually add powdered sugar (also known as confectioners’ sugar) to the butter-cream cheese mixture. Start with about one cup at a time, mixing well after each addition. Powdered sugar is ideal for cream cheese icing because it dissolves easily and doesn’t leave a gritty texture. By adding it slowly, you ensure the mixture stays smooth and doesn’t become lumpy. Depending on your desired sweetness and consistency, you may need to adjust the amount of sugar. Typically, around 3-4 cups will create a thick, spreadable icing.
4. Add Vanilla Extract for Extra Flavor
Vanilla extract enhances the overall flavor of the cream cheese icing, adding a touch of warmth and depth to the frosting. Add 1-2 teaspoons of pure vanilla extract to the icing mixture. If you want a more complex flavor, consider adding other flavorings like almond extract or a bit of fresh lemon juice for a subtle tangy twist that pairs beautifully with chocolate cake.
5. Mix Until Smooth and Fluffy
After adding the powdered sugar and vanilla, continue mixing the icing on medium speed until it becomes smooth, creamy, and fluffy. You want the icing to have a spreadable consistency, but not too runny. If your icing is too thick, you can add a tablespoon of milk or heavy cream at a time until you reach the desired texture. On the other hand, if it’s too thin, add a little more powdered sugar to thicken it up.
6. Check for Consistency and Sweetness
It’s important to taste your icing as you go to ensure it’s not too sweet or too tangy. Adjust the flavor by adding a pinch of salt to cut down on sweetness or a little more sugar if you want it sweeter. If the icing is too thick to spread easily, add more milk or cream to loosen it up. If it’s too thin, add more powdered sugar until it reaches the right consistency.
7. Chill the Icing (Optional)
If you’re not ready to frost your cake immediately, you can chill the cream cheese icing for about 15-30 minutes. Chilling will firm it up slightly, making it easier to spread without it melting too quickly. However, be careful not to leave it in the fridge for too long, as it can become too stiff and hard to work with.
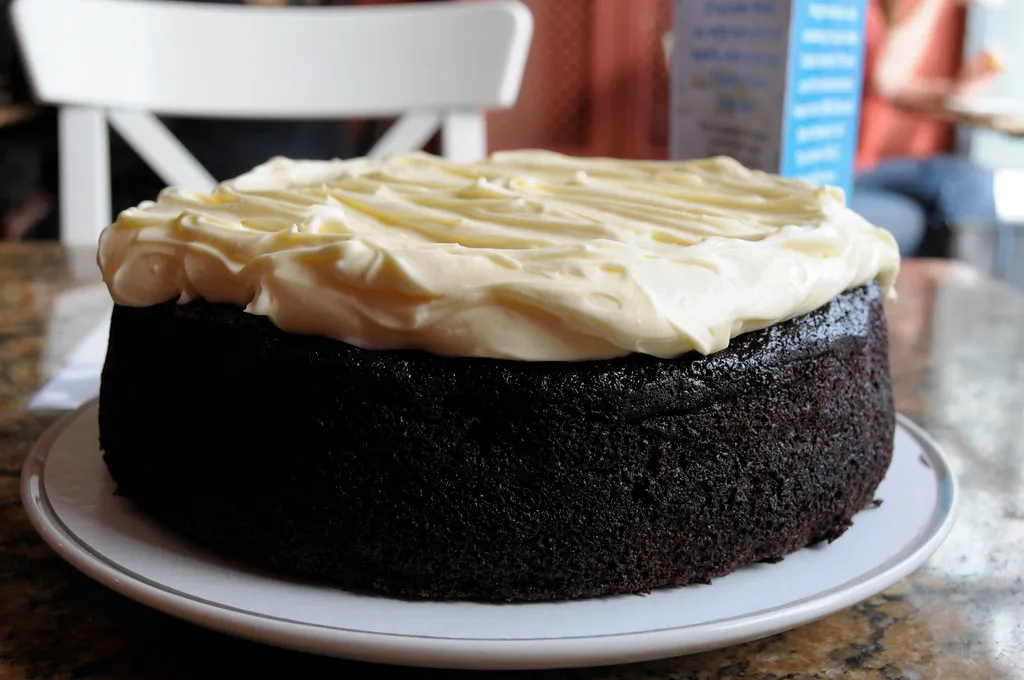
8. Frost the Cake
Once the icing is at the right consistency, it’s time to frost your cooled chocolate cake. Start by spreading a thin layer of frosting on the top of the cake to create a crumb coat. This first layer helps seal in the crumbs and gives a smooth surface to apply the final coat of frosting. After the crumb coat is set, add a thicker layer of cream cheese icing, smoothing it out with a spatula or butter knife. You can create a rustic look by leaving the frosting a bit textured or smooth it out for a polished finish.
Decorating and Serving Your Chocolate Cake with Cream Cheese Icing
Once your moist chocolate cake and creamy cream cheese icing are ready, it’s time to bring your creation to life with decoration and presentation. Whether you’re preparing the cake for a special occasion or just treating yourself to a decadent dessert, the final steps of decorating and serving can elevate the look and taste of your cake. Here’s how to make it shine:
1. Start with a Crumb Coat for a Smooth Finish
Before you begin decorating, it’s helpful to apply a crumb coat, which is a thin layer of frosting that locks in the crumbs and creates a smooth surface for the final layer of icing. To do this, spread a thin, even layer of cream cheese icing over the entire cake using a spatula or butter knife. Don’t worry if the crumb coat isn’t perfect—it’s just a base layer. Once the crumb coat is applied, place the cake in the refrigerator for about 15-30 minutes to let it firm up. This will prevent any cake crumbs from mixing into your final frosting layer.
2. Apply the Final Layer of Icing
After the crumb coat has set, it’s time to apply the final, thicker layer of cream cheese icing. Use an offset spatula or a bench scraper to spread the icing evenly over the top and sides of the cake. Start from the center and work your way out to the edges, smoothing the icing as you go. If you prefer a smooth and polished look, use a bench scraper to even out the sides and top of the cake, wiping off any excess icing with each pass. If you want a more rustic or textured look, you can leave the frosting as is, with a bit more texture on the surface.
3. Add Decorative Touches
Now comes the fun part—decorating! There are countless ways to decorate your chocolate cake with cream cheese icing, depending on the occasion and your personal style. Here are a few ideas:
- Chocolate Shavings or Chips: Sprinkle chocolate shavings or mini chocolate chips on top of the cake for an extra touch of decadence and texture. The contrast between the smooth cream cheese icing and the crunchy chocolate bits is delightful.
- Fresh Fruit: Fresh berries like raspberries, strawberries, or blackberries are a beautiful addition to a chocolate cake. Their slight tartness pairs well with the sweetness of the cake and frosting. You can also use slices of kiwi, bananas, or even citrus segments for a bright pop of color.
- Edible Flowers: For a more elegant look, consider decorating the top of your cake with edible flowers like pansies or violets. These will add a natural and refined aesthetic, perfect for a wedding or celebration cake.
- Nuts and Caramel: Chopped nuts like pecans, walnuts, or almonds can add a crunchy texture and nutty flavor to the cake. Drizzling a bit of caramel or chocolate ganache over the top will also give your cake an extra layer of indulgence.
- Whipped Cream: A swirl of freshly whipped cream on top of the cake can complement the creamy icing while providing a light, fluffy texture. Add a dusting of cocoa powder or a sprinkle of cinnamon for an additional layer of flavor.
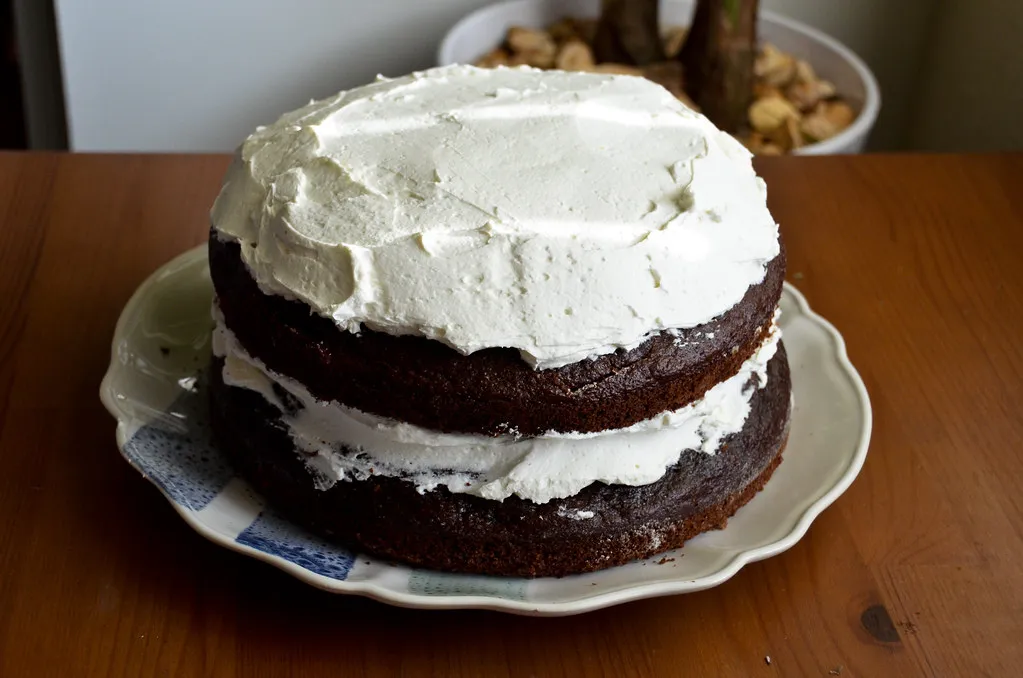
4. Create Layered Cakes for Visual Appeal
If you’ve baked multiple layers of chocolate cake, you can stack them for a show-stopping presentation. When stacking layers, make sure the frosting between each layer is even, creating a beautiful contrast between the rich chocolate cake and the creamy icing. You can even add some filling between the layers, like a layer of raspberry jam or chocolate ganache, for an extra burst of flavor.
Once your layers are stacked, apply the final layer of icing and smooth it out with a spatula. Don’t forget to decorate the top of each layer to make the cake look as beautiful as it tastes.
5. Let the Cake Set Before Serving
After decorating, it’s a good idea to let your cake sit for a while before serving. This gives the icing a chance to set and helps the flavors meld together. If you’ve used fresh fruit or whipped cream for decoration, you can place the cake in the refrigerator for a short time, but be sure to bring it back to room temperature before serving. The cake will taste better when it’s not too cold, and the texture of the icing will be at its best.
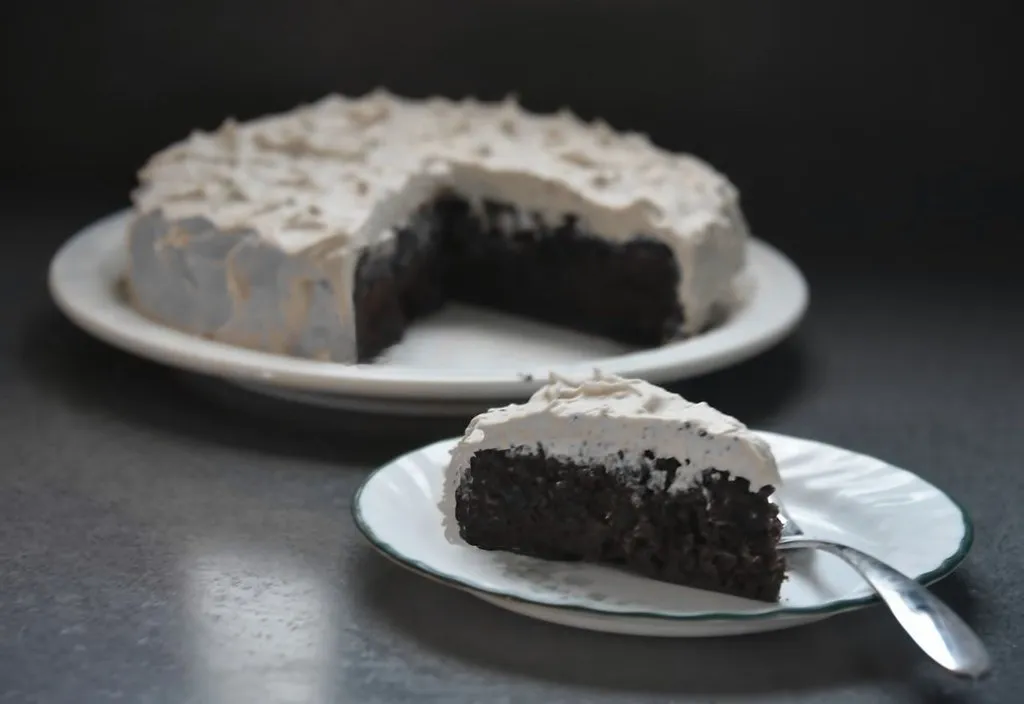
6. Slice and Serve with Style
When it’s time to serve your cake, use a sharp knife to cut clean slices. If you’ve decorated the cake with fresh fruit or chocolate shavings, take care to slice between the decorations for a neat and clean cut. You can serve the cake on its own or with a scoop of vanilla ice cream, a dollop of whipped cream, or even a drizzle of chocolate or caramel sauce for extra indulgence.
To ensure that each slice stays moist, store any leftover cake in an airtight container in the refrigerator. The cream cheese icing will keep the cake fresh for several days, and the flavor will continue to develop as it sits.
For more cake baking tips, check out this helpful guide: Cake Baking Tips
With this detailed guide, you can bake a rich, moist chocolate cake with a creamy cream cheese icing that’s perfect for any occasion. Whether for birthdays, holidays, or simply indulging your sweet tooth, this cake will surely impress!
For more cake baking tips, check out this helpful guide: How to Make Chocolate Mousse Cake


[…] you love chocolate cake but want to try a different frosting, check out this delicious chocolate cake with cream cheese icing recipe for […]
this article is very useful, thank you for making a good article